Simulate pre-tensioning by applying loads directly to 3D bolts and nuts.
Loads can be specified by nut turns, bolt torque or target axial load values. A
wide variety of bolted configurations are supported including blind bolts, nuts on
threaded shafts, and nuts on posts.
For a video tutorial of adding Bolt/Nut tightening
loads, click here.
In the Project Tree, open
the Analysis Workbench.
Click on the desired Analysis branch.
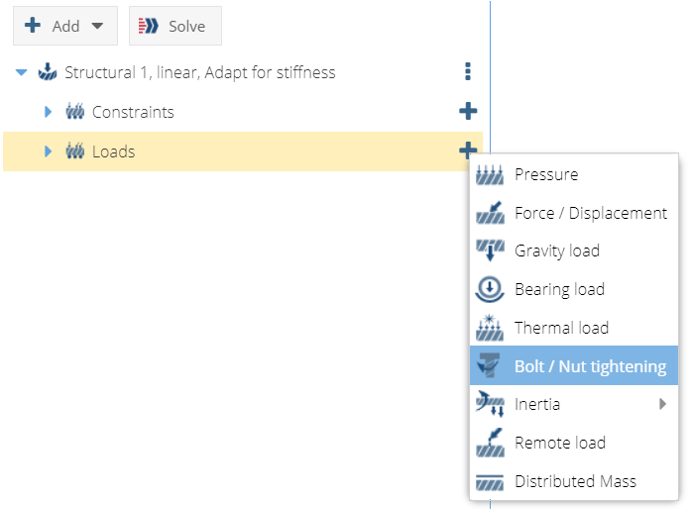
Next to Loads, click Add.
Choose (Bolt/Nut tightening) from
the list of loads.
Figure 1. The Bolt/Nut tightening dialog opens.
In the modeling window, select bolts and/or nuts in the
model.
Specify Thread pitch value and units.
Do one of the following to define how the load is specified.
Option
Description
Define by number of turns
Under Bolt/Nut tightening, select number of
turns.
Specify the number of turns.
Note: For this method, the value is
specified as fractional bolt turns and not degrees or
radians. For example, a value of 0.5 represents a nut turn
angle of 180 degrees.
Define by bolt torque
Under Bolt/Nut tightening, select
Torque.
Specify the Torque value and units.
Specify the Friction coefficient.
Define by target axial force
Under Bolt/Nut tightening, select Target axial
force.
Specify the target axial force value and units.
Click OK.
Note:
SimSolid Cloud does more than just recognize bolts, nuts and
washers. It uses this information to automatically set up the
appropriate contact conditions. Contact conditions in the bolt, rod or
post inner shank (between the bolt head and nut) are set to sliding.
Contact conditions on the inner radius of washers are set to sliding as
well. Other contact conditions remain bonded.
 Add.
Add.
 (Bolt/Nut tightening) from
the list of loads.
(Bolt/Nut tightening) from
the list of loads.