Configure Orange Cloud Flexible Engine for Cloud Bursting
Create the necessary components in Orange Cloud Flexible Engine that are required for cloud bursting and then create a cloud bursting scenario.
Create an Orange Cloud Flexible Engine User Account
Create an Orange Cloud Flexible Engine user account so that you can later create a cloud account in Control.
- Username and password
- API password
-
Click Your services.
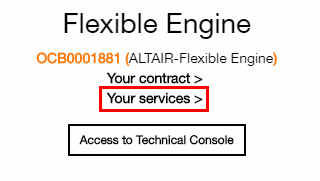
Figure 1. Orange Cloud Customer Space Services -
In the navigation bar on the top click Users

Select a Region
Define a region in the Orange Cloud Flexible Engine console to set up the infrastructure for cloud bursting.
-
In the navigation bar on the top select the region for setting up your
infrastructure.
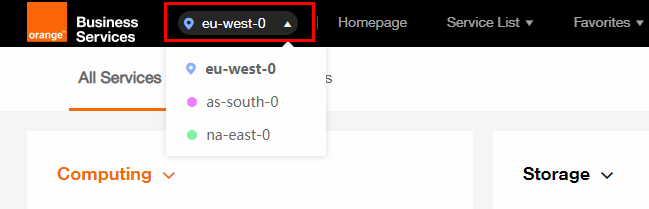
Figure 2. Select a RegionNote: For Auth (IAM) URL (Authorization URL), enter the url in the following format based on the region you chose in the Orange Cloud Flexible Engine console.https://iam.<orange region>.<console link> e.g. https://iam.eu-west-0.prod-cloud-ocb.orange-business.com
Add an Orange Cloud Flexible Engine Account
Add an existing Orange Cloud Flexible Engine account to Control so that you can create a cloud bursting scenario or an appliance.
- Created an Orange Cloud Flexible Engine user account.
- Obtained the Domain name for the Orange Cloud Flexible Engine account.
- Obtained the API password for the user.
- Defined the region where you will deploy your cloud infrastructure.
- Obtained the Auth (IAM) URL based on the selected region.
This information is necessary to create a cloud account in Control. If you do not have this information see Create an Orange Cloud Flexible Engine User Account and Select a Region.
- Login to Control.
- Click the Cloud tab.
- Click Cloud from the Infrastructure menu located on the left-hand side of the web page.
-
Click
 .
.
-
Enter the following to add a cloud account:
- Click Create Account.
Check Orange Cloud Flexible Engine Account Service Quota
View your account resource usage and limits from the console.
Quotas are used to limit the number of resources available to users. It is important to ensure you are not exceeding your quota while setting up the resources for cloud bursting. If the existing resource quota cannot meet your service requirements, you can submit a work order to increase your quota. Once your application is approved, your resource quota is updated accordingly and you will be sent a notification.
-
In the navigation bar on the top right hand side, click
 .
.
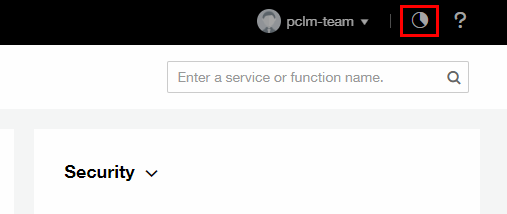
Figure 3. Check Quotas for ResourcesInformation about resources usage and availability is displayed.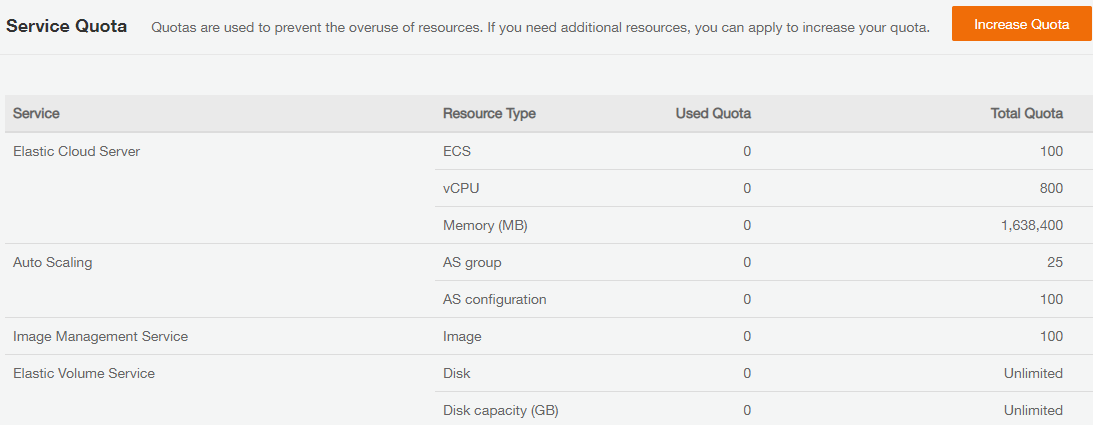
Figure 4. Resources Quotas Table
Create a Virtual Private Cloud
Create a Virtual Private Cloud (VPC) so that you can perform cloud bursting.
Creating a Virtual Machine
Create a Elastic Cloud Server (ECS) using a public image provided by Orange Cloud Flexible Engine for cloud bursting.
Installing and Configuring the PBS MoM on the VM
Install the PBS MoM on the virtual machine and configure the VM per your site's environment.
Log into the VM using the default user "cloud" and the .pem generated during the creation of the VM. For more information about logging into the Linux ECS, refer to the Elastic Cloud Server User Guide.
A startup script is provided during the creation of the bursting scenario. This script is ran after a cloud node is burst and is used to set up the system environment so that nodes burst in the cloud can communicate with the PBS Server. A service specifically designed for cloud instance initialization is cloud-init and is utilized by Control when booting cloud nodes, therefore it must be installed on the VM. For more information about installing cloud-init, refer to the Cloudinit Documentation.
-
In the search box above the upper right corner of the ECS list, enter the ECS
name, IP address, or ID, and click
 .
.
Create an OS Image
Create an image of the virtual machine configured per your site's requirements.
- A Linux ECS in the Stopped state.
- Configured DHCP for the NICs of the ECS
- Configured Network attributes of the ECS
- Detached Data Disks from the ECS
Create a Orange Cloud Cloud Bursting Scenario
Create an Orange Cloud Flexible Engine bursting scenario so that PBS execution nodes can be burst in the cloud.
A startup script is provided during the creation of the bursting scenario. This script is ran after a cloud node is burst and is used to set up the system environment so that nodes burst in the cloud can communicate with the PBS Server. Use a cloud-init script for the startup script. For more information about writing cloud-init scripts, refer to the Cloudinit Documentation and Cloud Bursting Startup Script.
-
Enter information about the bursting scenario such as name, cloud provider,
cloud account, and geographic location.
-
For Region, select the availability domain where
the cloud bursting virtual machine is hosted.
Figure 5. Virtual Machine Availability Domain
-
For Region, select the availability domain where
the cloud bursting virtual machine is hosted.
-
Click Service List.

Figure 6. Orange Cloud Flexible Engine Console -
Click Service List.
Figure 7. Orange Cloud Flexible Engine Console -
For Tags, enter a key-value pair to add a label to the
cloud node and press ENTER.
A tag is a label that is assigned to a cloud node. Tags enable cloud nodes to be categorized in different ways, for example, by purpose, owner, or environment.The key-value pair must be entered as key:value. The key must be less than 36 characters and the value must be less than 43 characters. The length of both the key + value should be less than 80 characters. Valid values are alphanumeric, dash (-) and an underscore ( _ ).Once the tag is added, it will appear within its own bubble.

Figure 8. Key-Value Tag -
Repeat the previous step to add more tags.

Figure 9. Additional TagsTip: To remove a tag click on the 'x' located within the tag bubble.