Configure Google Cloud Platform Cloud Bursting
Create the necessary components in GCP that are required for cloud bursting and then create a Control cloud bursting scenario.
Create a Project
Create a GCP Project so that you can create the necessary cloud components for cloud bursting.
Google Cloud Platform projects form the basis for creating, enabling, and using all Cloud Platform services including managing APIs, enabling billing, adding and removing collaborators, and managing permissions for Cloud Platform resources.
-
Click
 located in the upper left-hand corner of the web
page.
located in the upper left-hand corner of the web
page.
Create a Service Account
Create a Google Cloud Platform service account so that you can later create a cloud account in Control.
GCP documentation can be found at Understanding Service Accounts and Compute Engine IAM Roles .
- Project ID
- Client ID
- Client email
- Private key ID
- Private key
- Login to the GCP console.
-
Click located in the upper left-hand corner of the web
page.
- Click .
- Click CREATE SERVICE ACCOUNT.
-
Enter the following to create a service account:
Add a GCP Cloud Account
Add an existing GCP service account to Control so that you can create a cloud bursting scenario or an appliance.
- Login to Control.
- Click the Cloud tab.
- Click Cloud from the Infrastructure menu located on the left-hand side of the web page.
-
Click
 .
.
-
Enter the following to add a cloud account:
- Click Create account.
Create a Virtual Private Cloud Network
Create a Virtual Private Network (VPC) in GCP so that you can later create a virtual machine for cloud bursting.
GCP documentation can be found at Virtual Private Cloud Documentation and Using VPC Networks .
-
Click located in the upper left-hand corner of the web
page.
Creating a Virtual Machine
Create a CentOS 7.3 virtual Machine in GCP.
GCP documentation can be found at Virtual Machine Instances and Creating and Starting a VM Instance.
-
Click located in the upper left-hand corner of the web
page.
-
Enter the following to create a virtual machine:
-
In the Machine type, click the
Customize link.
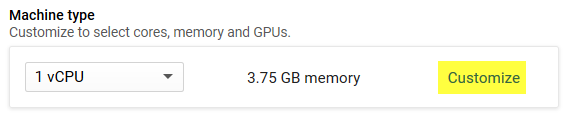
Figure 1. Customize the Machine Type
-
In the Machine type, click the
Customize link.
Installing and Configuring the PBS MoM on the VM
Install the PBS MoM on the virtual machine and configure the VM per your site's environment.
A startup script is provided during the creation of the bursting scenario. This script is ran after a cloud node is burst and is used to set up the system environment so that nodes burst in the cloud can communicate with the PBS Server. A service specifically designed for cloud instance initialization is cloud-init and is utilized by Control when booting cloud nodes, therefore it must be installed on the VM. For more information about installing cloud-init, refer to the Cloudinit Documentation.
-
SSH into the virtual machine using the public IP address of the VM:
ssh IPV4PublicIP
where IPV4PublicIP is the public IP address of the virtual machine.
Figure 2. Bursting Virtual Machine
Create an OS Image
Create an image of the virtual machine configured per your site's requirements. You can choose to keep the image and use it to update your bursting image with patches, new applications etc. You can bring the instance online, patch and then recreate the image at your discretion. The saving in build and management time for the images will offset the additional storage costs.
GCP documentation can be found at Creating, Deleting, and Deprecating Custom Images.
-
Click located in the upper left-hand corner of the web
page.
-
Click
 next to the
virtual machine that was created for cloud bursting.
next to the
virtual machine that was created for cloud bursting.

Figure 3. Bursting Virtual Machine -
Click Images from the menu located on the left-hand
side of the web page.
CAUTION:Do NOT choose Machine images.
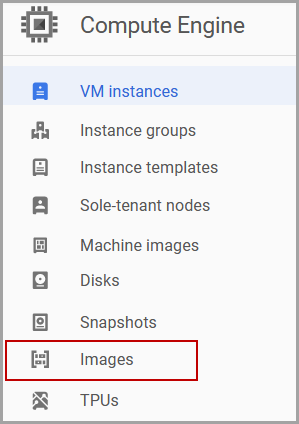
Figure 4. Images
Create a GCP Cloud Bursting Scenario
Create an GCP bursting scenario so that PBS execution nodes can be burst in the cloud.
A startup script is provided during the creation of the bursting scenario. This script is ran after a cloud node is burst and is used to set up the system environment so that nodes burst in the cloud can communicate with the PBS Server. Use a cloud-init script for the startup script. For more information about writing cloud-init scripts, refer to the Cloudinit Documentation and Cloud Bursting Startup Script.
Enter information about the GCP resources necessary to burst in the cloud.
-
Click located in the upper left-hand corner of the web
page.
-
Click located in the upper left-hand corner of the web
page.
-
For Tags, enter a key-value pair to add a label to the
cloud node and press ENTER.
A tag is a label that is assigned to a cloud node. Tags enable cloud nodes to be categorized in different ways, for example, by purpose, owner, or environment.The key-value pair must be entered as key:value. The key must be less than 36 characters and the value must be less than 43 characters. The length of both the key + value should be less than 80 characters. Valid values are alphanumeric, dash (-) and an underscore ( _ ).Once the tag is added, it will appear within its own bubble.

Figure 5. Key-Value Tag -
Repeat the previous step to add more tags.

Figure 6. Additional TagsTip: To remove a tag click on the 'x' located within the tag bubble.