Configure OpenStack for Cloud Bursting
Create the necessary components in OpenStack that are required for cloud bursting and then create a cloud bursting scenario.
OpenStack is a set of software tools for building and managing cloud computing platforms for public and private clouds. OpenStack software controls large pools of compute, storage, and networking resources throughout a datacenter, managed through a dashboard or through the OpenStack API.
OpenStack cloud bursting is available for sites that have installed their own OpenStack private cloud on their premises and want to manage cloud bursting through Control. Since OpenStack installations can be highly diverse, it is recommended to work with your Altair support team to set up cloud bursting via OpenStack as not all implementations may be supported.
Add an OpenStack Cloud Account
Add an OpenStack Cloud account to Control so that you can create a cloud bursting scenario.
-
Click
 .
.
-
Click
 > OpenStack RC File.
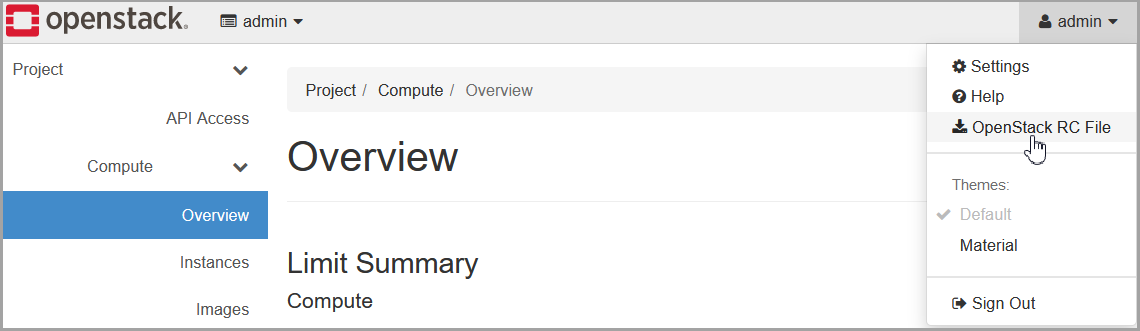
Figure 1. Open the OpenStack RC FileThe contents of the OpenStack RC file are displayed.
Prerequisites for OpenStack Cloud Bursting
Components that are necessary to create an OpenStack cloud bursting scenario.
- A virtual network must be created. For more information see Create and manage networks.
- A subnet must be created for this network. The subnet’s ID is a value that is required to be entered for the bursting scenario.
- If you want the cloud nodes to be accessible from public networks, create a router for this network. Add a gateway interface and attach it to the subnet. Use floating IP addresses for accessing the instance from public networks. For more information about floating IPs see Openstack External Network Settings Example.
- A security group must be created. Either create a new security group or use
the default security group. The security group’s ID is necessary to create a
bursting scenario. For more information see Configure access and security for
instances.
- Add any inbound/outbound security rules necessary for the security group.
- An OS image is necessary to launch a cloud instance. For more information see OpenStack Virtual Machine Image Guide. The OS image ID is necessary for creating a cloud bursting scenario.
Create an OS Image
If your site has not created an OS image for launching cloud instances, there are several options. You can create the image manually on your own system and then upload the image to your cloud. For more information see Create images manually.
- Create a virtual machine. For more information see Launch and manage instances.
- Attach the virtual network to the virtual machine.
- Assign the security group to the virtual machine.
- SSH into the virtual machine. For more information see Connect to your instance by using
SSH.
- Install the PBS MoM.
- Configure the virtual machine for your site's environment such as mounting file systems, connecting it to the authentication service, installing any applications, etc.
- Install cloud-init.
- Connect the virtual machine to your PBS server and submit a job to ensure it is working as expected.
- Create a snapshot of the virtual machine. For more information see Create an instance
snapshot.Note: Before taking the snapshot, clear user data such as home folders and remove cloud-init logs and artifacts by using the cloud-init clean command.
Create an OpenStack Cloud Bursting Scenario
Create an OpenStack bursting scenario so that PBS execution nodes can be burst in the cloud.
A startup script is provided during the creation of the bursting scenario. This script is ran after a cloud node is burst and is used to set up the system environment so that nodes burst in the cloud can communicate with the PBS Server. Use a cloud-init script for the startup script. For more information about writing cloud-init scripts, refer to the Cloudinit Documentation and Cloud Bursting Startup Script.
Enter information about the OpenStack resources necessary to burst in the cloud.
-
For Subnet ID, paste the OpenStack subnet ID.
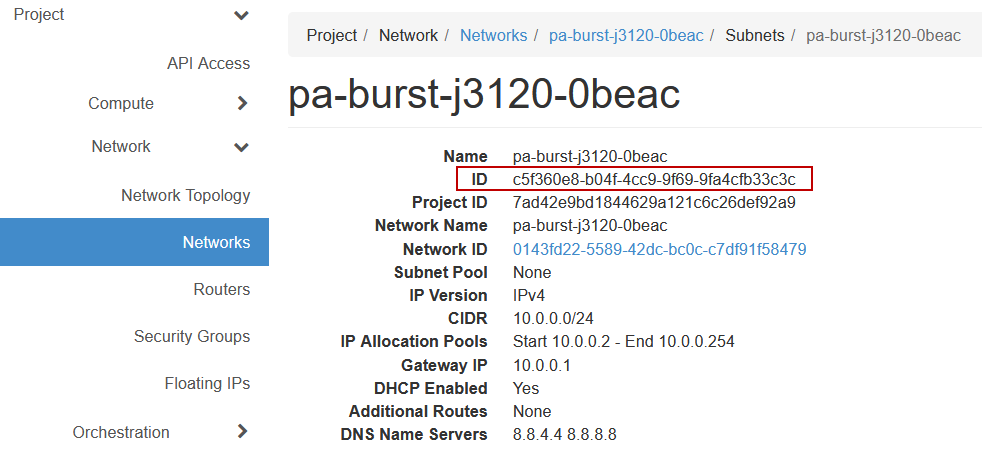
Figure 2. Subnet ID -
For Security Group, paste the OpenStack security group's
ID.

Figure 3. Security Group ID -
For OS Image URI, paste the OpenStack OS image ID.
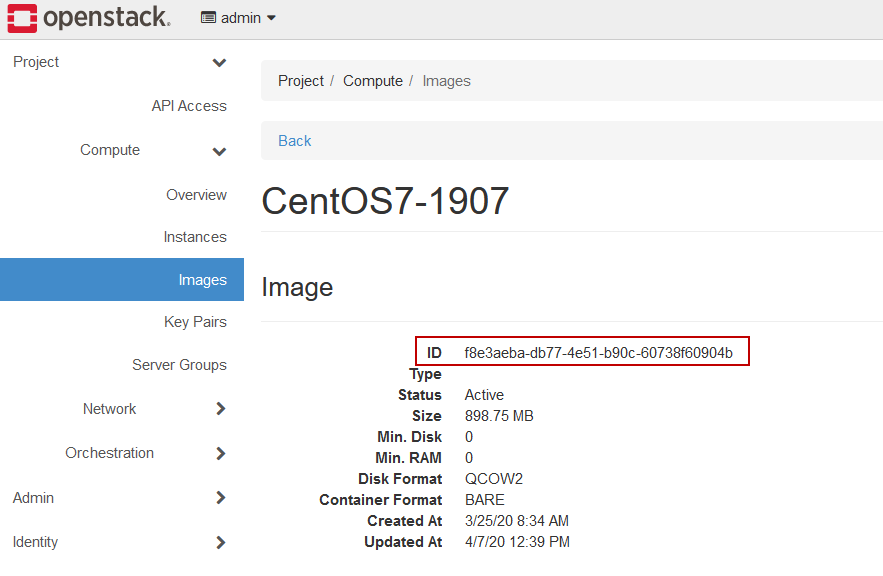
Figure 4. OS Image ID -
If you want the cloud nodes to be accessible from public networks:
-
For Gateway network name, paste the name of the
network from which the floating IPs will be taken.
This is required in case of a router having several networks attached for floating IPs.
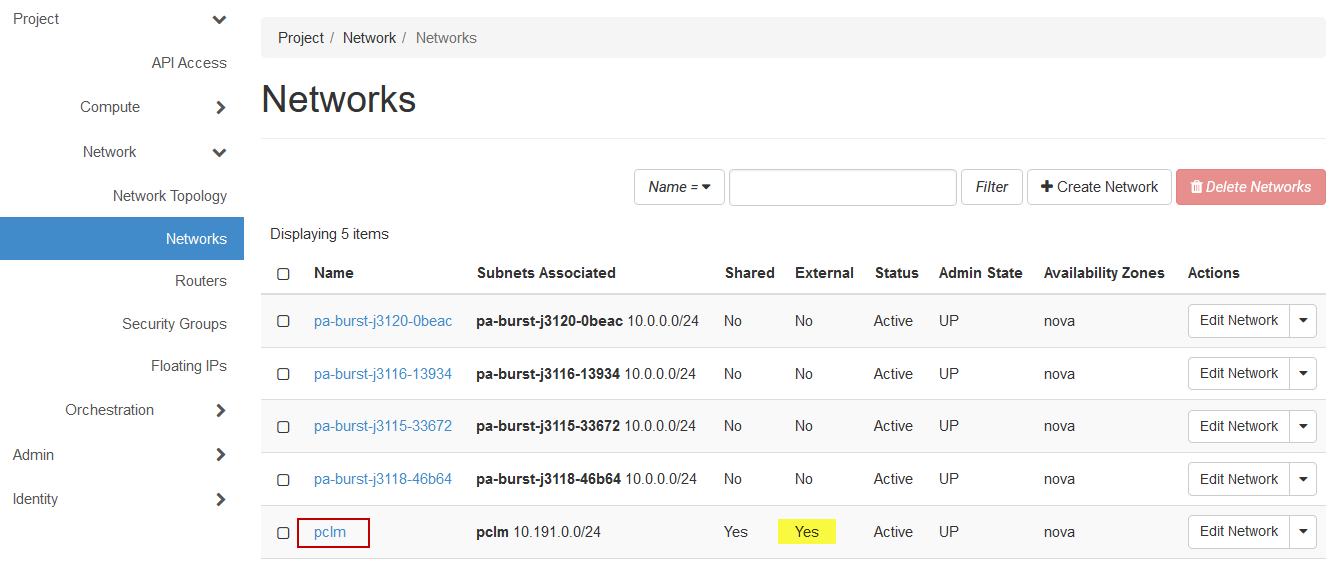
Figure 5. Gateway Network
-
For Gateway network name, paste the name of the
network from which the floating IPs will be taken.
-
For Tags, enter a key-value pair to add a label to the
cloud node and press ENTER.
A tag is a label that is assigned to a cloud node. Tags enable cloud nodes to be categorized in different ways, for example, by purpose, owner, or environment.The key-value pair must be entered as key:value. The key must be less than 36 characters and the value must be less than 43 characters. The length of both the key + value should be less than 80 characters. Valid values are alphanumeric, dash (-) and an underscore ( _ ).Once the tag is added, it will appear within its own bubble.

Figure 6. Key-Value Tag -
Repeat the previous step to add more tags.

Figure 7. Additional TagsTip: To remove a tag click on the 'x' located within the tag bubble.