Configure Oracle Cloud Platform Cloud Bursting
Create the necessary components in Oracle Cloud that are required for cloud bursting and then create a Control cloud bursting scenario.
Create an Oracle Cloud User Account
Create an Oracle Cloud user account so that you can later create a cloud account in Control.
Oracle documentation can be found at Adding Users and Resource Identifiers.
- The user account's Oracle Cloud ID (OCID).
-
Click
 located in the upper left-hand corner of the web
page.
located in the upper left-hand corner of the web
page.
-
Click
 located in the upper left-hand corner of the web
page.
located in the upper left-hand corner of the web
page.
Generating an SSH Public for the Oracle Cloud User
Use OpenSSL to create a private and public key in a PEM format for the previously created Oracle Cloud user.
- The RSA public key's fingerprint.
-
Click located in the upper left-hand corner of the web
page.
-
Click Add.
A fingerprint is generated.
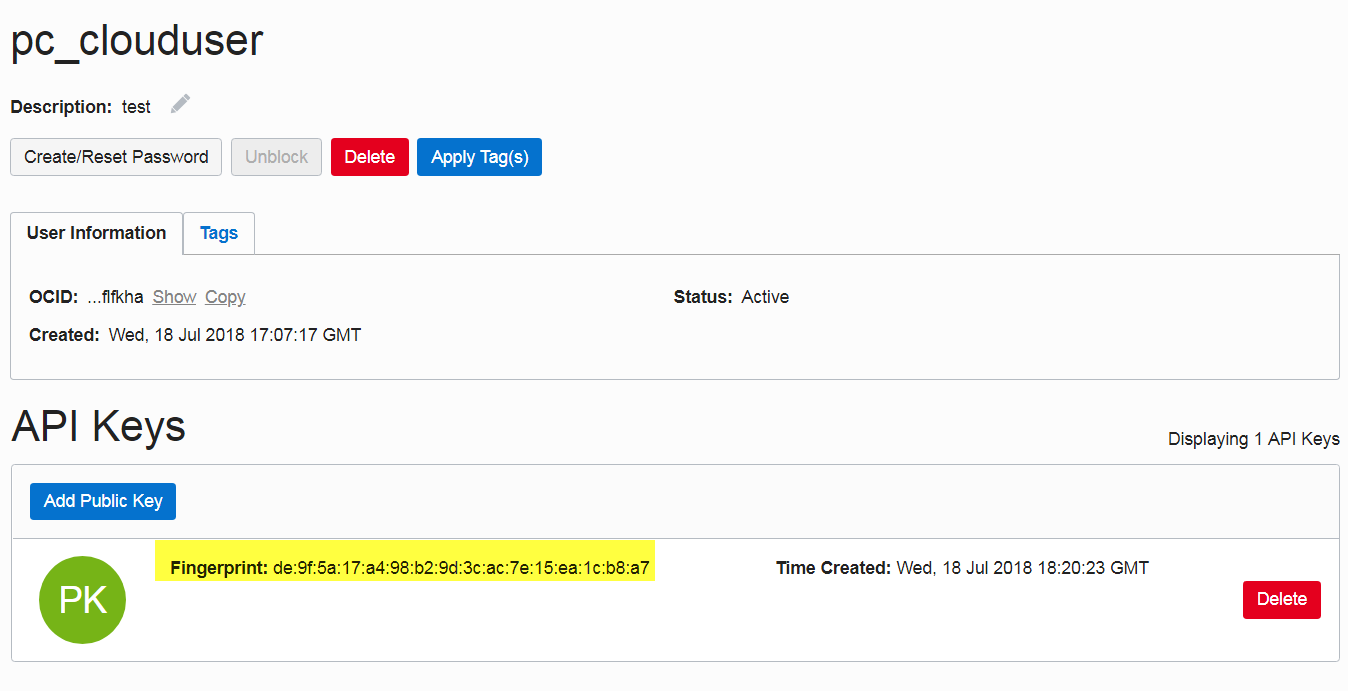
Figure 1. Public Key Fingerprint
Obtain the Root Compartment Identifier
Obtain the Oracle Cloud identifier of the root compartment so that you can later create a cloud account in Control.
Oracle documentation can be found at Understand Compartments.
- The compartment's Oracle Cloud ID (OCID).
-
Click located in the upper left-hand corner of the web
page.
Obtain the Tenancy Identifier
Obtain the Oracle Cloud identifier of the tenancy that you can later create a cloud account in Control.
- The tenancy's Oracle Cloud ID (OCID).
-
Click located in the upper left-hand corner of the web
page.
-
Under Tenancy Information, click Show located to the
right of OCID:
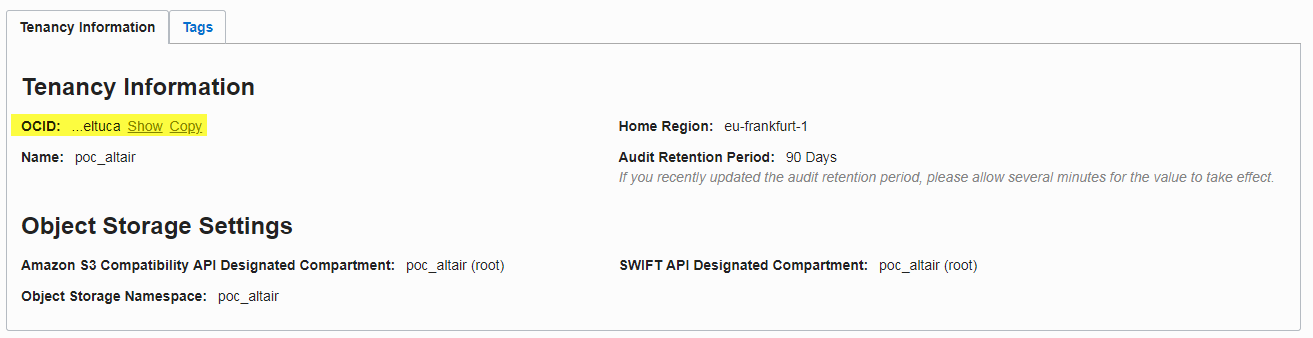
Figure 2. Tenancy OCIDThe tenancy's OCID is displayed.
Add an Oracle Cloud Account
Add an existing Oracle Cloud account to Control so that you can create a cloud bursting scenario or an appliance.
- User OCID generated when creating the Oracle user.
- Tenancy OCID.
- Root compartment OCID.
- Fingerprint of the public key generated for the Oracle user.
- RSA private key that was generated for the Oracle user.
This information is necessary to create a cloud account in Control. If you do not have this information see Create an Oracle Cloud User Account, Generating an SSH Public for the Oracle Cloud User, Obtain the Root Compartment Identifier and Obtain the Tenancy Identifier.
- Login to Control.
- Click the Cloud tab.
- Click Cloud from the Infrastructure menu located on the left-hand side of the web page.
-
Click
 .
.
-
Enter the following to add a cloud account:
- Click Create account.
Create a Virtual Cloud Network
Create a Virtual Cloud Network (VCN) so that you can perform cloud bursting.
Oracle documentation can be found at Overview of Networking and Creating a Virtual Cloud Network.
-
Click located in the upper left-hand corner of the web
page.
-
Choose a region based on the geographical location of your users.
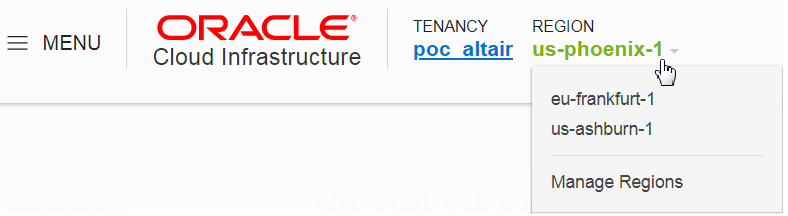
Figure 3. Select a Region -
Click the name of the VNC.
The subnets are displayed. A subnet is created for each availability domain (data center) located in the previously selected region.
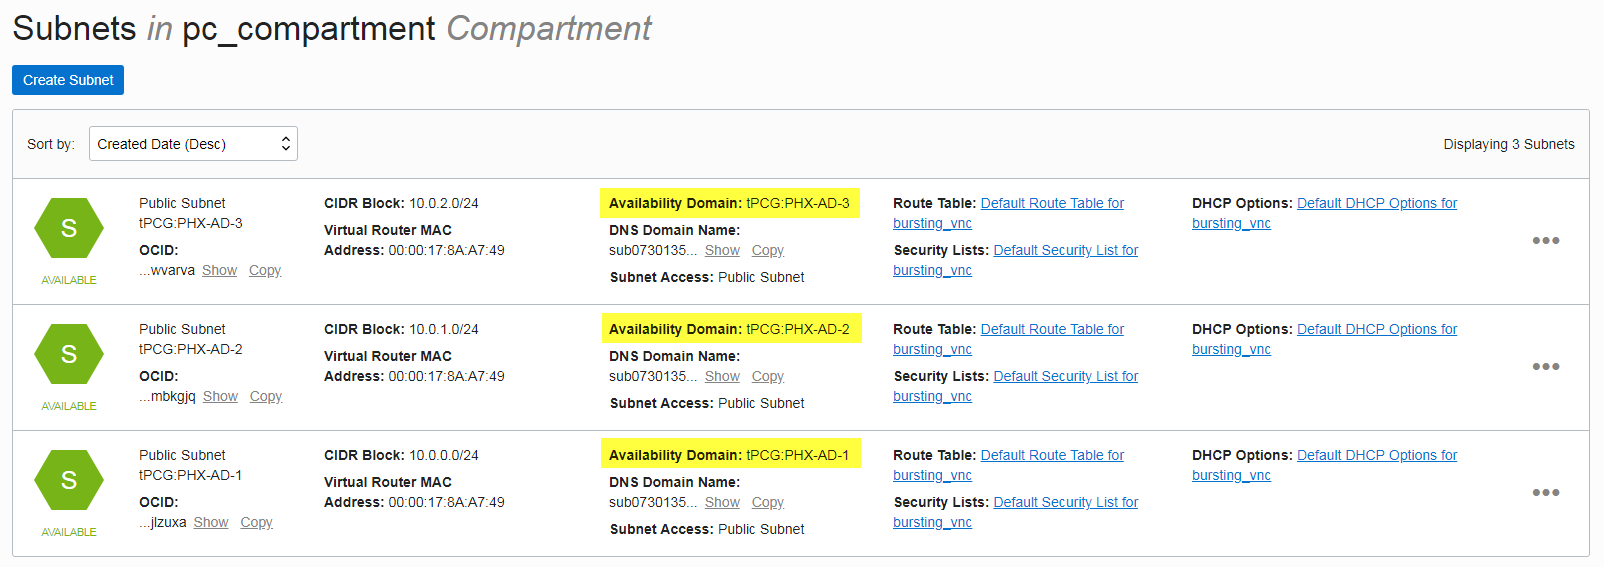
Figure 4. Virtual Machine Subnets and Associated Availability Domain
Creating a Virtual Machine
Create a CentOS 7 virtual machine (VM) in Oracle Cloud.
Virtual machines are hosted in availability domains (data centers) located in a region and are based on predefined VM shapes. Before proceeding, determine the VM shape that your site requires for cloud bursting based on the number of CPUs, memory, disk space, network bandwidth, and virtual network interface cards. While selecting the shape for a VM, consider the nature of the applications that you plan to deploy on the instance, the number of users that you expect to use the applications, and also how you expect the load to scale in the future. Remember to also factor in the CPU and memory resources that are necessary for the operating system.
Next, verify that your Oracle tenancy has the appropriate service limits for the VM shape and the region's availability domains Check Tenancy Service Limits.
-
Click located in the upper left-hand corner of the web
page.
-
Choose the region where the previously created VNC is hosted.
Figure 5. Select a Region -
For COMPARTMENT, select the root compartment.
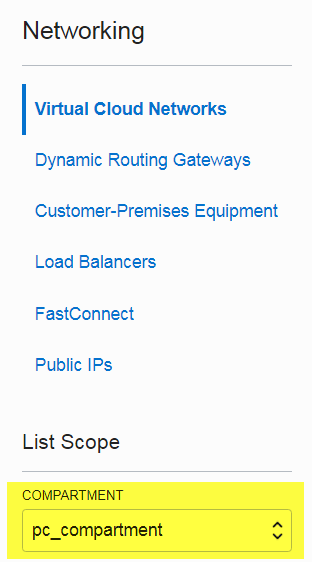
Figure 6. Choose Compartment -
Click Create Instance.
Creating the virtual machine may take some time. It is done when the state is "Running".
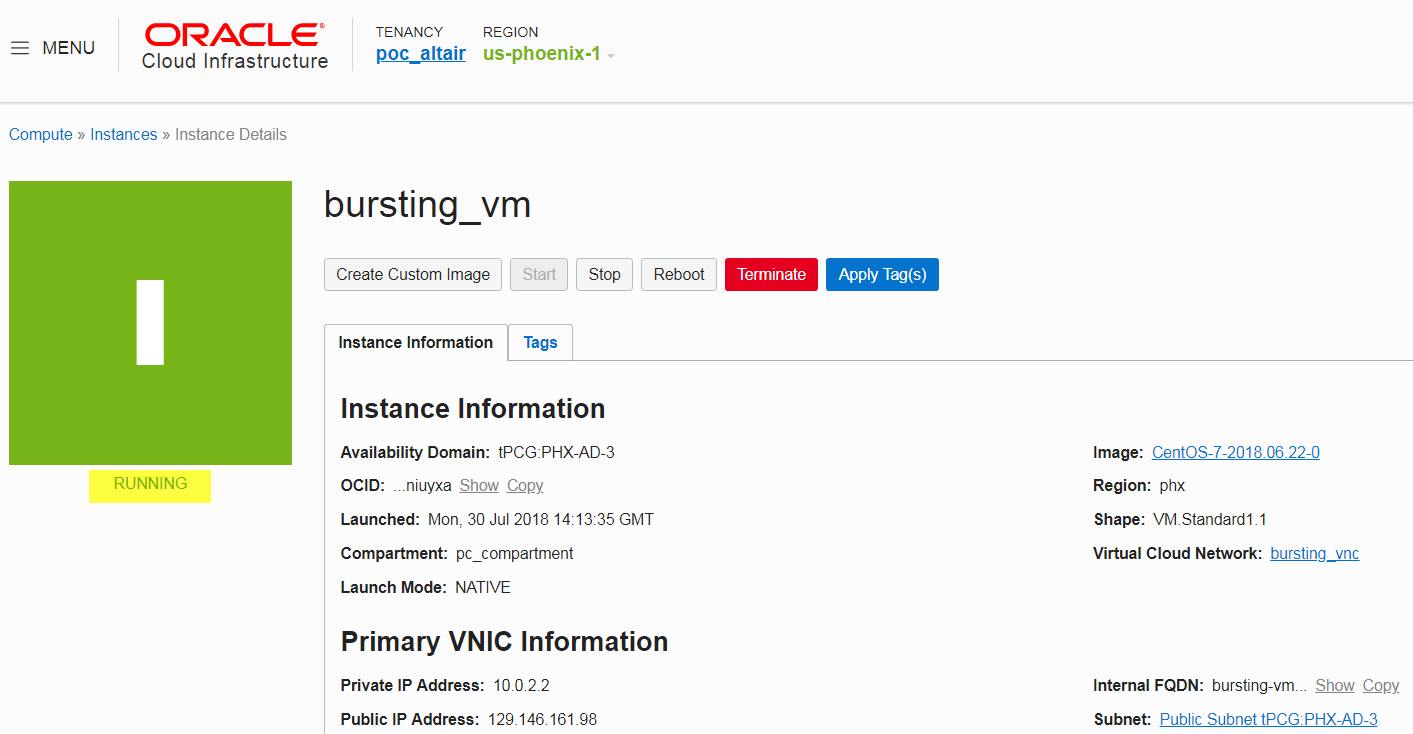
Figure 7. Running Virtual Machine
Check Tenancy Service Limits
Check the service limit for your tenancy before creating the components necessary for cloud bursting.
When you sign up for Oracle Cloud Infrastructure, a set of service limits are configured for your tenancy. The service limit is the quota or allowance set on a resource. For example, your tenancy is allowed a maximum number of compute instances (virtual machines) per availability domain. These limits are generally established with your Oracle sales representative when you purchase Oracle Cloud Infrastructure. Oracle documentation can be found at Service Limits and Regions and Availability Domains.
When you reach the service limit for a resource, you receive an error when you try to create a new resource of that type. You cannot create a new resource until you are granted an increase to your service limit or you terminate an existing resource.
-
Choose the region where the previously created VNC is hosted.
Figure 8. Select a Region -
Click located in the upper left-hand corner of the web
page.
-
Click Compute.
Availability domains (data centers) for the region are displayed. For each resource (VM shape) the number of nodes that can be burst in the corresponding availability domains are displayed. In the below example, three nodes can be burst in each data center in the us-phoenix-1 region for the VM Standard1.1 shape.
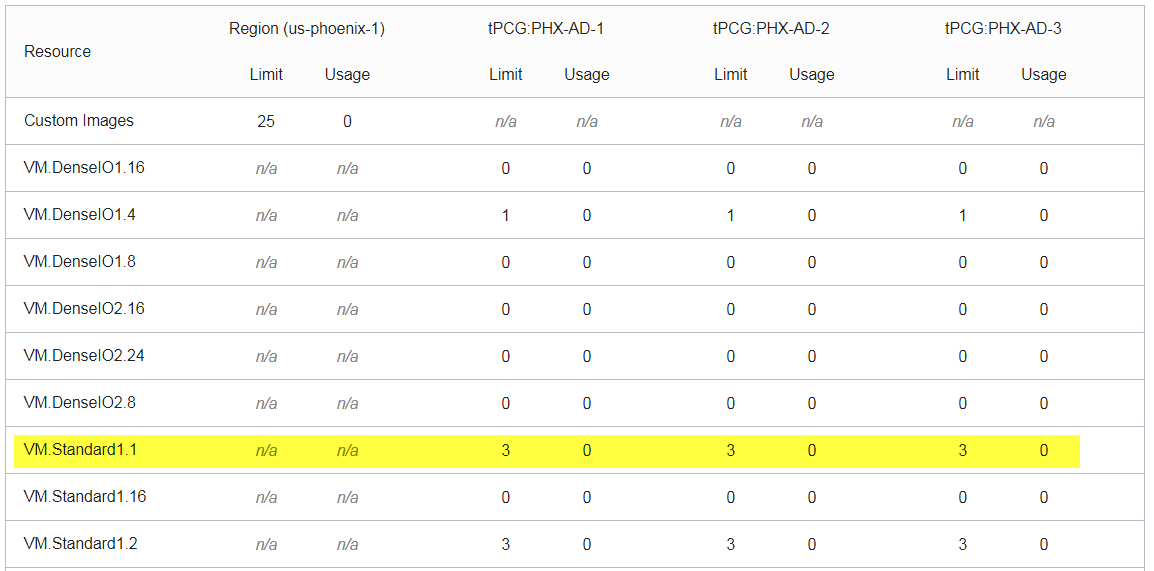
Figure 9. Virtual Machine Type Limits
Installing and Configuring the PBS MoM on the VM
Install the PBS MoM on the virtual machine and configure the VM per your site's environment.
A startup script is provided during the creation of the bursting scenario. This script is ran after a cloud node is burst and is used to set up the system environment so that nodes burst in the cloud can communicate with the PBS Server. A service specifically designed for cloud instance initialization is cloud-init and is utilized by Control when booting cloud nodes, therefore it must be installed on the VM. For more information about installing cloud-init, refer to the Cloudinit Documentation.
-
SSH into the virtual machine using the default user "opc", the private SSH key
of the user account provided during the creation of the VM and the External IP
assigned to the VM.
ssh -i PRIVATE_KEY_PATH opc@PUBLIC_IP_ADDR
Where PRIVATE_KEY_PATH is the path to the file that contains the private SSH key of the user account provided during the creation of the VM and PUBLIC_IP_ADDR is the public IP address of the VM.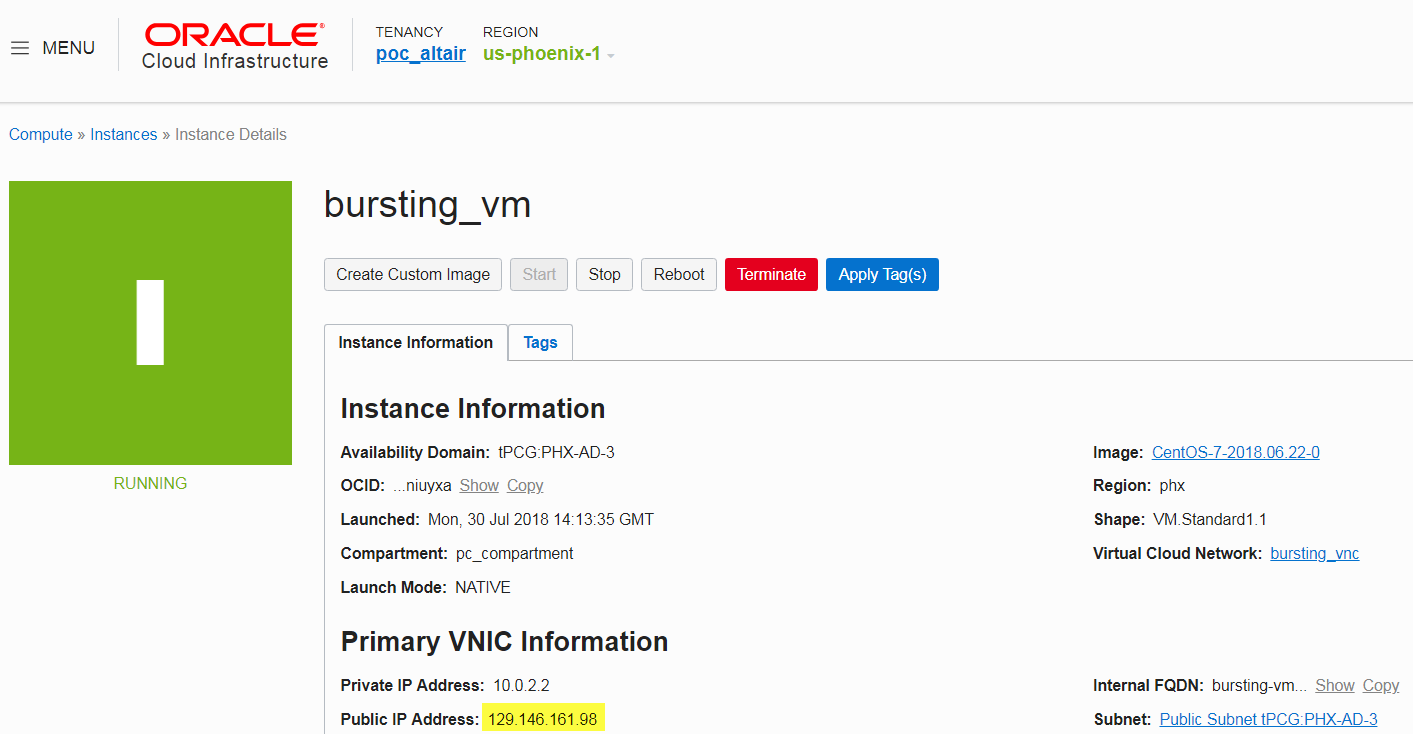
Figure 10. Bursting Virtual Machine
Create an OS Image
Create an image of the virtual machine configured per your site's requirements.
Oracle documentation can be found at Managing Custom Images.
-
Click located in the upper left-hand corner of the web
page.
Create an Oracle Cloud Bursting Scenario
Create an Oracle bursting scenario so that PBS execution nodes can be burst in the cloud.
A startup script is provided during the creation of the bursting scenario. This script is ran after a cloud node is burst and is used to set up the system environment so that nodes burst in the cloud can communicate with the PBS Server. Use a cloud-init script for the startup script. For more information about writing cloud-init scripts, refer to the Cloudinit Documentation and Cloud Bursting Startup Script.
-
Enter information about the bursting scenario such as name, cloud provider,
cloud account, and geographic location.
-
For Region, select the availability domain where
the cloud bursting virtual machine is hosted.
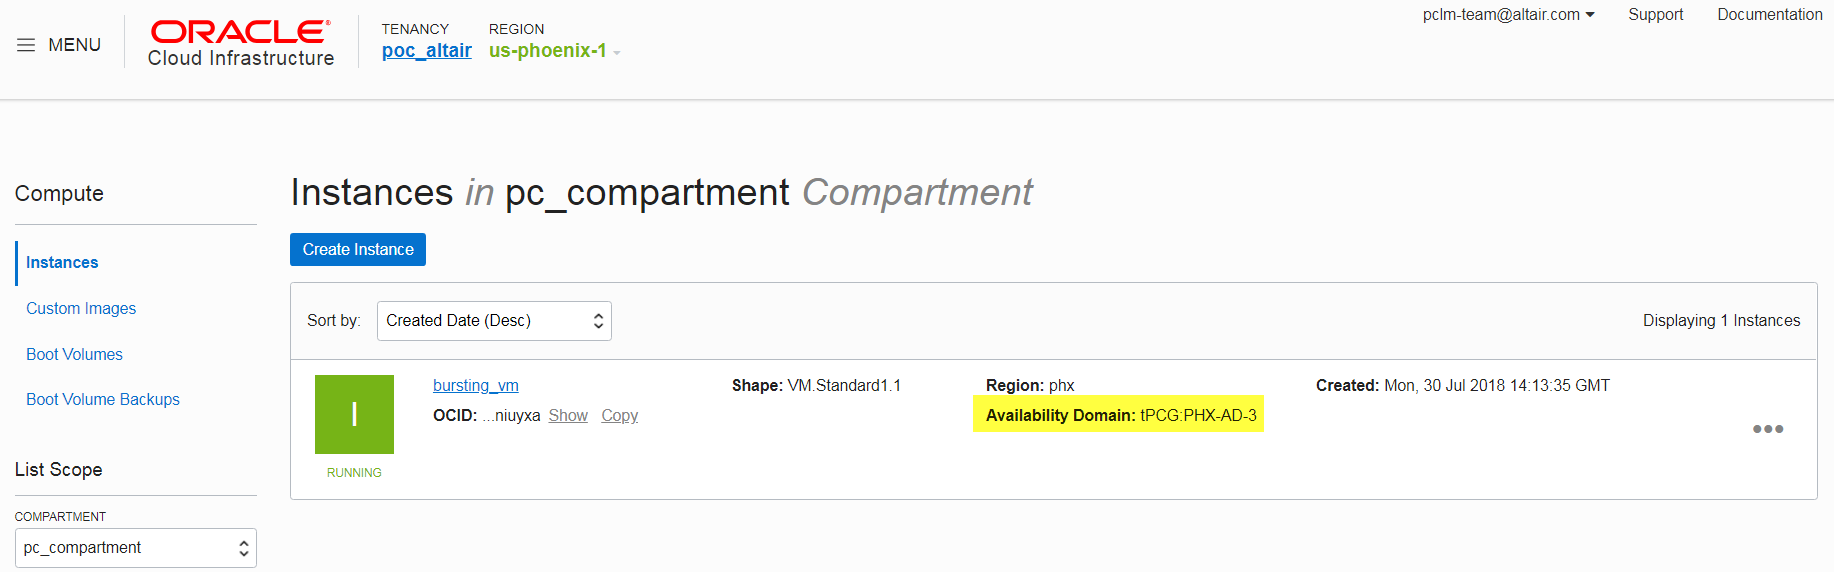
Figure 11. Virtual Machine Availability Domain
-
For Region, select the availability domain where
the cloud bursting virtual machine is hosted.
Enter information about the Oracle resources necessary to burst in the cloud.
-
Click located in the upper left-hand corner of the web
page.
-
Locate the subnet associated with the availability domain where the cloud
bursting virtual machine is hosted.
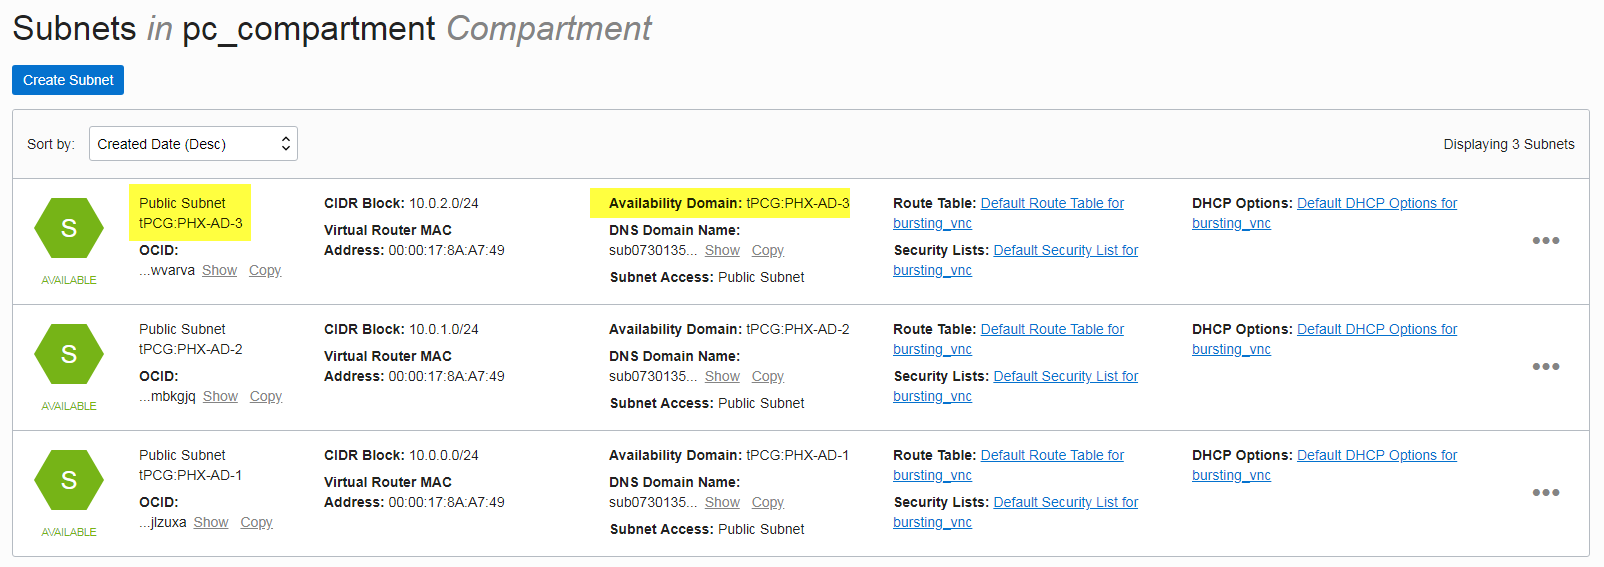
Figure 12. Subnet and Associated Availability Domain -
Click located in the upper left-hand corner of the web
page.
-
For Tags, enter a key-value pair to add a label to the
cloud node and press ENTER.
A tag is a label that is assigned to a cloud node. Tags enable cloud nodes to be categorized in different ways, for example, by purpose, owner, or environment.The key-value pair must be entered as key:value. The key must be less than 36 characters and the value must be less than 43 characters. The length of both the key + value should be less than 80 characters. Valid values are alphanumeric, dash (-) and an underscore ( _ ).Once the tag is added, it will appear within its own bubble.

Figure 13. Key-Value Tag -
Repeat the previous step to add more tags.

Figure 14. Additional TagsTip: To remove a tag click on the 'x' located within the tag bubble.