Import and Classify
Import the TSurf model and classify the components.
Import pre-made surfaces (tsurfs in this tutorial) and/or points (a csv file here) to define the model domain. The individual tria(ngular) or quad(rilateral) elements making up the surfaces are often called 2D or shell elements.
Import
Import the TSurf model.
-
From I/O group, click Import.
 GeoD - Import dialog appears.
 -
Click
 .
A file browser window will appear. Browse and select the tutorial files mentioned in the File Required section.
.
A file browser window will appear. Browse and select the tutorial files mentioned in the File Required section. -
Select all the TSurf files from the folder.
You can observe that the File Type column states the selected file type.

-
Accept the default selections for other options and click
Import.
This will import the selected TSurf model into the HyperWorks X session.

Classify Model
Use Classify tool to classify TSurf model and its components.
After import it is necessary to classify and date the imported surfaces. The classification and age assignment provides the logical basis for subsequent clean-up operations. Whilst these operations can be applied on unclassified or undated features, the geological rules underlying them are not employed and unexpected results may occur.
-
Once the model is imported, Classify user message will
appear to classify the model. Click Close.
 If not, you can launch the tool from . This also launches the Model - GeoD tab for model classification and age definition.
 -
Click
 to
switch to Flat Part View.
to
switch to Flat Part View.
 Figure 1. Note: If you close the Model - GeoD browser, click Classify from ribbon to re-launch it.
 -
Once the model classification is done, click
 to switch to Hierarchical Part
View.
Your model classification and age definition should be as displayed below.
to switch to Hierarchical Part
View.
Your model classification and age definition should be as displayed below.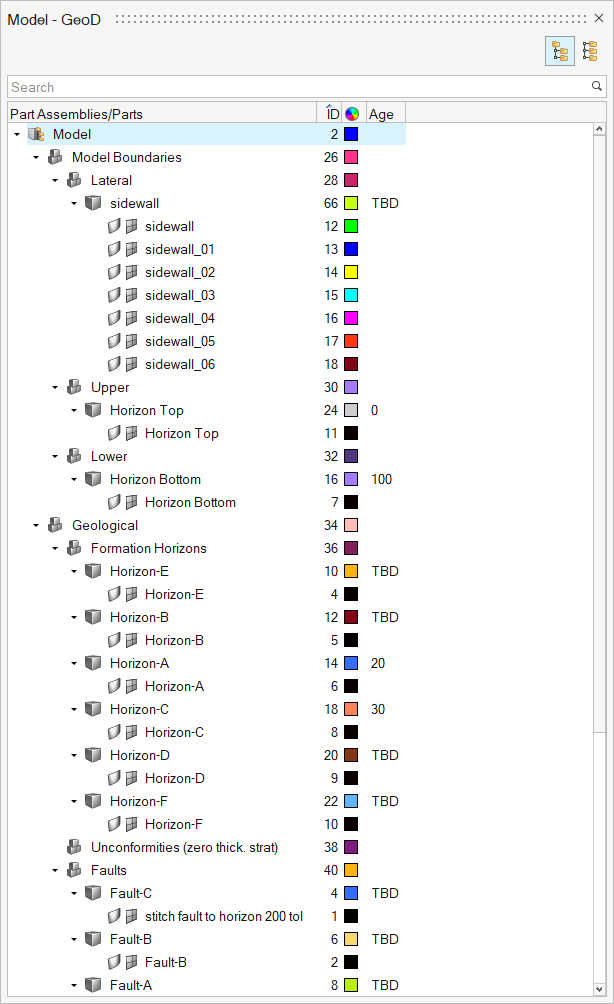 Figure 2. Tip: You can keep the Model - GeoD tab open during the complete session.