


|
The Preview Window
The Preview Window allows you to:
-
Open a file a data source
-
Preview and confirm the data in the data source
-
Load a table into your workspace, for combining and transforming
-
Combine records from similar tables before loading into your workspace
The Preview Window initially displays a list of tables from the sources you have opened:
These tables may be:
-
contained in the data source you have just loaded
-
the result of a Prep Document operation you have carried out
-
the tables on the web page you have selected
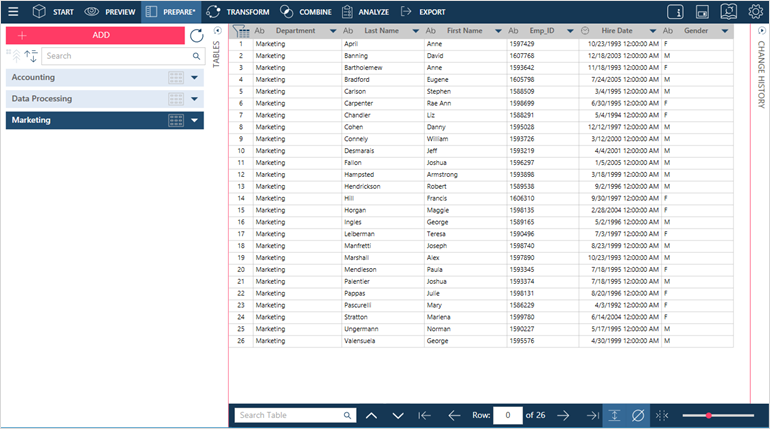
From this window you can preview tables and/or select the tables you want to work with.
To preview a table and inspect your data, click the Preview
icon:  .
.
The window will look like this:
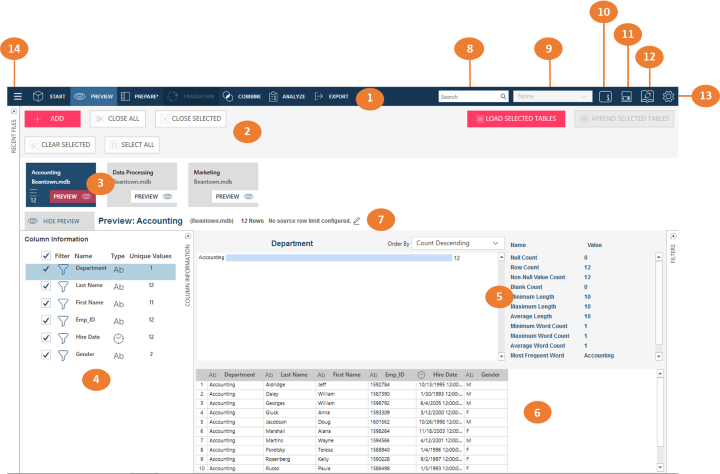
Preview Window panels
|
Panel |
Description |
|
1 |
The standard Monarch Data Prep Studio Toolbar Select a tool to move to the Start Page, Prepare Window, Transform Pane, Combine Stage, Analyze Drop-down, or Export Window. |
|
2 |
Preview Tools Select a tool to select or deselect a table, prior to loading. You can also select to:
|
|
3 |
Table List The table list shows all of the data sources you have added to the current workspace. |
|
4 |
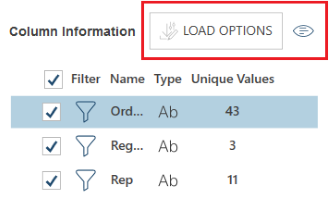
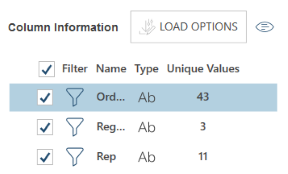
Column Information This panel displays a list of the columns on the table currently in preview. It shows the column names, each column's data type, and the number of unique values for each column as well Note the following:
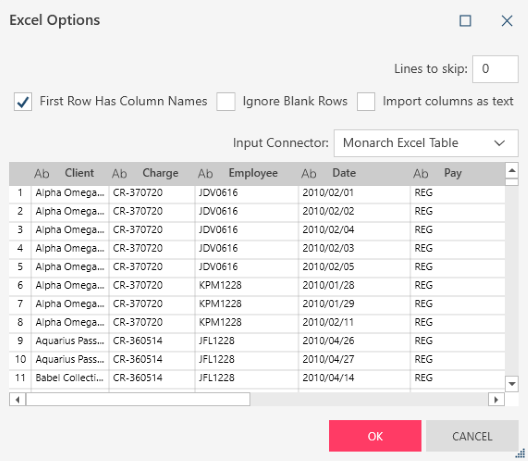
Clicking on the Load Options icon displays the HTML Load Options dialog; this dialog will allow you to specify whether the first row of the table includes column names and define n number of lines to skip before capturing the next row as the first row of your table. Clicking on the Text Viewer icon displays a dialog showing the HTML style code of the table.
Click on the icon to view the warning or error. Refer to Previewing Data for details. |
|
5 |
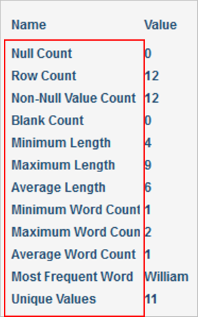
Column Statistics This panel displays statistics about a selected column. Select a column on the Column Information panel (marked #4 in the Preview window image above) to display various statistics according to data type. For text columns, the following statistics are displayed:
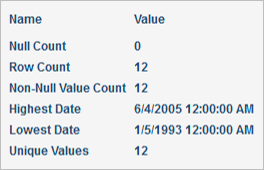
For date/time columns, the following statistics are displayed:
For numeric columns, the following statistics are displayed:
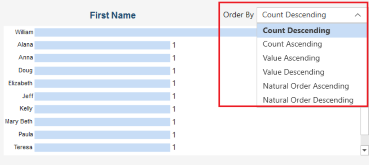
If you wish to order the rows of a selected column according to statistics, select an option from the Order by list:
|
|
6 |
Data Preview Displays sample rows from the currently-selected table. The Data Preview panel allows you to visually confirm the data in your tables. Icons on the header readily tell you a column's data type:
|
|
7 |
Row Count and Row Limit Configuration Displays the number of rows in the data source. You can limit the number of rows to work with by selecting the Edit icon
to display the Edit source row limit dialog:
|
|
8 |
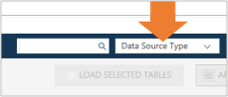
Search Data Source
Use this search box to search for a data source. You can search for data source by name, or search for all data sources of a certain type. |
|
9 |
Grouping Drop-Down
Allows you to group the tables, according to Data Source Type or Data Source Name. By default, tables are not grouped. Select a value from the drop-down list to set the grouping. |
|
10 |
Object Description Click this icon to launch a text field into which you can enter a comment or description of the workspace. |
|
11 |
Save Workspace Use this icon to automatically save your workspace. |
|
12 |
Data Source Library You can save workspaces and tables to the Data Source Library. Clicking this icon displays the Library dialog. |
|
13 |
Settings Click to set Current Workspace or Application Default settings. |
|
14 |
Application Menu Click on this button to display a menu showing additional Monarch Data Prep Studio options. You can: |


 Date/Time
 Number
 Text
Text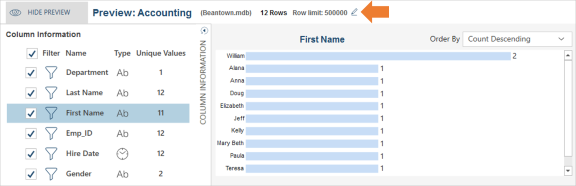


Related Links