


|
The Application Default Settings
Application Default settings allow you to specify global work settings for Monarch Data Prep Studio.
Import
The Import tab allows you to specify how files should be imported into Data Prep Studio.
General
You can specify a row limit to enable partial data loading of excessively large files and improve the application's performance. To do so, in the General tab of the Application Default Setting dialog, select the drop-down button for Default Source Row Limit and then click on Limit: from the options that display. In the field that appears to the right of this selection, specify a row limit to apply when opening tables and then tick the Apply to existing tables check box if you wish to use this limit on all currently open tables as well.

Note that the number of rows displayed does not affect the number of rows obtained when a table is exported. You could, for example, set a limit of 10,000 rows to view when opening a table with 1,000,000 rows. When ready, you may opt to export only 10,000 rows or all 1,000,000 rows as necessary.
Note also that the application imposes a 2,000-record limit when opening SalesForce reports. To get a full view of the data when opening SalesForce reports with over 2,000 rows, export the data to a CSV file in SalesForce and then use the Text plugin to import the data.
excel
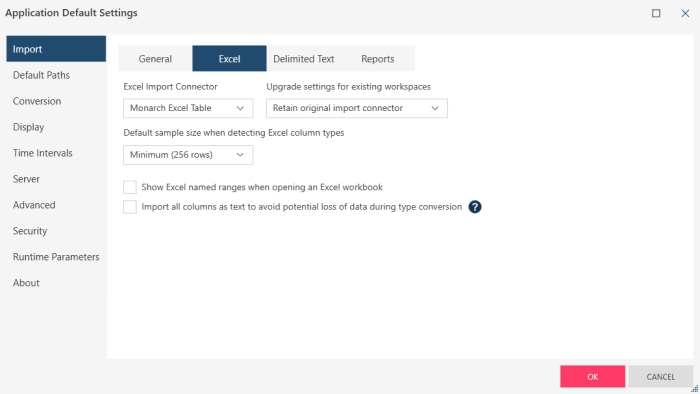
These settings allow you to specify options when importing new data from Excel.
-
Excel Import Connector
-
Select whether to import new Excel data using the Monarch Excel Table connector (i.e., the Aspose engine) or the ACE OLEDB connector (i.e., the legacy engine).
-
Upgrade settings for existing workspaces
-
When a existing workspace containing an existing Excel data source is opened, select whether to retain the use of the original import connector to load the data or use the Monarch Excel Table connector instead.
-
Default Sample Size
The sample file size specifies how Monarch Data Prep Studio determines the data type of a column coming from Excel.
Take the following example:
Column A
Row 1 1234
Row 2 4569
Row 3 4568
Row 4 4562
Row 5 4562A
If the default sample size is set to 4, Monarch Data Prep Studio will scan up to Row 4 and the column datatype will be Numeric. When the table is displayed, Row 5 will be NULL. If the default sample size is set to 5, Monarch Data Prep Studio will scan up to Row 5 and the column datatype will be Text. All values from Rows 1-5 are displayed.
Select a sample size that ensures Monarch Data Prep Studio can make a correct assessment of the data type. At the same time, be mindful that if you select a very large sample size, you sacrifice speed in loading data.
-
Show Excel named ranges when opening an Excel workbook
Check to import Excel named ranges as individual tables. When you load an Excel source containing multiple sheets and sheets with named ranges, each sheet and named range will be listed as individual tables in Preview Data.
Named ranges will be visible only to Excel workbooks you open after this settings is enabled, including Excel files added to the Prepare window via drag and drop.
This setting is not affected by the “Apply to current workspace” or the “Apply to recent data sources” checkboxes.
-
Import all columns as text to avoid potential loss of data during type conversion
Check to convert all columns imported from the data source as text regardless of their original type. Note that toggling this checkbox in Application Default Settings will not affect the column types in existing load plans.
delimited text
-
Rows to scan for columns
In the box provided, indicate a number of rows that must be scanned by Monarch Data Prep Studio to determine what data type to assign to a certain column. Note that setting this number to a very high value may negatively impact the application's load performance depending on the number of rows and columns in your input source.
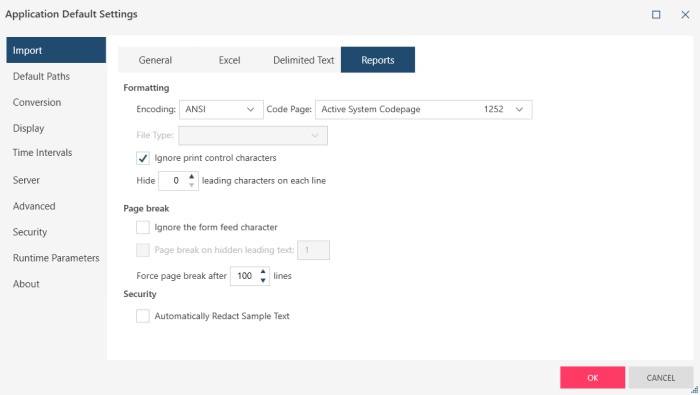
REPORTS
The following settings allow you to specify options when importing new data from Report files. These settings are also made available to you when you click Report Design Settings > Input in the Report Design window.
|
Field |
Description |
|
Formatting |
|
|
Encoding |
Use this setting to specify the default report file format. The following encodings are supported by Monarch Data Prep Studio:
These options may also be accessed in open files by right-clicking on the report in Report view. |
|
Code page |
Select the appropriate code page to use with the chosen input file encoding format. This option is only applicable to the ASCII (14 codepages available), ANSI (10 codepages available), and EBCDIC (16 codepages available) encoding systems. These options may also be accessed in open files by right-clicking on the report in Report view. |
|
File Type |
This option is enabled only when EBCDIC is selected as the encoding type. Choose from one of the following options:
|
|
Ignore Print Control Characters |
Select this setting to have Monarch Data Prep Studio ignore all print control characters below ASCII 32 except for:
|
|
Hide n Leading characters on each line |
When you download print files from a network, a mini-computer, or a mainframe, one or more extra characters may appear at the beginning of each line. The exact number and type of characters depends on the operating system. These introductory characters are typically used for form feed, carriage return, or line feed printer commands. They are usually not needed in a PC file and may affect the way the file is displayed by Monarch Data Prep Studio. A few communications programs are smart enough to either discard unnecessary characters or translate useful characters into the corresponding PC character codes. However, a form feed command is typically the only useful character you may get, and most communications programs are unable to translate it. Use this setting to specify the number of leading characters to strip from each line of the report. Typical values are 0, 1, and 2. The value can be in the range 0 - 99. For example, if you download from an IBM 3090 mainframe computer using an IRMA communications card, each line in the report will be preceded by two non-productive characters. You can strip those characters from the data by entering 2 in the Hide leading characters box. |
|
Page Break |
|
|
Ignore the Form Feed Character |
Selecting this setting causes Monarch Data Prep Studio to ignore all form feed (page break) characters in a report. Use this setting to turn off the hard-coded page breaks in a report file and replace them with page breaks based upon a Page Header trap or based upon the ForcePageBreakAfter n Lines setting (see below). |
|
Page break on hidden leading text: n |
For some mainframe and midrange system generated reports, especially from AS/400 systems, a page break could be indicated by a leading control character in the report file. This option allows you to hide the control character and to force a page break when a specified character is encountered. Note: This option is not accessible unless you specify a Hide n Leading Characters setting. |
|
Force page break after n lines |
Use this setting to add page breaks to a file at regular intervals by specifying the number of lines you want on each page. Monarch Data Prep Studio scans the report for existing page breaks and inserts a virtual page break whenever a real page break has not been encountered before the number of lines specified. The action of this setting is modified by the ForcePageBreakLookAhead setting. |
|
Security |
|
|
Automatically redact sample text |
Use this option to automatically redact the sample text line in Report Design. |
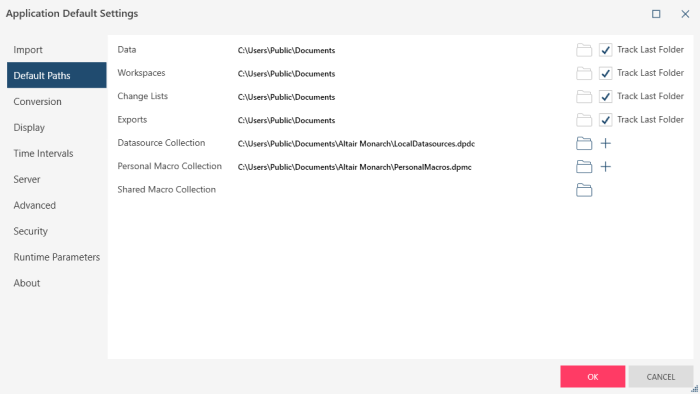
Default Paths
Specifying Default Folders
By default, Monarch Data Prep Studio saves all work data, workspaces, changes lists, exports, and data source (i.e., library) catalog files to C:\Users\Public\Documents. You can configure Monarch Data Prep Studio to save to a different folder by clicking on the Folder icon that displays beside each field. To enable folder tracking (i.e., use the last-accessed folder for subsequent file opening/saving activities), tick the check box for Track Last Folder. Note that changes to this setting are reflected only when the current Monarch Data Prep Studio session is closed and a new one is opened.
Specifying the Path to a DataSource Collection File
If you wish to create "snapshots" or backups of your library
at predetermined time intervals for easy access to previous versions of
a specific data source, you can create a Datasource Collection file and
store it in some location of your choosing via the Application
Default Settings > Default
Paths tab. In the Datasource Collection
setting, click the Create
a new Datasource Collection file  icon to
launch a file browser, and then use this browser to specify a location
in which to store your DataSource Collection file. Click Save
on the Save As dialog and OK on the Application
Default Settings dialog to save and apply your changes.
icon to
launch a file browser, and then use this browser to specify a location
in which to store your DataSource Collection file. Click Save
on the Save As dialog and OK on the Application
Default Settings dialog to save and apply your changes.
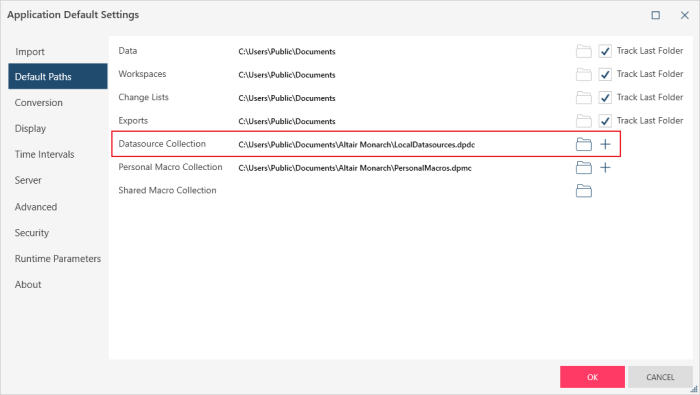
If you already have a Datasource Collection file and wish to use this
file instead, click on the Browse for
an existing Datasource Collection file  button
and then use the file browser that displays to navigate to your Datasource
Collection file. Click Save on
the Save As dialog and OK on the Application
Default Settings dialog to save and apply your changes.
button
and then use the file browser that displays to navigate to your Datasource
Collection file. Click Save on
the Save As dialog and OK on the Application
Default Settings dialog to save and apply your changes.
Specifying Paths to Macro Collections
You can save macros created in
your workspace to a Macro Collection file. In the Personal
Macro Collection setting, click the Create
a new Macro Collection file icon to launch a
file browser, and then use this browser to specify a location in which
to store your Macro Collection file. Click Save
on the Save As dialog and OK on the Application
Default Settings dialog to save and apply your changes.
If you already have a Macro Collection file and wish to use this file
instead, click on the Browse for an existing
Macro Collection file button and then use
the file browser that displays to navigate to your Macro Collection file.
Click Save on the Save
As dialog and OK on the
Application Default Settings
dialog to save and apply your changes.
To access macros from a shared Macro Collection file, in the Shared
Macro Collection setting, click on the Browse
for an existing Macro Collection file button
and then use the file browser that displays to navigate to the shared
Macro Collection file. Click Save
on the Save As dialog and OK on the Application
Default Settings dialog to save and apply your changes.
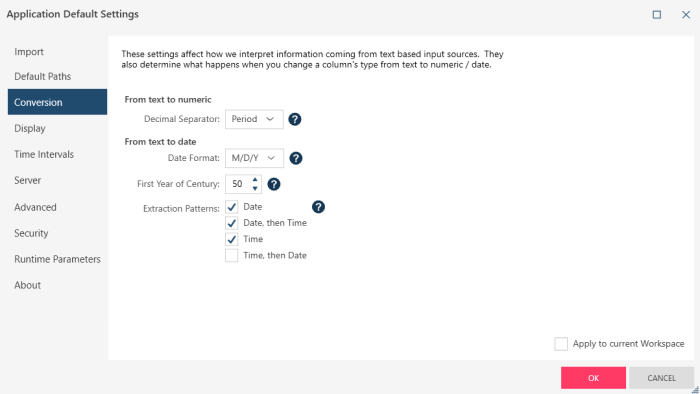
Conversion
These settings affect how information from text-based data sources is interpreted and converted to either the numeric or date/time format. You can specify a decimal separator (for converting text to numeric) and a date format, first year of century, and date/time extraction pattern. Ticking the Apply to current workspace check box applies all of your settings to any open workspace.
Note that while most data sources, such as delimited text, excel, XML/JSON, etc., will correctly use the default column format settings to display the data. Monarch files will not use the default column format settings of the workspace since the column formats are applied in Monarch Data Prep Studio and attached to the model when exported. Files opened in Report Design (such as Text and PDF Reports) also do not take into account the default column format settings since each field created in Report Design allows the column formats to be set within Report Design. These column formats take precedence over the default column format settings of the workspace.
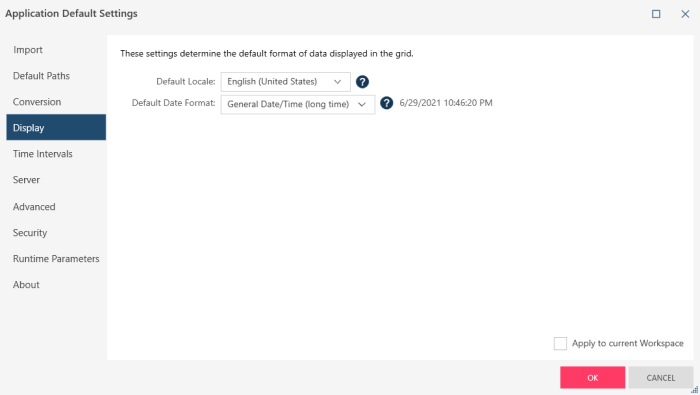
Display
These settings allow you to specify the default format when data are displayed in tables. The Default Locale parameter sets the global language to be used by the application. The Default Date Format parameter specifies the default format of date/time columns.
Note that while most data sources, such as delimited text, excel, XML/JSON, etc., will correctly use the default column format settings to display the data, Monarch files will not use the default column format settings of the workspace since the column formats are applied in Monarch Data Prep Studio and attached to the model when exported. Files opened in Report Design (such as Text and PDF Reports) also do not take into account the default column format settings since each field created in Report Design allows the column formats to be set within Report Design. These column formats take precedence over the default column format settings of the workspace.
Time Intervals
This setting allows you to set the characteristics of a fiscal year, fiscal weeks, and fiscal periods
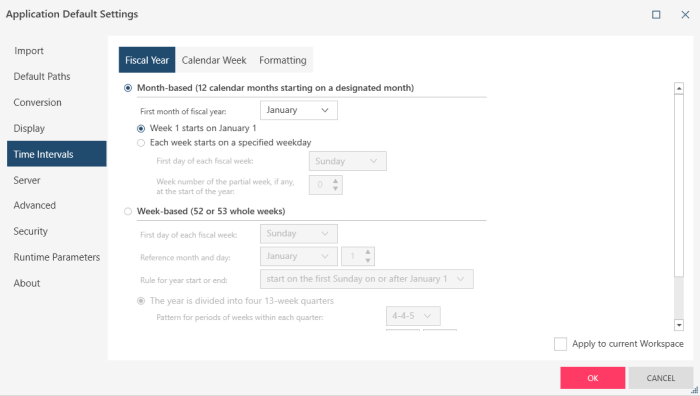
Fiscal Year Settings
|
Field |
Description |
|
Month-based |
Specifies that the fiscal year consists of 12 calendar months. |
|
First month of the fiscal year |
Selects the month of which the first day begins the new fiscal year. |
|
Week 1 starts on January 1 |
Specifies that the first week of the fiscal year begins on January 1. |
|
Each week starts on a specified weekday |
Defines the start of a fiscal week and the week number of a partial week. |
|
Week-based |
Specifies that the fiscal year consists of 52 or 53 whole weeks. You can specify the first day of each fiscal week, a reference month and day, and a rule for year start or end. Select to divide the year into four 13-week quarters, then pick one of the following:
|
|
The year is divided into four 13-week quarters |
Divides the year into four 13-week quarters and allows you to choose a week distribution pattern and quarter and period in which to place the 53rd week if necessary. |
|
The year is divided into thirteen 4-week periods. |
Divides the year into thirteen 4-week periods and allows you to choose a period in which to place the 53rd week if necessary. |
Calendar Week Settings
|
Field |
Description |
|
Week 1 starts on January 1. |
Specifies that the first full week of the year starts on the first day of the week on or after January 1.
|
|
Each week starts on a specified weekday |
Specifies that the week begins on a specific weekday and allows you to set a week number for a partial week. |
Formatting Settings
|
Field |
Description |
|
Interval |
Lists the names of the time intervals available.
|
|
Formatting Mask
|
Displays
the formatting mask applied to the adjacent interval. To edit
the formatting mask, double-click on the desired time interval,
or select an interval and press the Edit Formatting Mask button
|
|
Sample Value
|
Shows the effect of the formatting masks on today’s date. To change the date that the sample value is based on, adjust the sample date calendar control accordingly. This control is located on the right-hand side of the dialog immediately below the table containing the time intervals. |
|
Description |
Displays a description of each time interval.
|
 .
.
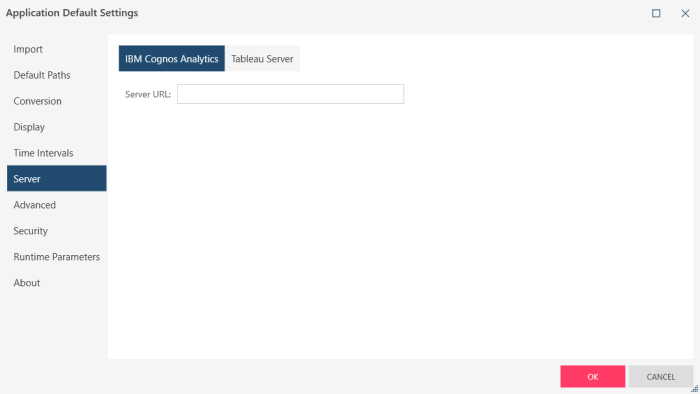
Server
Allows you to set connection settings to the following servers:
|
Server |
Required Fields |
|
IBM Cognos Analytics |
Server URL |
|
Tableau Server |
Server Address Username Password Proxy Address Path to TABCMD |
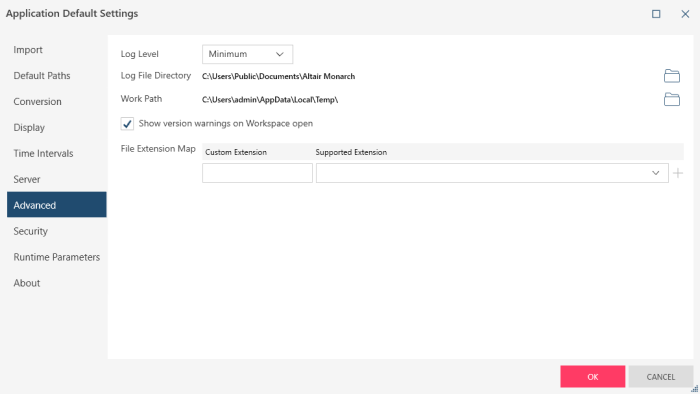
Advanced
These settings allows you to specify the following:
-
The log level to apply when log files are created. Select the maximum log level allows an administrator (or Altair Support) to more easily debug issues, however this may cause the system to slow down.
-
A location in which to place log files
-
A work path in which to store temporary files created while using Monarch Data Prep Studio.
-
File extension mappings. Data sources created using other applications may be saved to a custom file extension that must be mapped to a supported file extension in Monarch Data Prep Studio to enable correct loading. Use the Add button to map as many custom extensions as necessary.
Security
These settings describe how passwords should be handled when saving workspaces in Monarch Data Prep Studio.
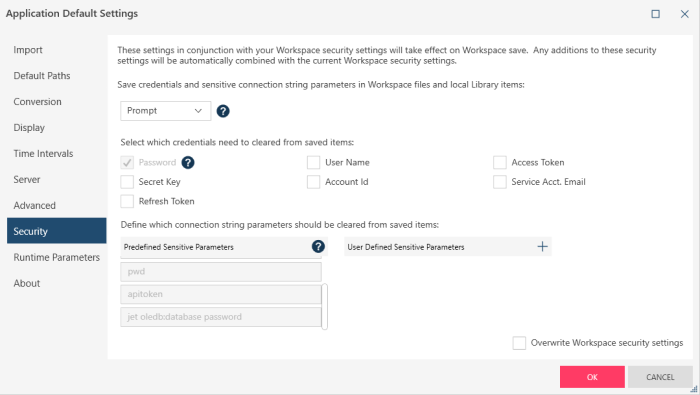
Saving Data source passwords and sensitive connection string parameters
This setting tells Monarch Data Prep Studio what to do with passwords and sensitive connection string parameters from data sources and connections in workspace files and local library items. This setting only affects local workspace and library save behavior.
You can instruct Monarch Data Prep Studio how to save passwords and sensitive connection string parameters in one of three ways:
-
Always - Always save the password/sensitive connection string parameter each time you save a workspace or data source without prompting
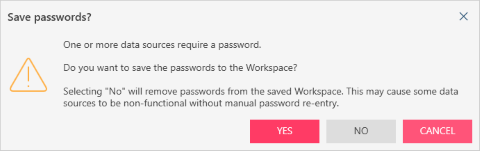
-
Prompt - Prompt whether to save the password/sensitive connection string parameter each time you save a workspace or data source. The following prompt displays.
-
-
Never - Never save the password/sensitive connection string parameter when the workspace or data source is saved.
Credentials to Clear from Saved Items
This settings specifies what types of credentials should be cleared from saved items, such as workspaces:
-
Password (always deleted when clearing is employed)
-
Account ID
-
User name
-
Service account email
-
Access token
-
Refresh token
-
Secret key
Sensitive Connection string Parameters
This list identifies strings that should be considered a sensitive connection parameter when saving details for OLE DB data sources and connectors for which the field Other Connection Options is provided in the connection dialog. When Monarch Data Prep Studio saves a connection detail and encounters the specified sensitive connection parameter (e.g., "password"), it "scrubs" (i.e., deletes) the following string according to the save behavior selected:
-
Always - Saves workspace as is without clearing any credentials. When this option is selected, all passwords and credentials are saved, regardless of the parameters indicated in the Sensitive Connection String Parameters list.
-
Prompt - Returns a prompt asking the user whether to save the string credentials or scrub them clean if data sources containing passwords or parameters matching any entry in the Sensitive Connection String Parameters list are used in the workspace
-
Never - Scrubs all passwords and sensitive connection string parameters from all connections in the workspace before saving
Note: Microsoft Jet/ACE drivers use a specific password parameter for connection strings that must be added to the default clearing settings to maintain parity with password clearing in other sources.
This parameter is: "Jet OLEDB:Database Password"
This parameter will be added to the default parameters in its normalized, lower case form and will appear as: "jet oledb:database password"
Overwrite Workspace Security Settings
Ticking this checkbox instructs the application to replace all workspace security settings with those currently selected.
Runtime Parameters
Allows you to define and set values for runtime parameters that can be used by all tables in all workspaces within the application.
Refer to Working with Runtime Parameters for details on defining and using runtime parameters.
About
Displays relevant information related to your Monarch Data Prep Studio application, including the version number and Altair and Datawatch copyright notices.
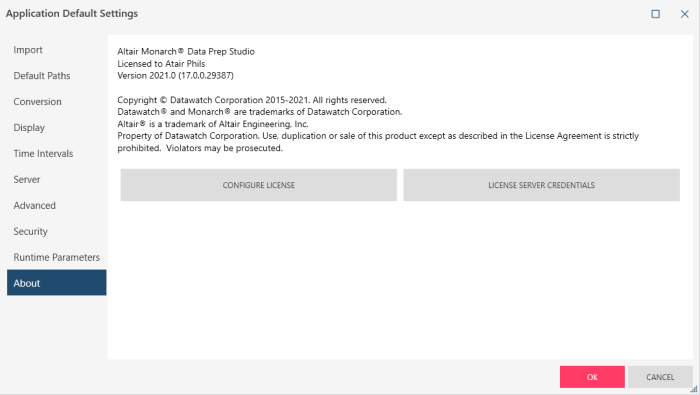
Clicking the Configure License button launches the Monarch License Manager, which will allow you to modify the license used with your Monarch application. If your Monarch Data Prep Studio installation is licensed via License Server, you can click License Server Credentials to launch a dialog through which you can enter the appropriate credentials and connect to a Monarch License Server instance. If your license allows it, you will also be able to check out/in your license for offline use through this tab.