


|
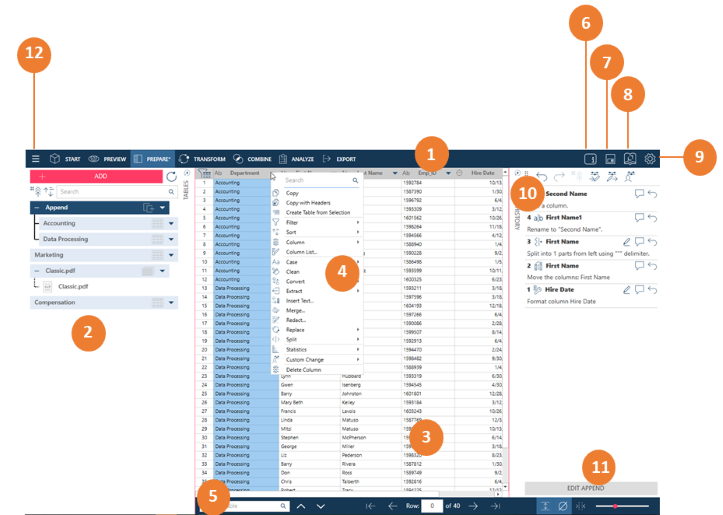
The Prepare Window
Prepare allows you to transform columns, using Prep Data operations, to prepare your data for subsequent analysis.
Prepare Window panels
|
Panel |
Description |
|
1 |
The standard Monarch Data Prep Studio Toolbar Select a tool to move to the Start Page, Preview Window, Transform Pane, Combine Stage, Analyze Drop-down, or Export Window. |
|
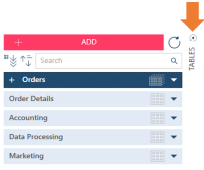
2 |
Table Selector Lists all the tables you have selected and loaded from the Preview Window. You can toggle viewing and hiding this panel by selecting the Hide/View Tables icon:
You can click on the drop-down arrow located to the right of each table to display an action menu. |
|
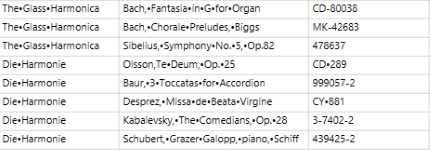
3 |
Data Preview Displays sample rows from the currently-selected table. The Data Preview panel allows you to visually confirm the data in your tables. Icons on the header readily tell you a column's data type:
You can easily change the data type of a column by clicking the data type icon and selecting a different data type from the options that display |
|
4 |
Prep Data Operations A drop-down list that displays when you right-click on a column or click on a column header. Select the operation from the drop-down list. Operations that display are specific to the column's data type. |
|
5 |
Navigation Bar Provides ways to:
Enter a value to search into the text field. Select Find Previous or Find Next to look for succeeding values in the table.
Enter a row value into the Row: box to go to a specific row. Use the arrows to move to the next or previous set of rows, or go to the first or last row on the table.
When enabled, white spaces are represented by small dots. This feature allows you to verify, for example, how many spaces are between words in a value, so that you can account for this when you do string operations.
Slide this slider to the left or to the right to decrease or increase the font size of the column values. |
|
6 |
Object Description Click this icon to launch a text field into which you can enter a comment or description of the workspace. |
|
7 |
Save Workspace Use this icon to automatically save your workspace. |
|
8 |
Data Source Library You can save workspaces and tables to the Data Source Library. Clicking this icon displays the Library dialog. |
|
9 |
Settings Click to set Current Workspace or Application Default settings. |
|
10 |
Change History Panel Click to hide or unhide the Change History Panel and work with Change History. |
|
11 |
Action Bar The buttons displayed in the action bar vary according to the active table displayed in the Prepare window. You can use these buttons to perform quick operations on your table, such as edit file paths or add metadata columns. |
|
12 |
Application Menu Click on this button to display a menu showing additional Monarch Data Prep Studio options. You can: |
 Date/Time
 Number
 Text
Text


 .
.

Preparing data from Report Design
Data tables extracted from PDF files may be prepared in the same way that tables obtained from other data sources, such as databases, text reports, and the like, are prepped. However, changes such as column name revisions, splits, and other operations, are NOT reflected in the Report Design preview when you return to the Report Design window via the Edit in Report Design action.
Should you wish to review your data prep operations once more, exit Report Design and return to the Prepare window. If you edit a report and remove a column that was used in data prep operations, this column, as well as all other operations done to it, will no longer be visible when you return to the Prepare window.
Related Links