


|
Working with Change History
Topics:
General Procedure
Steps:
-
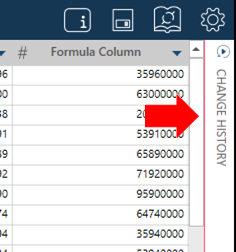
By default, the Change History panel is displayed when in the Prepare window. If your Change History panel is collapsed, select it to expand it.
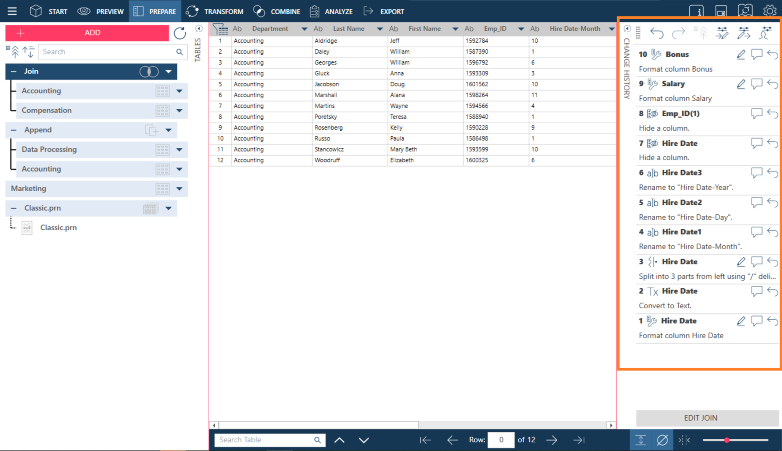
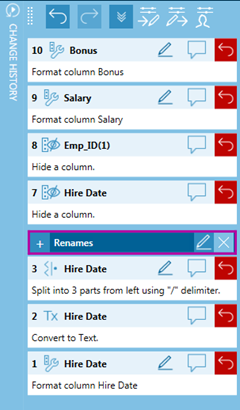
The Change History panel displays:
-
Review your history of changes. If you want to undo an operation, select Undo Change
 beside
that operation.
beside
that operation.
Note that selecting Undo for one operation will also undo all operations after it. This means if you undo change #5 in a 10-item Change History list, changes #6 to #10 are also deleted.
To hide the Change History panel, click Change History once more.
Applying changes to other columns
Monarch Data Prep Studio allows you to "reuse" changes that you have already made in conjunction with the Change History list.
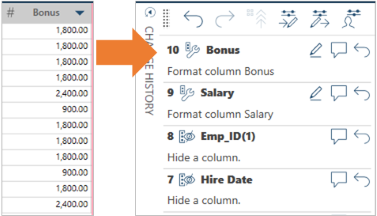
To do so, drag a change from the Change History list to another column in your table.
The change is applied to the new column and a new entry is added to the Change History list.
Note:
The new column you apply a change must have the same data type as the column the change was initially applied to.
Exporting the Change History list
You can export the Change History so that you can import the changes and apply them to a similar table.
Steps:
-
Do one of the following:
-
Select Change Lists > Export Change History from the application menu.
-
Select
 from the menu bar at the top of the Change
History panel.
from the menu bar at the top of the Change
History panel. -
In the Save As dialog that displays, specify the path to the folder in which you want to store the exported change list.
-
Enter a name for the change history file in the appropriate field.
-
Select Save.
The change history list is exported to a file with a .dpcl extension.
Importing a Change History list
You can import a Change History into a workspace. Once imported, the changes are applied to the active table in the Prepare Window
Steps:
-
In the Prepare window, select the table you want to apply the Change History to.
-
Do one of the following:
-
Select Change Lists > Import Change History from the application menu.
-
Select
 from the menu bar at the top of the Change
History panel.
from the menu bar at the top of the Change
History panel. -
In the Open dialog that displays, navigate to the location of your change history file and then select it. The file must have a .dpcl extension.
-
Select Open.
Important Notes
-
Changes are applied to the new table in sequence as they appear on the Change History.
-
This operation assumes that the current table has columns with the same name and data type as the table from which the Change History was exported. For instance, if a date column named Ship Date was converted to date from text, the import Change History operation will look for a date column named Ship Date in the current table and then convert this to text. If such a column cannot be found, an error message will be displayed.
Editing changes in Change History
You can modify some changes applied to tables and columns from the Change History panel. The table below describes which changes can be edited in Change History.
The following example demonstrates how an applied filter is modified in Change History.
Steps:
-
Display the Change History List panel.
-
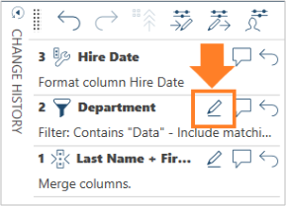
Select the Edit icon beside the filter entry you want to review or edit.
-
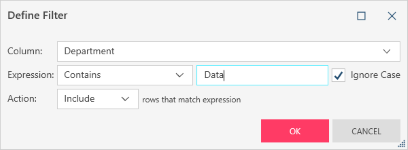
Use the options provided to modify the filter and then select OK.
The Apply Filter dialog box displays:
Grouping changes in a Change History list
You can group multiple changes made to a single column or multiple instances of the same change into groups to avoid creating excessively long Change History lists.
Steps:
-
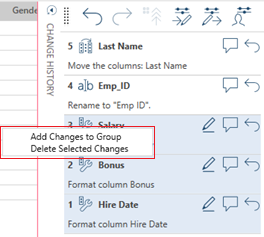
Using ,CTRL + Click select all of the changes you want to include into a change group from the Change History list.
-
Right-click on your mouse and, from the options that display, select Add Changes to Group.
-
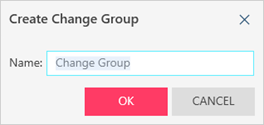
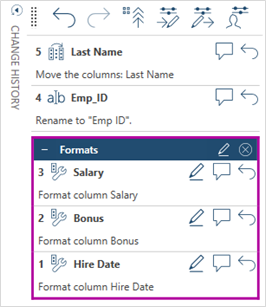
The Create Change Group dialog displays. Enter a name for the change group you wish to create and then click OK.
-
Clicking the Collapse change group
tool at the top of the Change History panel minimizes the group.
The change group displays as below:
Reordering changes in a Change History list
Data Prep Studio allows you to reorder changes any way you want in the Change History list.
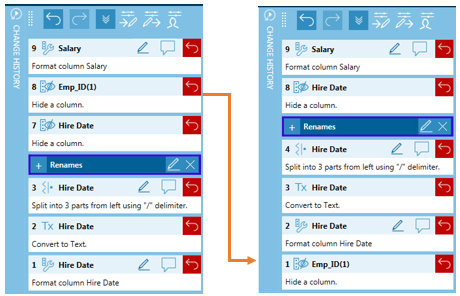
To do so, simply grab the change you wish to reorder and then drop it into its new location in the Change History list.
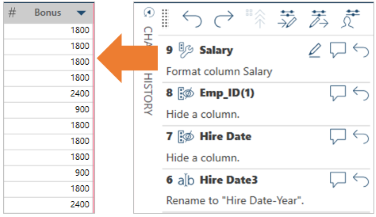
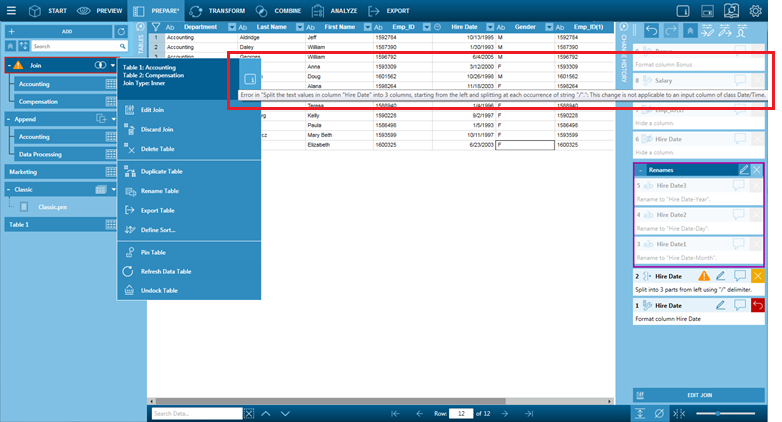
In the figure below, Change #8 of the original list was dragged and dropped to Change #1 of the reordered list.
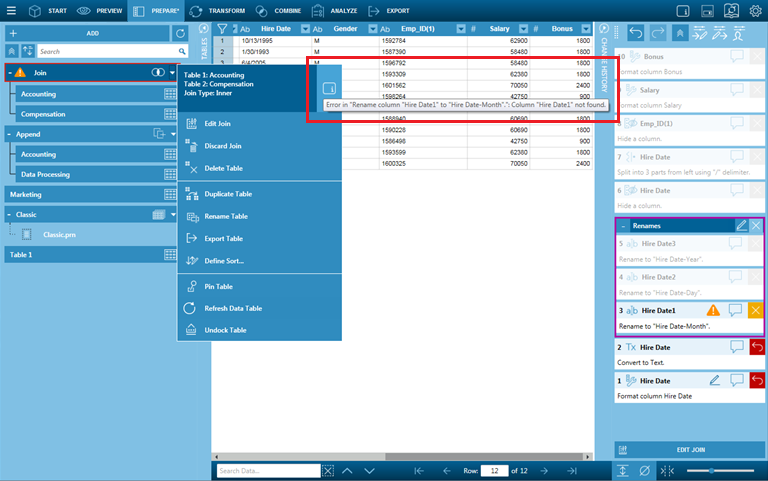
Note, however, that the success of a reordering depends on whether or not changes are dependent. When changes are dependent (i.e., subsequent changes are related to the final state of previous changes), reordering them may result in all subsequent changes becoming nullified and an error message similar to that shown below.
Deleting selected changes in a Change History list
While working with tables in Data Prep Studio, you may make a change
or several changes that you decide afterwards that you don't really want
but only after having made other changes that you do want. Clicking the
Undo Change
icon will not yield the results you desire in this case because this operation
reverses all other changes, including those you want, made after the selected
change.
You can easily delete changes from the Change History List without affecting other changes by pressing CTRL on your keyboard and then clicking on all of the changes you wish to delete from the Change History List. Then, right-click on your mouse and, from the options that display, select Delete Change/Delete Selected Changes.
Note that, similar to reordering changes in a Change History List, the success of deletion depends on whether or not changes are dependent. When changes are dependent (i.e., subsequent changes are related to the final state of previous changes), deleting one or some of them may result in all subsequent changes becoming nullified and an error message similar to that shown below.
Related Links