


|
Adding Data
You can add as many tables as you want to your workspace. Once added, tables can be:
Preview is important as it allows you to review the information and check the quality of the data before loading these into the Monarch Data Prep Studio workspace.
Adding initial data
-
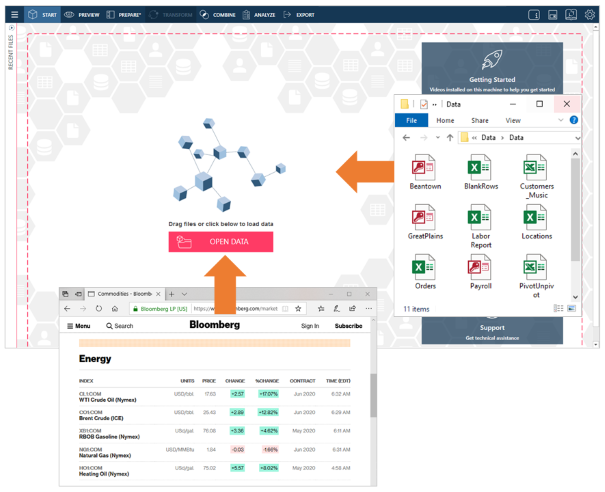
On the Start Page:
-
Select Open Data and then use the Select Open Data Source to Open dialog to add your data source.
-
Locate your file on your desktop or network and then drag it to the Start Page
-
Open a web page, select the data and then drag it to the Start Page
-
Preview the contents of the table.
-
Your table has enough rows for you to work with
-
The column values are meaningful
-
There are nulls or blanks
-
Do one of the following:
-
Load tables into your workspace by selecting the tables and selecting Load Selected Tables
-
Append multiple tables by selecting tables of interest and then clicking Append Tables. Refer to Appending Tables Overview for more details on this topic.
-
Do one of the following:
Note that when some file types, including Microsoft Access and Excel, are used as data sources, a dialog, also referred to as an explorer, displays to ask you to specify other options prior to loading the data to your workspace.
The Access Explorer is displayed below as an example.
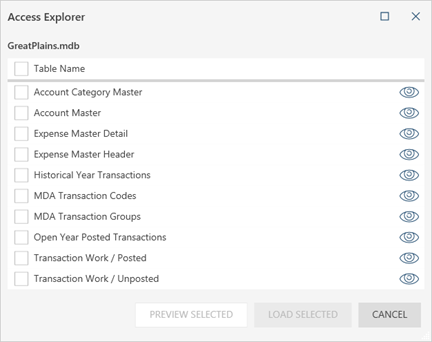
To continue loading your tables, indicate the necessary details and then click Load Selected.
You are brought to the Prepare Window:
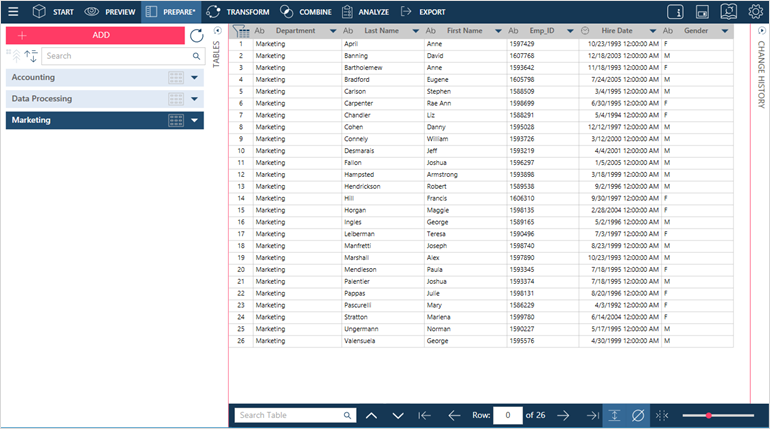
This step allows you to inspect your data before loading the table. You can, for instance, quickly determine if:
To inspect your data, click the Preview
icon:  on the table you wish to preview.
Refer to Previewing Data for additional steps and details.
The tables you load become available in the Combine Stage and Prepare Window.
NOTE: Letters beyond 64 are truncated when opening tables from Excel files with column names exceeding 64 characters because the Access driver used to read these files imposes a 64-character limit.
Adding more data
If you want to add more tables to your workspace, do one of the following:
-
Select Add More Stuff on the Preview or Prepare windows, navigate to the location of your file, and then open it. You can preview and load the data as usual.
-
Drag a file to the Prepare Window. This action immediately loads the data to your Prepare window.
Add a data source from the web
Steps:
-
Select Open from Web:

-
Enter the URL containing your data and then click OK.
A dialog box displays, asking you to enter a valid URL to download a data source.
Adding data source files via drag and drop
You can drag and drop a file if this is readily available on your workstation or network.
Steps:
-
Navigate to the location of the file you want to open.
-
Drag the file to the Start Page, Preview window, or Prepare window.
-
If you opened a database you are brought to the Preview window. Monarch Data Prep Studio automatically displays all tables (or worksheets) in your database.
-
If you opened a document, you are brought to the Report Design window, where you can define the fields you want to use.
Adding data sources from other workspaces
You can add tables saved in workspaces to your current workspace.
Steps:
-
Click on the application menu icon on the upper left-hand corner of your screen and then select Import Workspace Tables from the options that display.
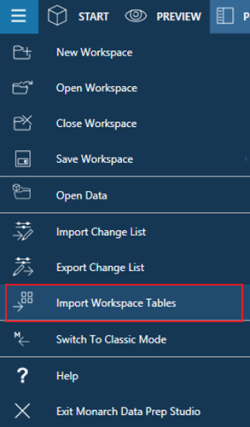
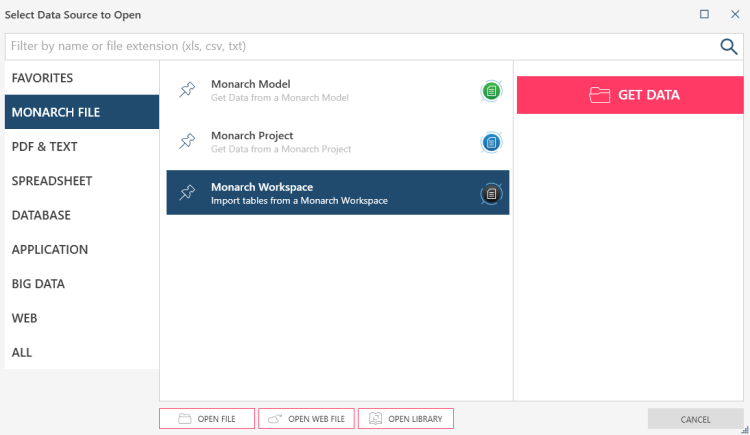
Alternatively, in the Start, Preview, or Prepare windows, select Open Data (in the Start page) or Add (in the Preview and Prepare windows) to launch the Select Data Source to Open dialog. In this dialog, select Monarch File > Monarch Workspace > Get Data.
-
An Open dialog displays. Use this dialog to navigate to and select the workspace containing tables you wish to add to your table.
-
If the workspace contains a single (child) table, this table (and its parent tables) is added to your workspace. Otherwise, the Import Tables from a Workspace dialog displays. Use this dialog to select which of the tables in the workspace should be added to your currrent workspace.
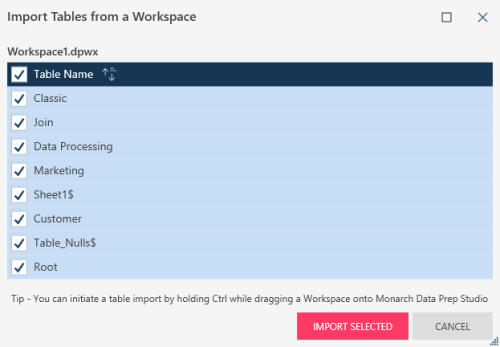
-
Click the Import Selected button when you are finished.
The tables you selected are added to your workspace.
Loading data from a web page
Steps:
-
Go the web page you want to use.
-
Highlight and select the information you want to use.
-
Drag the selection to the Start Page, Preview window, or Prepare window.
Closing tables
Steps:
-
Select the tables you want to remove.
-
Select Close All on the Preview Window toolbar.
If you want to close all tables in a group, select the Remove
Tables in this Group icon: 
Grouping tables in the Preview Window
Monarch Data Prep Studio allows you to group tables by Data Source Name or Data Source Type. Grouping allows you to organize the tables on the Preview Window, and will help you to look for specific tables faster.
Steps:
-
Click on the Group By drop-down to display a list of grouping options.
-
Selection an option. Tables are grouped according to the option you selected.

For instance, this shows tables grouped by Data Source Type:
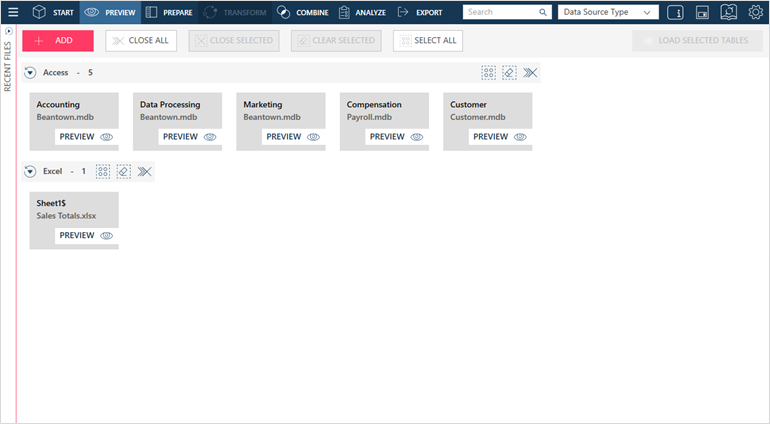
To clear the grouping option, select None from the drop-down list.
Searching for data sources
If you open a lot of data sources, or if your data sources contain many tables, the Preview window can get busy very quickly. Monarch Data Prep Studio allows you to easily search for a table or data source in the Preview window via the Search tool at the top of the window:

Steps:
-
Enter a name in the search box.
-
Click the Search icon to start the search. Only tables whose names match your criteria will be displayed on the Preview Window.
As you enter the name, only tables that match the name will display on the Table List.
To clear the search criteria, select the ![]() icon
on the search box.
icon
on the search box.
Related Links