Browser Context-Sensitive Menu
Clicking the right mouse button on a folder or entity/item within the browser’s tree structure allows you to change a variety of options using the browser context-sensitive menu.
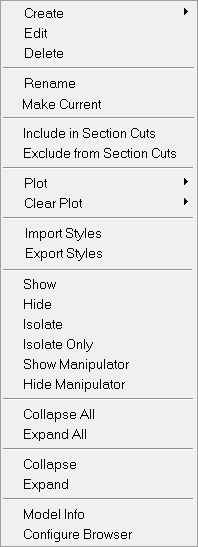
Figure 1.
| Option | Description | |
|---|---|---|
| Create | Select one of the available options: | |
| Derived Load Case | Create a Steps, Linear-Superposition, or Envelope derived load case. | |
| Cached Result | Create an internal cache for applied contour results. See the Cache Results topic for additional information. | |
| Derived Result | Add user-defined data types to a result using the Create Derived Results dialog. The Expression Builder will automatically launch and initialize the data type in the Results browser selected (by right-clicking on it). |
|
| Image Plane | Create a 2D or 3D image plane. | |
| Measure | Create a measure. | |
| Note | Create a note. | |
| Plot Style | Create a plot style based on a predefinition of the settings applied on a
plot. This option will only appear if a contour, vector, or tensor plot has been applied to the model. |
|
| Section Cut | Create a planar or spherical section cut. | |
| Set | Create a set. | |
| Streamlines | Create a rake/streamline. | |
| System | Displays a dialog which allows you to create a user defined system. See the User Defined Coordinate Systems topic for additional information. | |
| Tracking System | Create a tracking system. | |
| View | Save an unlimited number of views. | |
| Edit | Edit options/settings for to the currently selected item. Upon selection of the Edit option, the corresponding panel or dialog for the selected item will be displayed. For example, if a note is selected, the Notes panel will be automatically displayed. The action of the Edit option is dependent on the item selected. | |
| Delete | Displays a dialog which allows you to delete the selected item. | |
| Rename | Rename items in the browser by entering a new name in the name text field and pressing Enter. You can cancel the rename operation by pressing Esc. | |
| Make Current | Make a selected item current (when more than one is
available). For example, a particular model, load case, plot, or tracking system can
be made current by right-clicking on the item in the browser and selecting
Make Current from the context menu. This option is not available in the Component View. |
|
| Plot | Apply a contour, tensor, or vector plot to the model or the current selection. | |
| Clear Plot | Clear a contour, tensor, or vector plot (if applied); or clear all of the plots applied to the current model. | |
| Show | Displays the item in the graphics area. This selection
affects each item’s local display control. You can also use this on the entire folder. In such cases, this shows all of the items within that folder (all components for example, etc.). |
|
| Hide | Turns off the item in the graphics area. This
selection affects each item’s local display control. You can also use this on the entire folder. In such cases, this hides all of the items within that folder (all components for example, etc.). |
|
| Isolate | Works locally within a specific entity type. For example, if Component(s) are isolated, then all display states of other displayable entities (such as Systems) remain untouched. Isolate displays only the selected entities, turning their display state to on, and turning all other entities of the same type off. | |
| Isolate Only | Similar to Isolate, except that it also affects entity types different from the selected entities. This turns off ALL displayable entities (regardless of type) except for the selection one(s). | |
| Show Manipulator | Displays the Graphical Manipulator in the graphics area for section cuts,
streamline rakes, and image planes. The graphical manipulator allows you to modify
the location and shape of the section cut, rake, or image plane
interactively. Note: Area rakes without the Evenly distributed option activated
cannot be graphically manipulated.
The graphical manipulator is linked to the entity display; therefore if the display of the selected entity is turned off, it will get turned back on when the graphical manipulator gets displayed. See the Display State of Graphical Manipulators topic for additional details. |
|
| Hide Manipulator | Hides the graphical manipulator in the graphics
area. This option is only active when there is a graphical manipulator currently displayed in the graphics area. See the Display State of Graphical Manipulators topic for additional details. |
|
| Include in Section Cuts | Include the selection in a section cut. The Model View or Component View must be active within the Results Browser in order to access this option. |
|
| Exclude from Section Cuts | Exclude the selection from a section cut. The entities
that are excluded will not be cut through when a section cut is applied (or turned
on). This can be useful for investigating models that are surrounded by large
domains of mesh (ground, fluid, etc.). For example, in streamline visualization the
model can be excluded from the section cut in order to cut through the fluid only
(when the Model view is activated). By default, the streamlines are excluded from
section cuts. The Model view or Component view must be active within the Results Browser in order to access this option. |
|
| Collapse All | Collapses all items in the tree structure so that only the top-most level of items displays. If you have a particular entity or folder selected in the browser and select Collapse All, then this option only collapses the items beneath the currently selected entity or folder. | |
| Expand All | Expands all items in the tree structure, exposing every item nested at every level. If you have a particular entity or folder selected in the browser and select Expand All, then this option only expands the items beneath the currently selected entity or folder. | |
| Export Styles | Opens the Export Styles dialog where you can export
the current styles as an xml file. The Result View must be active within the Results Browser in order to access this option. |
|
| Import Styles | Opens the Import Styles dialog which allows you to
import an xml file containing previously saved styles. The Result view must be active within the Results browser in order to access this option. |
|
| Model Info | Opens the Model Info dialog for the current
model. Or Opens the Model Properties dialog for the selected model (if a model file other than the current model is selected in the Model Files view). The General tab provides information about the model and results file, and the Statistics tab displays the model and results files in a tree-like structure. |
|
| Configure Browser | Opens the Browser Configuration window which allows you to determine what entity types, columns, options, and toolbars are displayed in the Results browser. See the Configure the Results Browser topic for additional information. | |
User-Defined Context Menus
The following preference file statements can be used to connect a user written TCL script with a defined context-menu submenu and/or context-menu menu item:*BeginGraphicDefaults()
*BeginBrowserContextMenu("Contour")
*BrowserContextMenuItem("Current settings", "contour_from_browser.tcl", ::browsermenu::ContourCurrent, part);
*BrowserContextMenuItem("Displacement (Mag)", "/contour_from_browser.tcl", ::browsermenu::ContourDisplacement, part);
*BrowserContextMenuItem("Stress (VonMises)", "/contour_from_browser.tcl", ::browsermenu::ContourStress, part);
*EndBrowserContextMenu()
*EndGraphicDefaults()These commands can be defined in .mvw files and will become active upon the import of preference settings (see the Preference Files topic for additional information).