3D Line
Create a straight line in planar or non-planar 3D space. The line can be free in 3D space, tangent to a source curve, perpendicular to a source curve, normal to the plane in which a source curve lies, fixed to a source curve at one end, or combined with a source curve. The source curve can be an individual curve or the edge of a surface.
-
Click the 3D Line icon.
-
To define the second point:
- Define the direction:
- If you placed the first point in free space, move the mouse cursor.
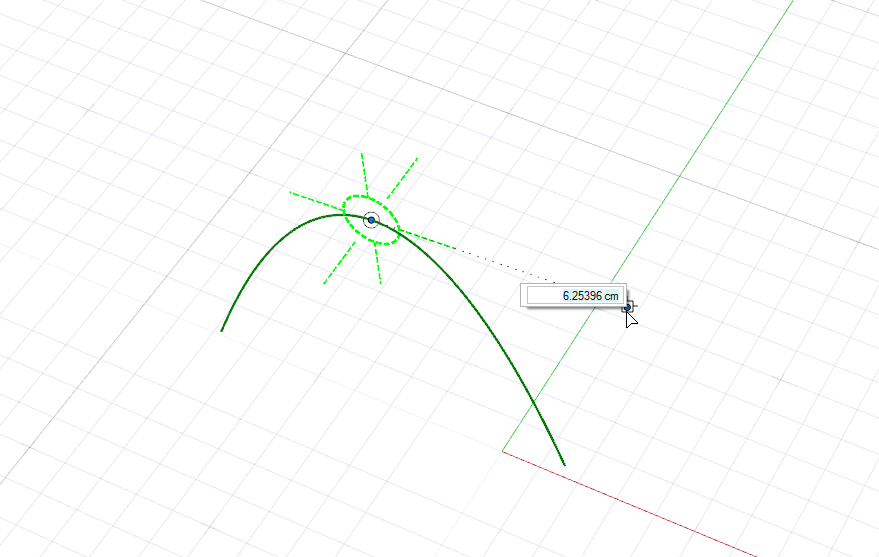
- If you snapped the first point to a source curve, use the green
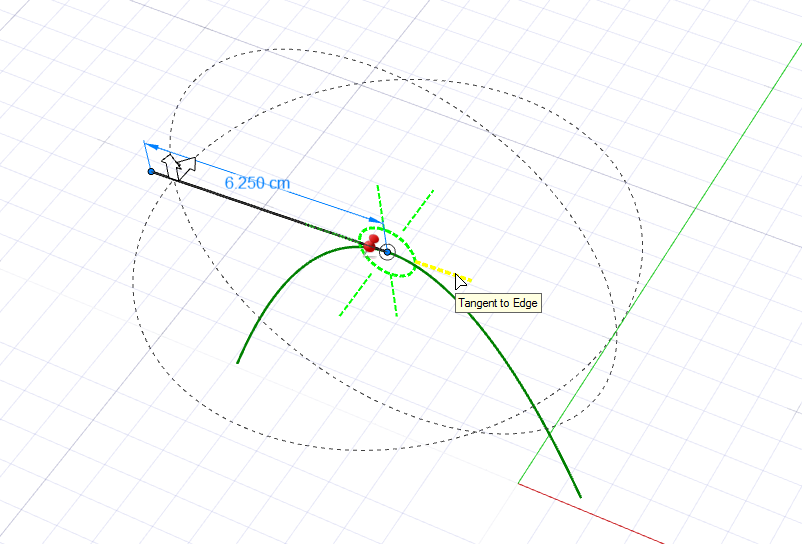
handles:
Handle Description Tangent to Edge By default, the second point will be placed tangent to the source curve. 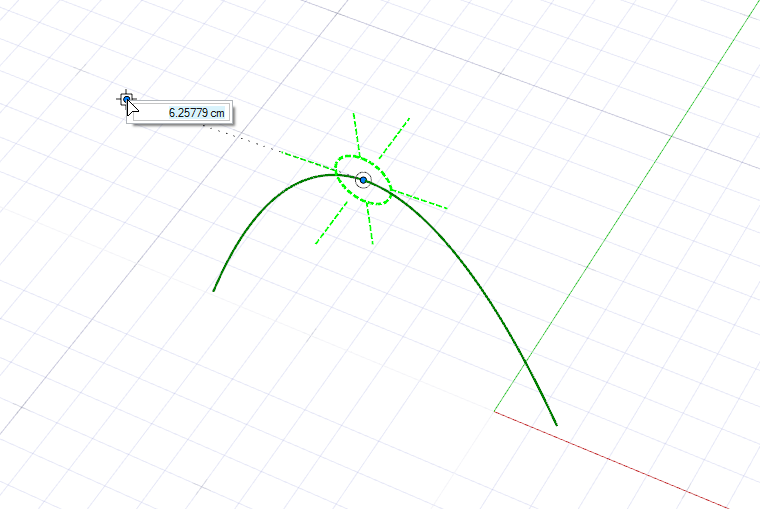
To place the second point tangent to the source curve in the opposite direction, move the mouse cursor over the opposite side; the handle for the opposite direction is displayed in yellow and a Tangent to Edge tooltip is displayed. Now click this Tangent to Edge handle.
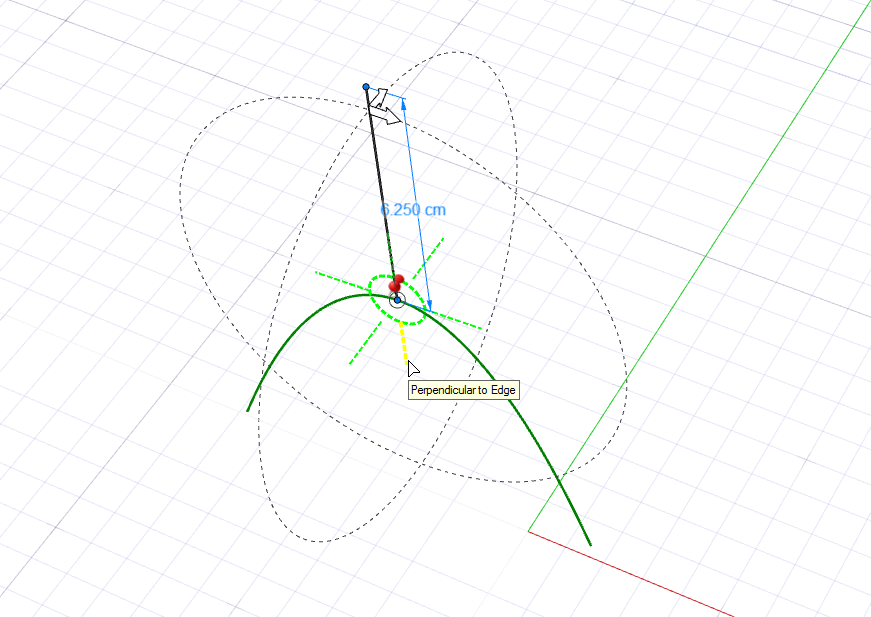
Perpendicular to Edge To place the second point perpendicular to the source curve, click a Perpendicular to Edge handle. 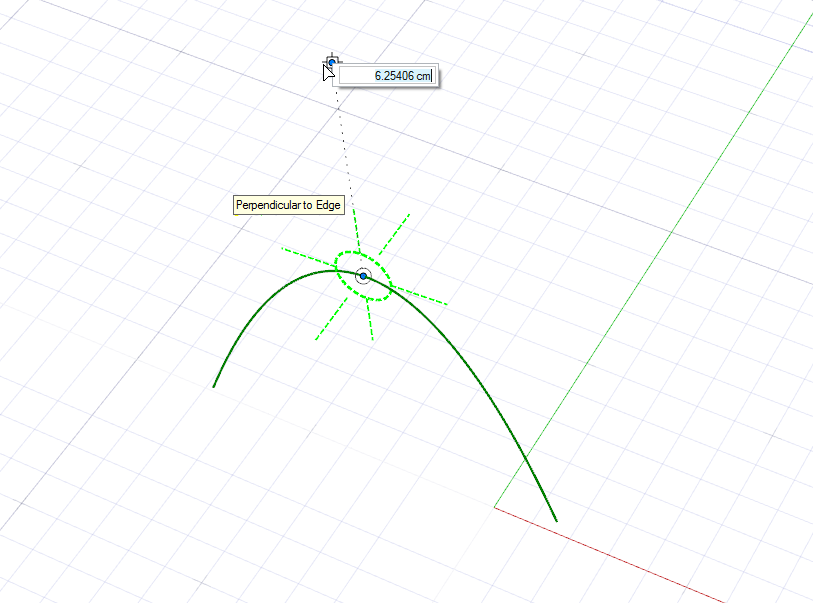
To place the second point perpendicular to the source curve in the opposite direction, move the mouse cursor over the opposite side; the handle for the opposite direction is displayed in yellow and a Perpendicular to Edge tooltip is displayed. Now click this Perpendicular to Edge handle.
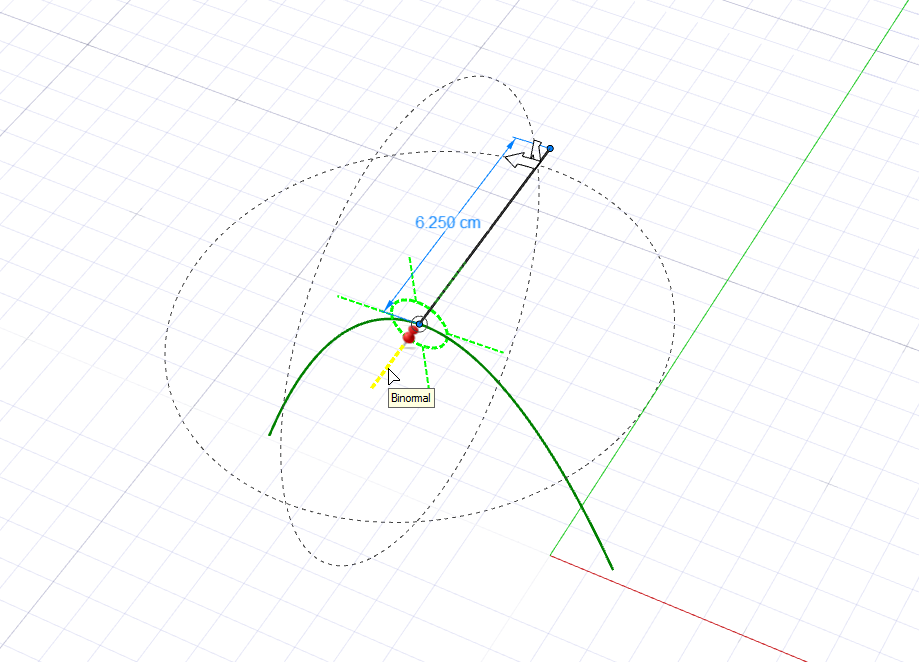
Binormal To place the second point normal to the plane in which the source curve lies, click a Binormal handle. 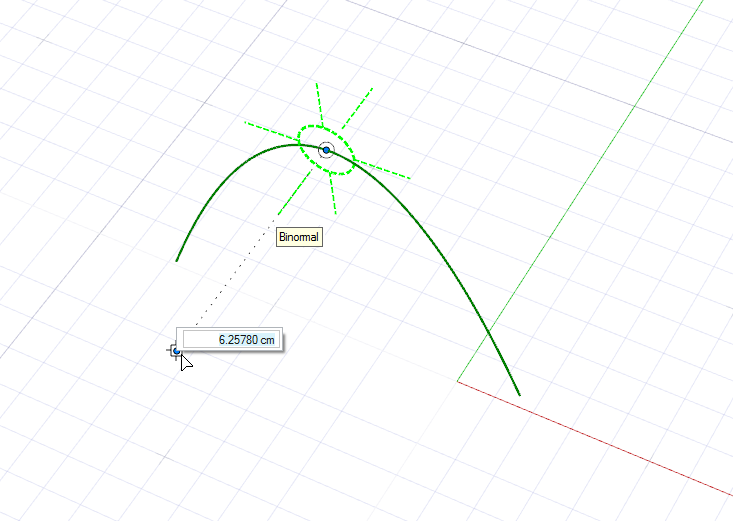
To place the second point normal to the source curve in the opposite direction, move the mouse cursor over the opposite side; the handle for the opposite direction is displayed in yellow and a Binormal tooltip is displayed. Now click this Binormal handle.
Free direction from entity To freely place the second point in 3D space, click the green circle. 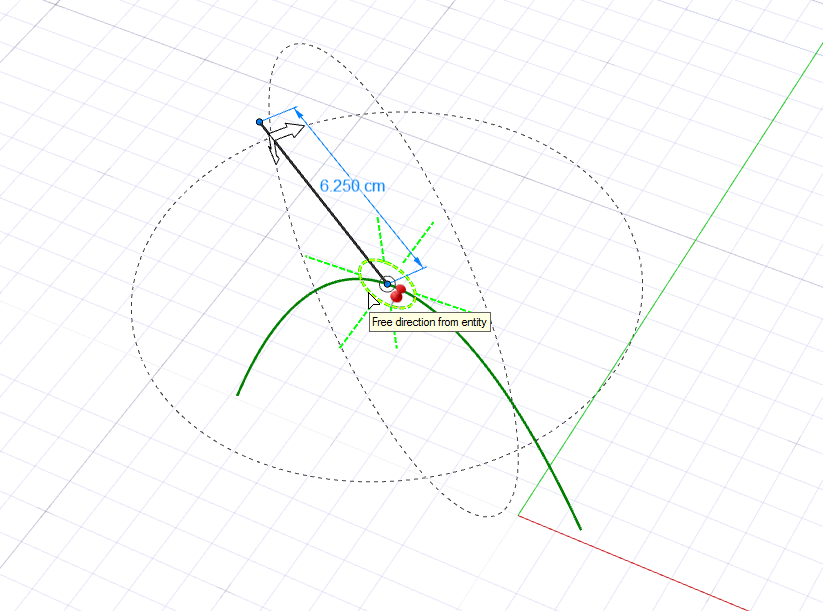
- As you hover the mouse cursor, a preview of the 3D line is displayed as
a faint, dotted, gray line. Place the second point by clicking (hold
down Ctrl to snap to a curve) or entering a
Length in the microdialog. Tip:
- To snap a point to a source curve, hover near the source curve before clicking. The source curve is displayed in green and the point attaches to the source curve.
- To unsnap a point from the source curve, move the mouse cursor far away from the source curve until the point detaches from the source curve and coincides with the mouse cursor.
- Define the direction:
- Optional:
To mirror the 3D line on the other side of the object, in the guide bar, click
Symmetric
 .
.
-
Edit the 3D line:
To Do this Note Move the first or second point - Select the point.
- Drag the point.
Change the direction In the Control Panel, select a Reference Direction: - Global X Axis
- Global Y Axis
- Global Z Axis
- Reference Geometry
 : In the modeling window,
click a reference object.
: In the modeling window,
click a reference object. - Custom
 : In the modeling window,
drag the Direction point,
Phi Angle, Theta
Angle, or Free
Angle, or click one of the arrows and
type an angle.
: In the modeling window,
drag the Direction point,
Phi Angle, Theta
Angle, or Free
Angle, or click one of the arrows and
type an angle.
To invert the current direction, click Invert Direction. Change the length - Select the line.
- Drag the second point or click the length dimension to enter a value in the microdialog.
Change the distance - Click
 to unlock the
distance.
to unlock the
distance. - Drag the Distance arrow or enter a Distance in the microdialog.