


|
Sorting a Column
Sort allows you to arrange the records on a table according to the ascending or descending values of one or more columns.
For example:
-
You can sort Invoice records according to the Invoice Number in descending order.
-
Sort Customer records according to State, and then for each state, sort according to Last Name in descending order.
Monarch Data Prep Studio allows you to sort column from several points:
-
From the context menu of a column
-
From the context menu of a table (via the Transform pane)
Sorting a column
Steps:
-
In the Prepare Window, do one of the following:
-
-
right-click on a column header to display the context menu
-
select multiple columns using CTRL + Click on one or more column headers, and then right-click to display the context menu
-
-
Select Sort, then Sort Selected Columns.
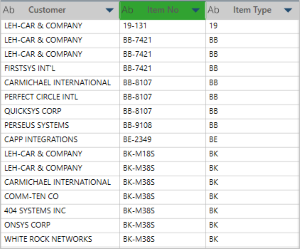
The column is sorted in Ascending order by default. The header changes from blue to green background to indicate that the table is sorted on that column:
If you sort on multiple columns, Monarch Data Prep Studio sorts the columns according to their order of selection.
If you want to modify the sort, do one of the following to display the Define and Edit Sort dialog box:
-
-
Right-click on a column header and select Sort Selected Columns
-
Multi-select several columns, right-click and then select Sort Selected Columns
-
Right-click on a table on the table list panel then select Sort Selected Columns
Monarch Data Prep Studio assigns sequential default names to the Sort result, i.e.: Sort, Sort(1), Sort(2). Rename the result as needed, following the steps in Renaming a Table.
-
Defining a sort using the Sort dialog
Steps:
-
In the Prepare Window, do one of the following:
-
-
Select Transform from the toolbar and then select Sort from the Transform pane that displays.
-
Right-click on a column header and select Sort > Define Sort...
-
Multi-select several columns, right-click and then select Sort > Define Sort...
-
Right-click on a table on the table list panel then select Define Sort...
-
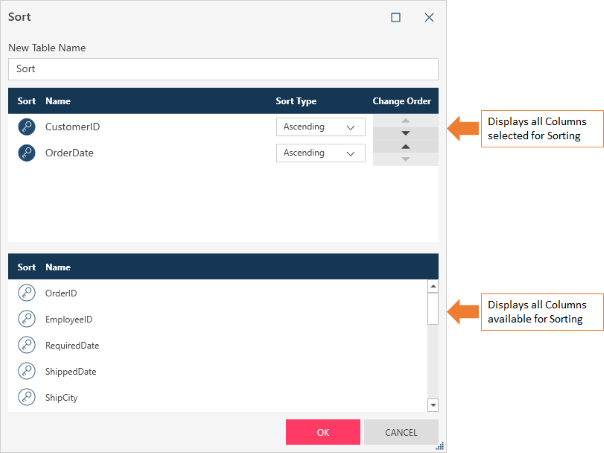
The Sort dialog box displays:
-
Enter a sort name.
If you do not define a name, Monarch Data Prep Studio assigns sequential default names to the Sort result, i.e.: Sort, Sort(1), Sort(2). Rename the result as needed, following the steps in Renaming a Table.
-
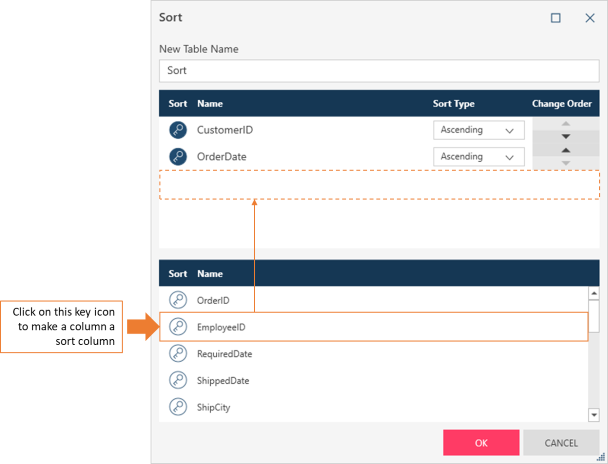
Select a sort column from the list of columns at the bottom of the dialog box.
Click the key icon to move the column from the columns list to the sort columns list:
-
Continue selecting sort columns. Note that the order in which you select columns determines how the records are displayed, as Monarch Data Prep Studio first sorts by the first column, then the second column all the way to the last column on the sort columns list.
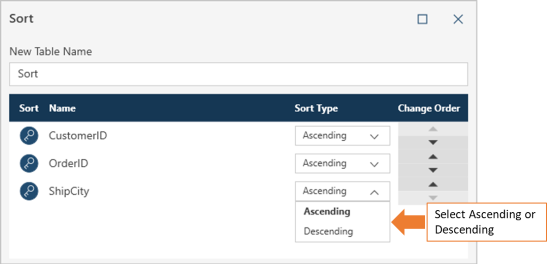
Defining the Sort Type
Set the sort type by selecting Ascending or Descending on the Sort Type drop down beside a sort column.
Changing the Sort ORDER
Monarch Data Prep Studio sorts according to the arrangement of sort columns. You can change the order by clicking on the up/down arrows beside a column.
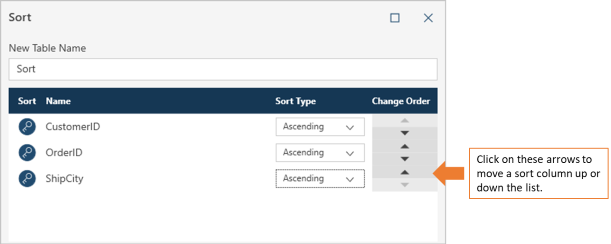
For instance, to move Ship City to the top of the list in the example above, you need to click on the up arrow beside Ship City twice.
Removing a Sort Column
To remove a sort column, click on the key icon beside a column on the sort column list:

Related Links