


|
Formatting a Date Column
You can format a date column from the Prepare Window. Monarch Data Prep Studio allows you to easily format date fields as follows:
-
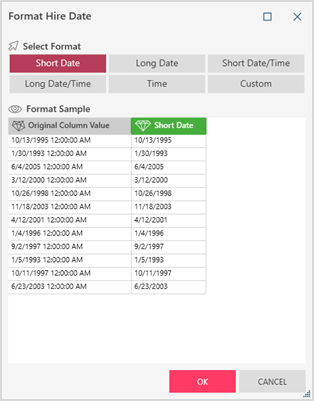
Short Date [d]
Example: 1/10/2016 -
Long Date [D]
Example: Sunday, January 10, 2016 -
Short Date/Time [g]
Example: 1/10/2016 12:00 AM -
Long Date/Time [f]
Example: Sunday, January 10, 2016 12:00 AM
You can also enter your own custom format.
Monarch Data Prep Studio follows standard .NET date formatting rules. Refer to this page for more advanced formatting.
Steps:
-
On the Prepare Window, right-click on a column and then select Column List from the context menu. The Column List dialog displays.
-
Click on the Edit Format icon beside the date column you wish to format:
-
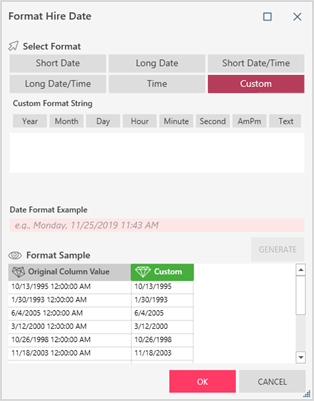
Select a pre-defined date format (Short Date, Long Date, Short Date/Time, Long Date/Time, Time) to apply these formats to your date columns. Alternatively, select Custom to enter your own custom formatting:
-
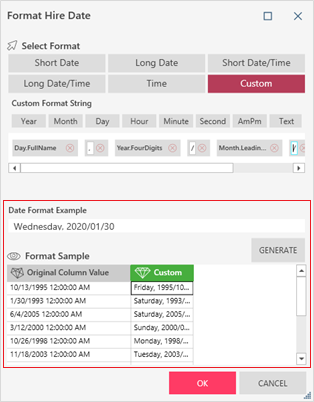
To create a custom format using standard date/time parts, select the date/time parts you wish to apply to your date field from the Custom Format String section of the Format dialog.
-
To define a custom date format by example, enter a sample custom format into the Date Format Example field. Click the Generate button to produce a sample of what your dates/times will look like when your selected formatting is applied. The format you specified is also added to the Custom Format String field.
-
Select OK if you are satisfied with the new formatting. The Format dialog closes and you are returned to the Column List dialog.
-
Select OK on the Column List dialog to accept your changes and return to the Prepare window.

The Format dialog box displays:
Alternatively, you can simply click on the drop-down arrow located to the right of the header of a date/time column and then select Format from the options that display. This will bring up the same Format dialog.
You can create a custom date format using standard date/time parts or by example:
If a custom number format sample had previously been defined, clicking the Generate button displays the following dialog:
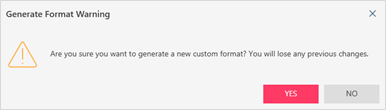
Simply click YES to continue applying your custom format.
Related Links