


|
Editing Table Load Options
This functionality allows you to change how to load data from Excel, Access, CSV, and HTML data sources. You can select and re-load a different sheet (Excel) or table (Access) if necessary.
Steps:
-
On the Prepare Window, click the drop-down arrow beside the Excel, CSV, HTML, or Access table of interest and then select Edit Load Options.
-
Implement the changes necessary by using the following dialogs:
-
Select a new sheet from the Switch Table drop-down.
-
Select the number of lines to skip, starting from the first row, if these lines do not contain data.
-
Select First Row Has Column Names if the first row of the sheet contains the column names.
-
Select Ignore Blank Rows to show only those rows that are not blank.
-
Select Import columns as text if you wish Monarch Data Prep Studio to import all columns in the data source as text regardless of the original data type.
-
Opt to automatically sync columns with source data on load or refresh. This setting is intended for use in case the columns in your file change over time and you require that Data Prep Studio sync with these changes. Tick the box for this setting if you wish to apply it. Note that when this mode is applied, your Change History items may yield an error state if the columns the sync is applied to are renamed or deleted from the source file.
-
Select a new input connector if necessary.
-
Select OK to accept and save your changes. The dialog closes, and your settings are applied to the corresponding table.
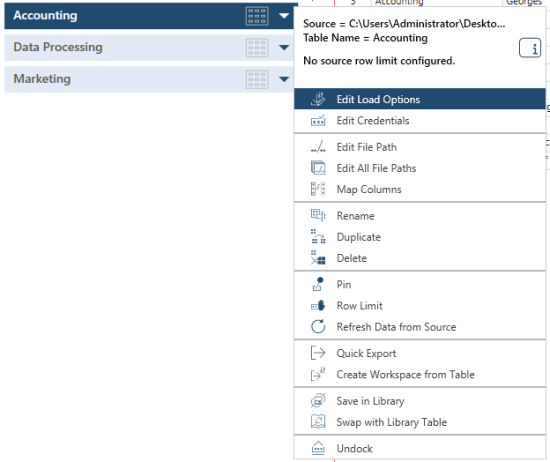
Alternatively, you can select Edit Load Options at the bottom of the Change History panel.
Load Options, when applicable, can also be accessed from the Column Information panel when a table is previewed.
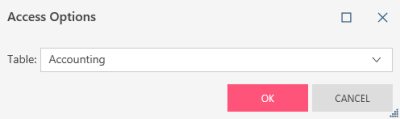
For Microsoft Access Data Sources:
For an Access data source, the following dialog displays. Select a new table from the Switch Table drop-down list.
For Excel data sources:

Using this dialog, you can:
You can specify a data type for each of the fields of your Excel data by source using the Type drop-down lists provided to the right of each column. Alternatively, you can specify a single ("bulk") data type to apply to all fields in your data source via the Bulk Type Edit drop-down list. These options are deactivated if the input connector selected is the legacy engine. You can verify the effects of your selection(s) by clicking on the Refresh icon in the data preview of the dialog.
If you wish to return the data types to their original values (as determined by the Monarch Excel Table connector), click on the Scan and Define Columns button.
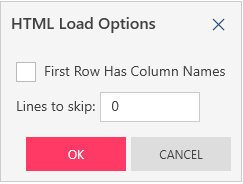
For HTML data sources:
Specify whether the first row of the HTML table includes the column names and a number of lines to skip, if necessary.
For delimited TEXT files:
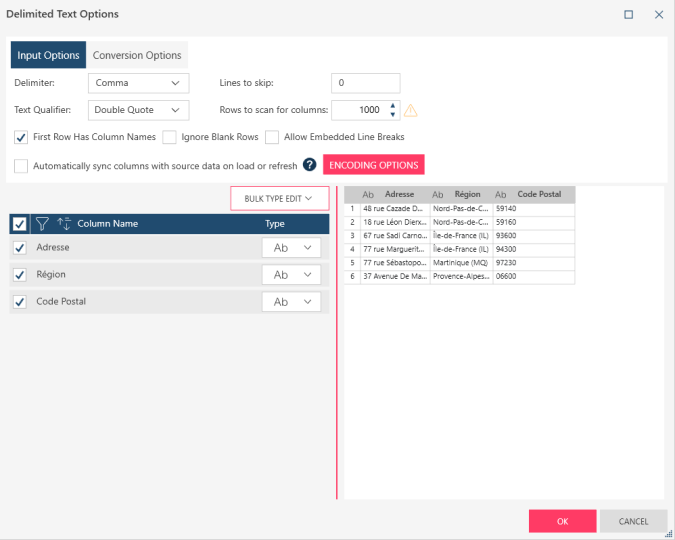
The Delimited Text Options dialog allows you to specify how many rows to scan in your data source before Monarch Data Prep Studio decides on a data type for the column. Note that setting this number to a very high value may negatively impact the application's load performance depending on the number of rows and columns in your input source. You can also define a delimiter by clicking on the drop-down button beside this field and choosing from several common delimiters which to apply to your table. If the delimiter you are looking for is not on this list (e.g., ^), simply type it into the field. Define a text qualifier by selecting one from the drop-down list provided. Select whether to ignore blank rows and allow embedded line breaks in your data source. If you need to modify Encoding Options, click on the button provided to launch drop-down lists that will allow you to select an encoding type and code page, if applicable.
The Delimited Text Options dialog also allows you to specify a data type for each of the fields of your CSV data source using the Type drop-down lists provided to the right of each column. Alternatively, you can specify a single ("bulk") data type to apply to all fields in your data source via the Bulk Type Edit drop-down list.
The Automatically sync columns with source data on load or refresh setting is intended for use in case the columns in your file change over time and you require that Data Prep Studio sync with these changes. Tick the box for this setting if you wish to apply it. Note that applying this setting to your delimited text files will prohibit you from selecting specific field types when tables from this type of file are imported into Data Prep Studio. Moreover, when this mode is applied, your Change History items may yield an error state if the columns the sync is applied to are renamed or deleted from the source file.
Related Links