


|
Applying Filters in the Prepare Window
Use this functionality to trim the records displayed on a table so that you can work with only the data that you need. Columns that have been filtered show the filter icon to the left of the column name.
This page discusses:
Filtering text values
Steps:
-
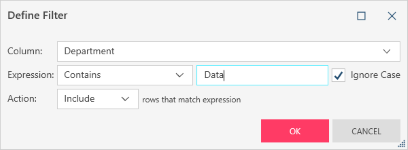
On the Prepare Window, select a table, right-click on a column you want to filter on, and select Filter > Define Filter. The Define Filter dialog displays.
-
Select a filter operator using the drop-down provided to the right of the Expression field. You can choose among the following operators:
-
Contains - This filter operator allows you to filter records with field values that contain a specific set of characters.
-
Multiple Selection - This filter operator allows you to filter records of one or more unique string.
-
Equals - This filter operator returns records containing a specific string.
-
Does Not Equal - This filter operator returns all records except those containing the specified string.
-
Starts With - This filter operator allows you to select records with column values that start with a specific set of characters.
-
Ends With - This filter operator allows you to select records with column values that end with a specific set of characters.
-
Is Null - This filter operator returns all records with nulls in the selected field.
-
Is Not Null - This filter operator returns all records without nulls in the selected field.
-
-
In the field provided to the right of the Expression field, enter your filter criteria.
-
Tick the box for Ignore Case to instruct Data Prep Studio to ignore case when searching for possible records to return.
-
Use the drop-down provided to the right of the Action field to either include or exclude the filter criteria you specified in Step 3 in the resulting table.
-
Click OK when you are finished.
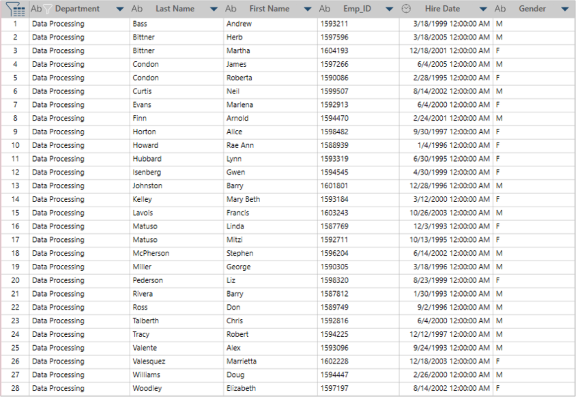
In the example below, the results of the filter defined by the image in Step 3 are displayed. Here, the original table contains the values "Accounting," "Data Processing," and "Marketing" in the Department field.
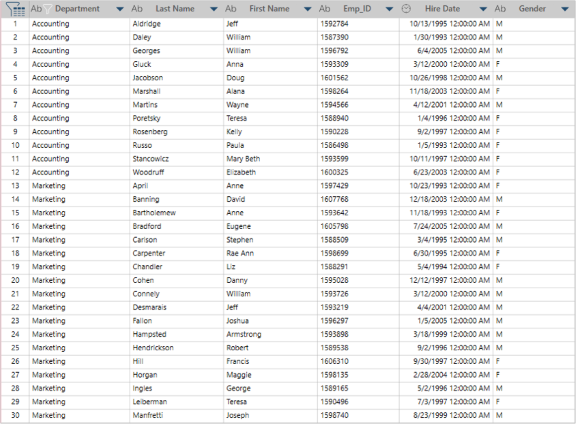
In this next example, the results of the filter defined by the image in Step 3 but with an action of Exclude are displayed.
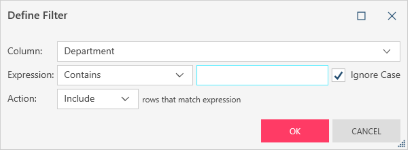
The column you selected automatically displays in the Column field of the dialog. If you wish to change this column, you can use the drop-down that displays to the right of the field to do so.
Filtering numeric values
Filters for numeric fields in the Prepare Window are created in the same way as filters for text fields.
The following operators may be applied when creating numeric filters:
-
Equals - This filter operator returns records containing a specific field value.
-
Does Not Equal - This filter operator returns all records except those containing the specified field value.
-
Multiple Selection - This filter operator allows you to filter records of one or more unique field values.
-
Less than - This filter operator allows you to filter for records less than a specified value.
-
Greater than - This filter operator allows your to filter for records greater than a specified value.
-
Less than or Equal to - This filter operator allows you to filter for records less than or equal to a specified value.
-
Greater than or Equal to - This filter operator allows you to filter for records greater than or equal to a specified value.
-
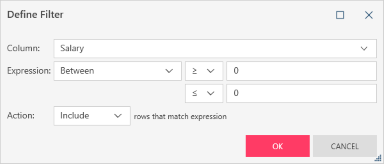
Between - This filter operator allows you to define numeric ranges; when this operator is selected, you must also select one from each of two sets of operators (i.e., greater than/greater than or equal to and less than/less than or equal to) to identify the range to filter for.
-
Is Null - This filter operator returns all records with nulls in the selected field.
-
Is Not Null - This filter operator returns all records without nulls in the selected field.
Filtering date/time values
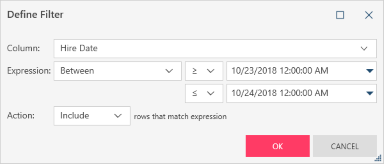
You can filter date/time values and opt to review only records with column values that fall within a range or are before or after a specific date value:
The following operators may be applied when creating date/time filters:
-
Equals - This filter operator returns records containing a specific date/time.
-
Does Not Equal - This filter operator returns all records except those containing the specified date/time.
-
Multiple Selection - This filter operator allows you to filter records of one or more unique dates/times.
-
Less than - This filter operator allows you to filter for records earlier than a specified date/time.
-
Greater than - This filter operator allows your to filter for records later than a specified date/time.
-
Less than or Equal to - This filter operator allows you to filter for records less earlier than or equal to a specified date/time.
-
Greater than or Equal to - This filter operator allows you to filter for records later than or equal to a specified date/time.
-
Between - This filter operator allows you to define date/time ranges; when this operator is selected, you must also select one from each of two sets of operators (i.e., greater than/greater than or equal to and less than/less than or equal to) to identify the range to filter for.
-
Is Null - This filter operator returns all records with nulls in the selected field.
-
Is Not Null - This filter operator returns all records without nulls in the selected field.
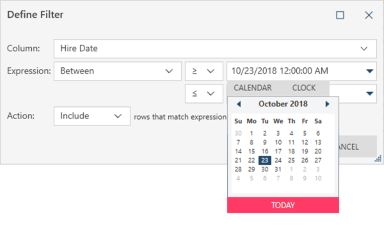
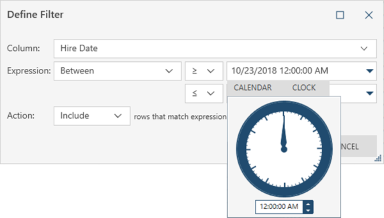
You can specify calendar and/or clock values when creating date/time filters. To do so, click on the drop-down buttons provided beside the date/time fields in the Apply (Date/Time) Filter dialog and then click Calendar or Clock.
Editing filters using Change History
Filters are recorded in the Change History panel. This means you can easily review or change a filter editions from the Change History List as well.
Steps:
-
Display the Change History List panel.
-
Select the Edit icon beside the Filter entry you want to review to edit:
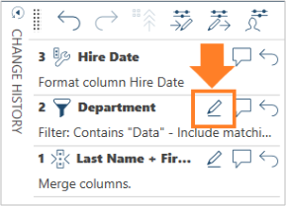
The Apply Filter definition dialog box displays:
-
Use the options provided to modify the filter and then select OK.
Discarding all filters
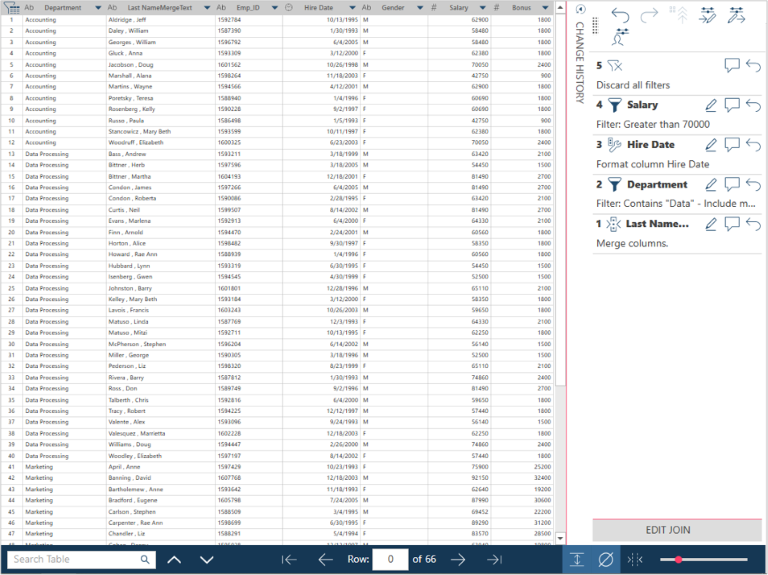
All of the filters applied to a table may be discarded simultaneously by right-clicking on any column in the filtered table and then selecting Discard All Filters from the options that display. Note that this operation only displays when at least one filter has been applied to the table.
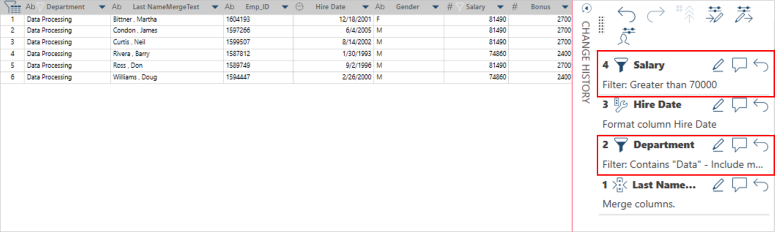
The image below, for example, displays a table to which two filters have been applied.
When the Discard All Filters operation is applied to this table, the original table is restored.
Related Links