HVVH-1000: Work With Session Files

In this tutorial, you will learn how to:
  • Start a session.
  • Load an existing session file.
  • Save and append session files.
  • Exit a session.

Start Session

  1. From the menu bar, click File > New.
    The following message is displayed:


    Figure 1.
  2. Click OK.
    To continue with a current session, click Cancel.

Load Session

  1. From the menu bar, click File > Load Session.
  2. Use the Open dialog to locate and load your session file.
    All GUI entries needed as input are loaded.
    Note: Each individual option has a session file. The loaded session file takes you to the respective options. For example, the session selected in Figure 2 takes you to the CAD > CAD IO tab.
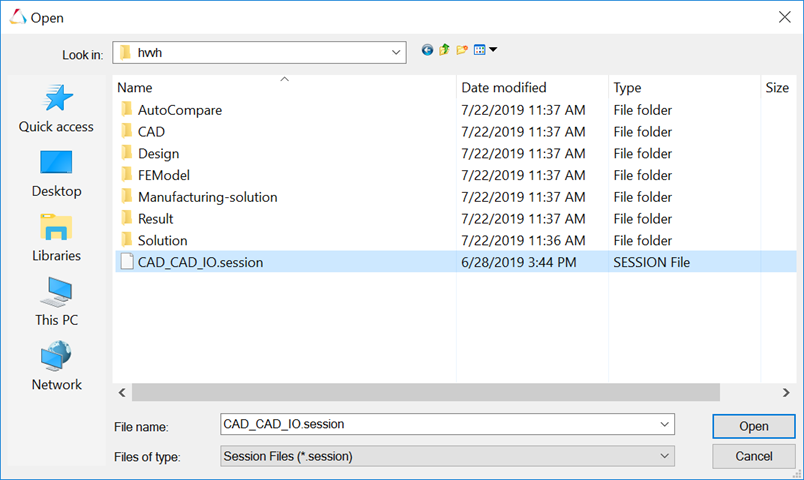

    Figure 2.

Save Session

  1. Load an existing session file or manually enter all input fields on a given tab.
  2. From the menu bar, click File > Save New Session.
    The Save New Session dialog is displayed.
  3. In the dialog, save the required session file.

    All GUI entries needed as input are saved in the session file.

    Each individual tab has a session file. When loaded again, the saved session file takes you to the respective tab.

    Below is an example of the session file, FEBASICIO.session.

    MainTab : {FE Model}
    SubTab : {Basic IO}
    Number : 1
    Begin : 1
    	       {Solver Type} : {OptiStruct}
    	       {HW Version} : {2017}
    	       {Model Checker} : 0
    	       {Export Profile} : {}
    	       {Input Files} : { C:\hvvh\FEModel\BasicIO\car1.fem}
    	       {Output Directory} : {C:\HVVH\OutDir}
    End : 1
    Note: To use this session file in batch mode: ..\utility\hvvh\launch.bat –b FEBASICIO.session

Append Session

Append a session to an existing session file. The appended information will be shown in different blocks.

  1. Manually enter all input fields for a given tab.
  2. From the menu bar, click File > Append Session.
  3. From the dialog, select a session.
    This appends the required entries to an existing session file; all GUI entries needed as input are appended in the existing session file.

    Each new set of entries are stored in different blocks.

    This can be used in batch mode to execute multiple sessions.

    MainTab : {FE Model}
    SubTab : {Basic IO}
    Number : 1
    Begin : 1
    	       {Solver Type} : {OptiStruct}
    	       {HW Version} : {2017}
    	       {Model Checker} : 0
    	       {Export Profile} : {}
    	       {Input Files} : {C:\hvvh\FEModel\BasicIO\car1.fem}
    	       {Output Directory} : {C:\HVVH\OutDir}
    End : 1
    Begin : 2
    	      {Solver Type} : {OptiStruct}
    	      {HW Version} : {2017}
    	      {Model Checker} : 1
    	      {Export Profile} : {}
    	      {Input Files} : {C:\ demos\buckling1.fem}
    	      {Output Directory} : {c:\temp5}
    End : 2

Exit Session

From the menu bar, click File > Exit.
The HyperWorks Verification and Validation Harness dialog closes.