Table of Reference
Add a table of reference to the report.
- Right-click Report and select
Or
From the Report ribbon, click the arrow next to the Add Item, then select Table of Reference.
Note: Report allows you to add only one Table of Reference for the session. - Once Table of Reference is added, a chapter titled Table of Reference is added to the tree. Also, a table entity titled Table of Reference is added under it.
- Below are the properties associated with the Table entity.
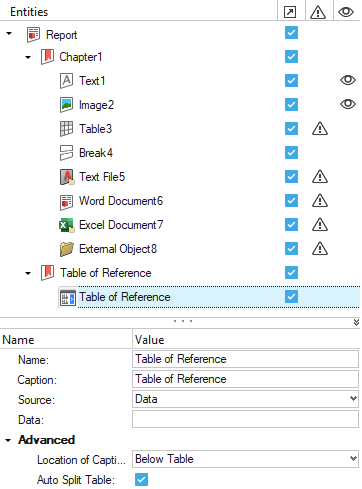
Figure 1.- Name: Edit the name property of the reference table entity.
- Caption: Provide a caption for the table entity. This caption is visible in the exported Document report.
- Source: Select the data input type for the table entity. Available
options are:
- Data
- External CSV/XLSX
- TableView Window
- HyperMesh Table
- Matrix Browser Table
Advanced
- Location of Caption: Select the caption location from the list. These are standard
locations as present in Microsoft Word. Table caption locations can be:

Figure 2.- Below Table, or
- Above Table
- Auto Split Table: Provides the function to split up tables automatically based on
the space available in the slide or page.
Adding a reference
- To add a reference, select the required text and right-click Insert Table of Reference.
- A table of reference option is displayed. Select the required cell from the table
and click OK. This adds a
reference for the selected text item to the cell item in the table.
Adding a Cross Reference
- To add a cross reference, select the required text and right-click Add Cross Reference.
- A Select Item to Cross Reference dialog opens. You can select the required entity from the table and click OK.