Excel Document
Add data from an Excel document to the report.
- Right-click at the Report or Chapter level and select .
Or
From the Report ribbon, click the arrow next to the Add Item, then select Excel Document.
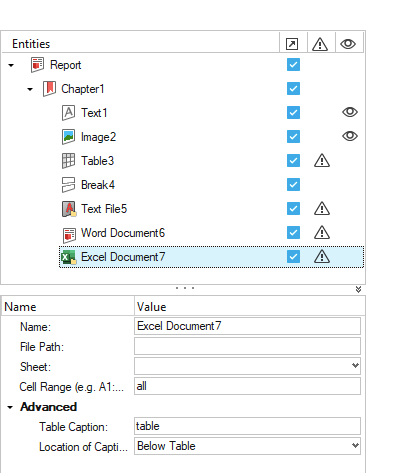
- Below are the properties associated with the Excel Document entity.

Figure 1.- Name: Edit the name property of the Excel document item.Note: Once you select an Excel file, the Excel item name is replaced with the selected file name.
- File Path: Select an Excel file using the file browser option.
- Sheet: Select a sheet from the Excel file to be inserted. All of the sheets in the selected Excel document are listed.
- Cell Range: Specify a cell range to be exported to the report.Note: By default, the entire cell range is added to the report.Cell Range Entries:
- A1:C5: The top left corner of the table is A1 and the bottom right corner is C5.
Advanced
- Name: Edit the name property of the Excel document item.
- Table Caption: Provide a caption for the table entity. This caption is visible in the exported Document report.
- Location of Caption: Select the caption location from the list. These are standard
locations as present in Microsoft Word. Table captions locations can be:

Figure 2.- Below Table, or
- Above Table