Right-click at the Report or Chapter level and select Add > Items > Table.
Or
From the Report Ribbon, Add Item tool group, click
Table.Figure 1.
.
Below are the properties associated with the Table entity. Figure 2.
Name: You change the name property of the table item.
Caption: Provide a caption for the table entity. This caption is visible
in the exported Document report.
Source: Select the data input type for the table entity. Available
options are:Figure 3.
Data: Edit data to the table entity. Data entry to the table can
be done through two methods. Figure 4.
Manual: Enter the required number of rows and columns
and click Update. This adds the
number of rows and columns where you can enter the data
manually. Figure 5.
Import: You can also import table data from a CSV or
XLSX file.
Click Import. A file
browser option is displayed.
Select a file and click OK. This imports the
data from the file and populates it in the table
entity.
External CSV/XLSX: Import data from a CSV or an XLSX file.
Select the required file and define the cell range to be
imported to the table entity.Figure 6.
TableView Window: Import data to the table entity from the
TableView window in the session. Select the TableView
page/window for Location, define the cell
range and other advanced options.Figure 7.
HyperMesh Table: Import data to the table entity from an
existing HyperMesh Table collector in the session. Select the
HyperMesh page/window for Location and
select the required table from the Table
list.Figure 8.
Matrix Browser Table: Use Matrix Browser table and Matrix
Browser Macro script to generate data for the table entity.Figure 9.
Advanced
Location of Caption: Select the caption location from the list. These are standard
locations as present in Microsoft Word. Table caption locations can be:
Below Table, or
Above Table Figure 10.
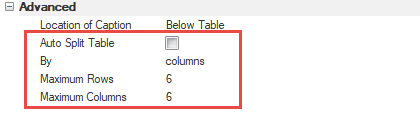
Auto Split Table: Provides the function to split up tables automatically based on
the space available in the slide or page.
If Auto Split Table is disabled,
Report allows you to split the table based on your requirement. Figure 11.
By: Select if you want to split the table along the columns or
rows.
Maximum Rows: Enter the value for the maximum number of rows for the
table.
Maximum Columns: Enter the value for the maximum number of columns for
the table.
 Figure 1.
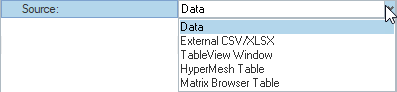 Figure 3.
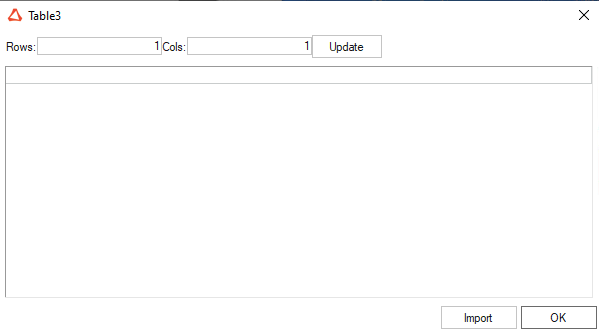
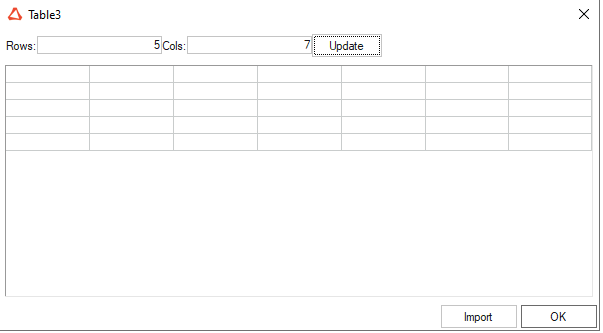
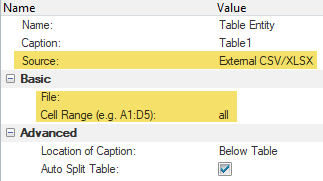 Figure 6.
 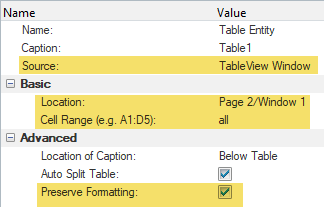 Figure 7.
 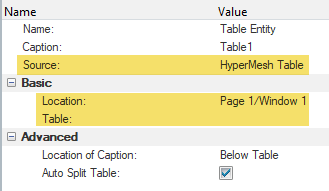 Figure 8.
 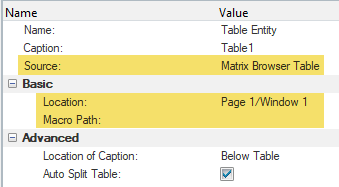 Figure 9.