This section explains briefly on how to build a Full truck with driver
model.
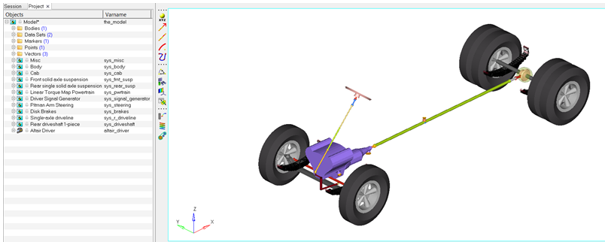
For example, follow the steps in the Build a Heavy Truck Model topic using the Assembly
Wizard. After building the model, the following model is displayed in the graphics area. Figure 1.
Events
The section explains how to add an event to the full truck model. Currently, the
following event types are available:
Constant Radius
Single Lane Change
Double Lane Change
Swept Sine
Straight Line Acceleration
Straight Line Braking
Sinusoidal Steering
BrakeIn Turn
J Turn
Throttle off cornering
Swept Steer
Pulse Steer
Throttle off TurnIn
Step Steer
Power off ln Straight Line
Altair Driver File
Road Course
nPost
Each event type has different options that need to be addressed. For example, the
Constant Radius event is explained in the following steps.
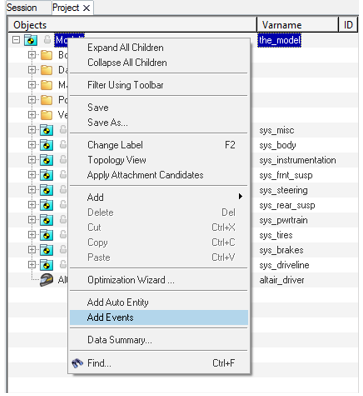
Right-click on the Model in the Project browser and click Add
Events.
Figure 2.
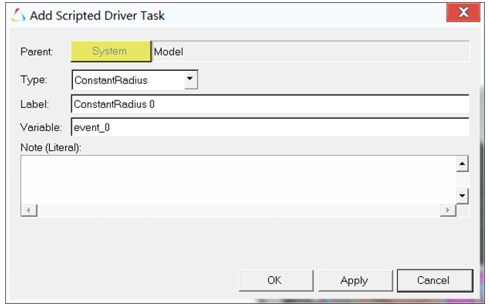
The Add Scripted Driver Task dialog is
displayed. Figure 3.
OK
Applies the selected type and closes the window.
Apply
Selects the event type without closing the window and also
updates the datasets.
Cancel
Exits the wizard.
Select the Constant Radius event from the Type drop-down
menu.
Enter in a Label and Variable and click OK.
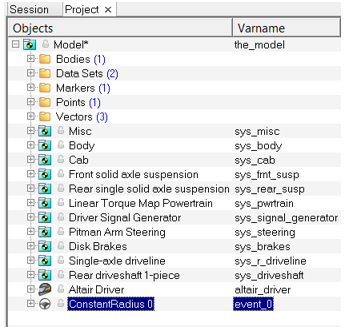
The Constant Radius event is added in the Project browser. Figure 4.
The Event Editor is displayed in the panel area.
Figure 5.
Note: The Event Editor window can be invoked done by right-clicking on the event
type in the Project browser or by clicking the Event
Editor button in the panel area.
Open the Event Editor by right-clicking on the event type in the Project
browser and selecting Event Editor.
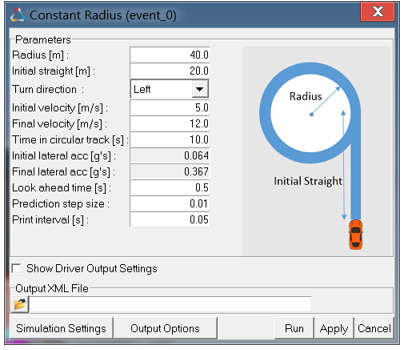
The Constant Radius event’s parameters are displayed. Figure 6.
Enter the above information in the Parameters section and browse and locate the
required file path in the Output XML File.
Now after entering all the required data, the event is ready to run. Click the
Run button.
HyperWorksMotionSolve is invoked in the
background.
After the MotionSolve run is completed, close the
window and return to the MotionView interface. The
generated file types are .adf, .plt,
and .h3d files.