HS-1515: Use HyperView Results Math Integration for Output
Response Extraction
Learn how to set up a study and add a model using HyperView Results Math to extract output responses.
Before you begin, copy the model files used in
this tutorial from <hst.zip>/HS-1515/ to your working
directory.
HyperView Results Math Integration enables you to write
an .xml file which queries the solver input and output files
and then extracts the output responses in HyperStudy. This route
queries the result faster and is considerable faster way to extract output responses
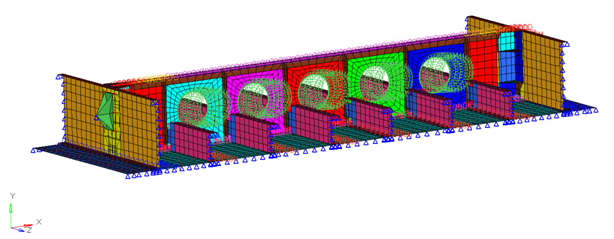
of a group of elements or nodes than “readsim” function. Figure 1.
Perform the Study Setup
Start HyperStudy.
Start a new study in the following ways:
From the menu bar, click File > New.
On the ribbon, click .
In the Add Study dialog, enter a study name, select a
location for the study, and click OK.
Go to the Define Models step.
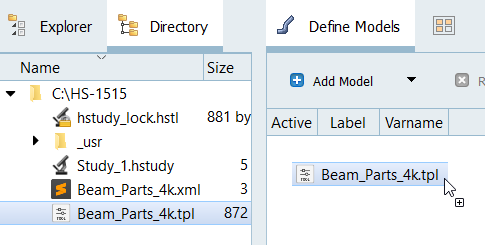
Add a Parameterized File model.
From the Directory, drag-and-drop the
Beam_Parts_4k.tpl file into the work area.
Note: The xml file needs to be copied to each run
directory. A new batch file will copy the xml
file to each directory, and then execute the OptiStruct job that needs to be
registered.
Figure 2.
In the Solver input file column, enter
Beam_Parts_4k.fem.
This is the name of the solver input file HyperStudy
writes during any evaluation.
In the Solver execution script column, select OptiStruct
(os).
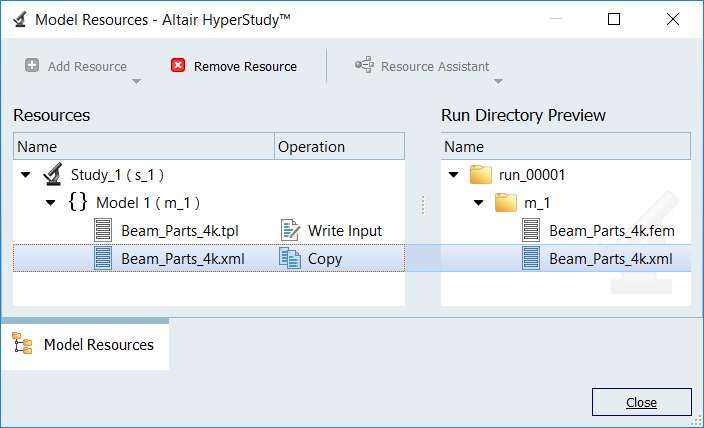
Define a model dependency.
Click Model Resources.
Select Model 1(m_1).
In the Model Resource dialog, click Resource Assistant > Add File.
In the Select File dialog, navigate to your
working directory and open the Beam_Parts_4k.xml
file.
Set Operation to Copy.
Click Close.
Figure 3.
Click Import Variables.
Two input variables are imported from the
Beam_Parts_4k.tpl file.
Go to the Define Input Variables step.
Review the input variable's lower and upper bound ranges.
Perform Nominal Run
Go to the Test Models step.
Click Run Definition.
An approaches/setup_1-def/ directory is created
inside the study Directory. The
approaches/setup_1-def/run__00001/m_1 directory
contains the input file, which is the result of the nominal run.
Create and Evaluate Output Responses
In this step you will create two output responses: Part 22 and Part 24.
Go to the Define Output Responses step.
Create the Part 22 output response.
From the Directory, drag-and-drop the
Beam_Parts_4k.xml file, located in
approaches/setup_1-def/run__00001/m_1, into the
work area.
In the File Assistant dialog, set the Reading
technology to Altair® HyperWorks® and click
OK.
Select Single Item in a Time Series, then click
Next.
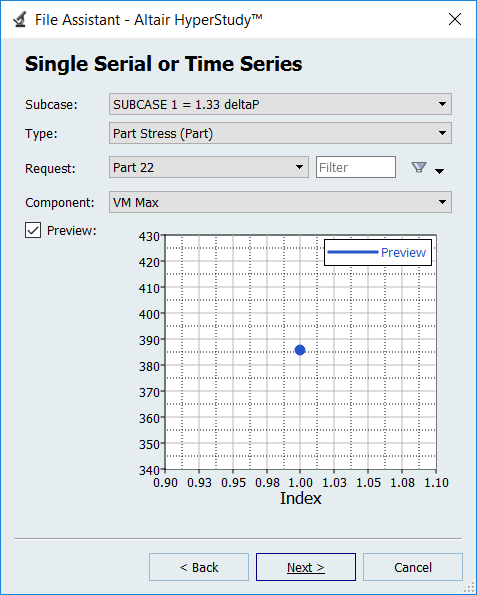
Define the following options, and then click Next.
Set Subcase to SUBCASE 1 = 1.33
deltaP.
Set Type to Part Stress (Part).
Set Request to Part 22.
Set Component to VM Max.
Figure 4.
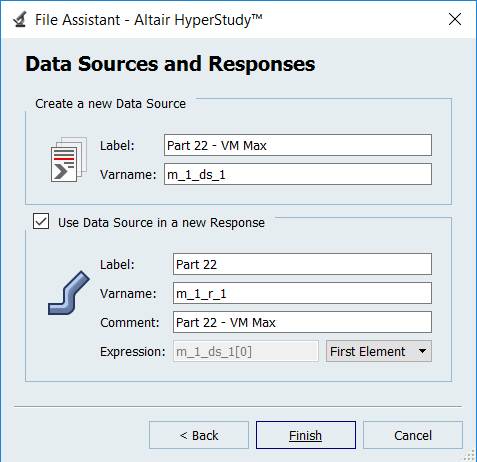
Label the output response Part 22.
Set Expression to First Element.
Click Finish.
Figure 5.
The Part 22 output response is added to the work area.
Create the Part 24 output response by repeating step 2.
 .
.