Browsers
Use the browsers in HyperWorks CFD to create, review, and manage the parts,setup parameters, and post-processing entities used in your simulation.
By default, browsers open on the left side of the application. However, you can undock browsers so that they appear as a free-floating dialogs. You can also re-dock browsers on the right-side or the bottom of the application.
Part Browser
Use the Part Browser to create, organize, and manage the CAE part structure/hierarchy.
To open the Part Browser, click from the menu bar.
The Part Browser displays the relationship between your model's
parts/assemblies (![]() ), solid bodies (
), solid bodies (![]() ), and surface bodies (
), and surface bodies (![]() ).
).
Solid bodies and surface bodies reflect the content within each part. Solid bodies contain a solid and surface bodies contain a group of surfaces. By reviewing the solid and surface bodies, you can get an idea of model.
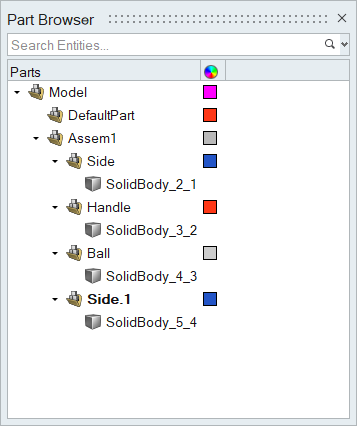
Figure 1.
Setup Browser
Use the Setup Browser to create, edit, and review your model's setup parameters.
To open the Setup Browser, click from the menu bar.
The Setup Browser contains the different categories of parameters that you can use to setup your simulation and any defined instances.
If you right-click on a parameter and select Create/Open, the corresponding ribbon and tool used to create that parameter are activated.
Once a parameter is defined, it is automatically added to the Setup Browser.
Similarly, you can right-click on a defined parameter in the browser and select Edit to quickly jump into the correct tool and change any options.
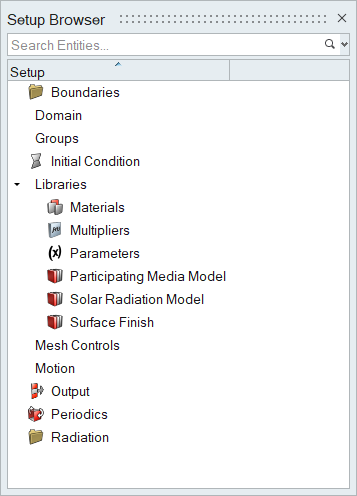
Figure 2.
Post Browser
Use the Post Browser to create, edit, and review post-processing visualizations and measurements.
The Post Browser contains the model's parts, boundary visualizations, and defined post-processing entities.
To create a new boundary collection set, right-click on Boundary Collections and select Create. In the new collection, all surfaces will be placed in a boundary group called "unassigned".
To control where new boundary groups are added, right-click on any collection and select Make Current.
When you create new boundary group by selecting surfaces, those surfaces will be removed from the existing boundary group.
Right click on any collection and select Delete empty groups to delete any empty boundary group.
Right-click on an entity in the browser and select Edit to quickly jump into the correct tool and change any options.
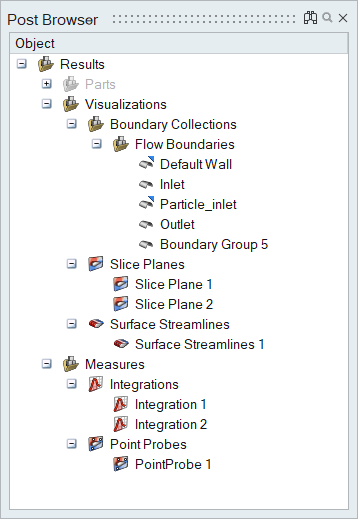
Figure 3.
Find and Search for Entities
The search bar can be used to find and filter entities in a browser.
-
Enter a string in the browser search bar.

Figure 4.Entering this string Returns this result shell All entities/parameters that contain shell in their name. "shell" All entities/parameters with the name shell. -
Press Enter or click
 to execute the search.
- In the Post Browser, click
 to find entities without filtering the list.
Click
to find entities without filtering the list.
Click  to search and filter. Use the icons besides the
search search bar to navigate results and
define options.
to search and filter. Use the icons besides the
search search bar to navigate results and
define options. - Click
 on the right side of the search bar to view recent searches.