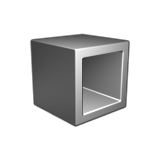
Shelling
Create a hollowed-out shell from one or more solid objects.
This tool removes one or more faces and thickens the remaining faces.
- On the ribbon, click the Modify tab.
-
Click the Shelling icon.

- Click the face, and then drag the arrow to set the thickness.
- Optional: To modify the shell thickness, in the guide bar, enter a Global thickness.
- Optional: To invert the shelling direction, in the guide bar, click the invert icon.
- Optional:
To round the edges of the shelling object, in the control panel, click
Rounded Corners
Note: Concave vertices are not rounded.
- Optional:
To set a custom thickness on a face or multiple faces, in the guide bar, click
Custom Mode, and then do the following:
- Tangent and single selection.
- Click a face, and then enter a Custom value for
the thickness.Tip: To select multiple faces, hold down Ctrl while clicking.
- To edit all faces with the same thickness, click a face, and then click Select all custom with same value.
- Select all custom faces with same value.
- To reset a custom face, click the face, and then click Custom face(s).
- To reset all changes, in the control panel, click Reset to Global Thickness.
- Right-click and mouse through the check mark to exit, or double-right-click.