Create and Edit Layer Filters
Note: By default the filter is set to
None.
-
From the panel, click on the Filter drop-down menu (the downward arrow next to
the icon) and select Create/Edit.

Figure 1.The Create/Edit Layer Filters dialog is displayed which lists all pre-defined filters available for editing and their status. The Layers list (located on the right side of the dialog) will display the layers associated with the data type selected in the panel.Note: If no filter has been previously defined, the dialog will be blank.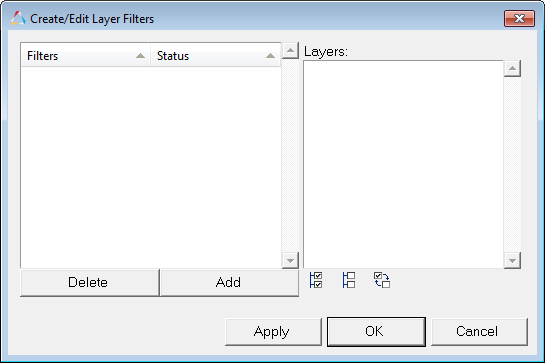
Figure 2. -
Click Add to create a customized filter by selecting (or
deselecting) the check boxes for the layers available in the Layers list.
Important: A minimum of one layer must be selected in order for the filter to be considered valid.
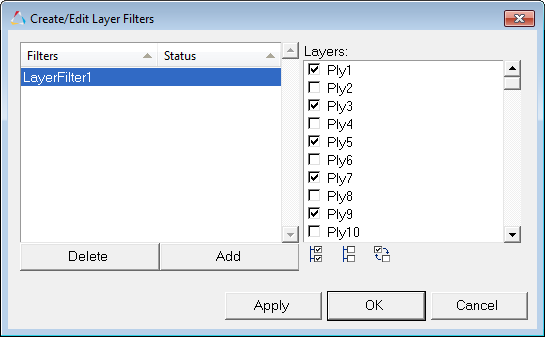
Figure 3.If any of the filters do not have at least one layer/ply selected from the list, then Undefined will be displayed in the Status column (next to the filter name). A warning message will appear if you attempt to close the dialog with undefined filters displayed in the list.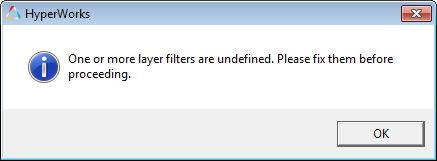
Figure 4.If only one layer is selected, the Contour and Iso panels will only show that layer without any aggregation modes of Min/Max/Extreme/Sum/Average/Range.If multiple filters are defined, clicking on each filter name in the Filters list will display the layers selected for that filter. -
After you are done creating or editing a filter select one of the following
options:
Option Description Apply Apply the layer filter changes. OK Apply the changes and exit the Create/Edit Layer Filter dialog. Cancel Disregard the changes and exit the dialog. When a filter is applied, the options listed in the Layers drop-down menu in the panel is reduced to whatever layers have been selected for the filter.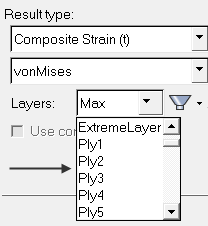
Figure 5. Full list - no filter applied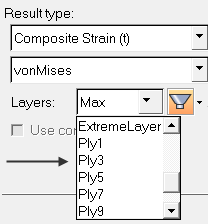
Figure 6. Reduced list - after filter is appliedNote: Orange highlighting around the filter icon in the panel shows that a filter is applied/turned on.