HV-2040: Creating Sets (Groups)

In this tutorial, you will learn how to create a set (group) of components, import and export created sets, and view the components of a set.

This exercise uses the d3plot file located in the animation\truck folder as both the model and the results file.
To access the Sets panel, click the Sets panel button on the Visualization toolbar.


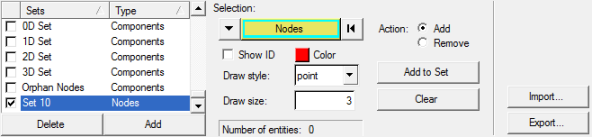
Figure 1. Mask Panel

The Sets panel allows you to create sets (groups) of components, elements, or nodes from the active model that is displayed.

Create and Export a Set (Group) of Components

  1. Load the d3plot file, located in the animation\truck folder.
  2. From the Model menu, select Create > Sets to create a new set.
    A new set is created using the Entity Editor in the Results Browser.
  3. Under the Standard section in the Entity Editor, click in the Label field and enter truck 1.
  4. Click in the Entity IDs field and make sure that the selector is set to Components.
  5. In the graphics area, pick the truck bed and the rear tire of the model.
  6. Under the Display section in the Entity Editor, click on the icon next to Color and select any new color.
  7. Right-click in the Results Browser and select Create > Set from the context menu to create a new set.
  8. In the Label field, enter truck 2.
  9. Click in the Entity IDs field and then pick the side door and the roof of the truck in the graphics area.
  10. Change the color of the set using the Color field in the Entity Editor.
  11. Under the Display section in the Entity Editor, change the Draw Style to shaded.

Export a Created Set

  1. In order to export a set, enter the Set panel by selecting the Sets icon from the toolbar.
  2. Select the truck2 set in the Sets list.
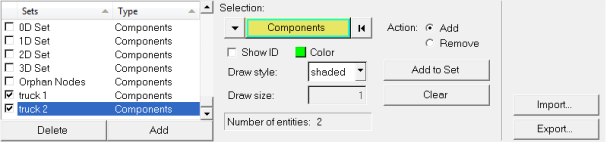

    Figure 2.
  3. Click Export, to export the created sets (groups).
    The Export Sets dialog is displayed.
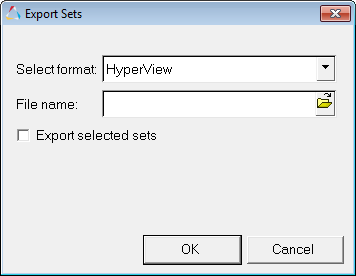

    Figure 3.
  4. Verify that Select format is set to HyperView.
  5. Click on the file browser icon .
  6. Enter groups.txt as the file name.
  7. Click Save.
  8. Click OK to close the Export Sets dialog.

Import a Created Set

  1. From the File Menu, select New > Session to start a new HyperView session.
    Answer Yes to the question "This operation will discard all current session file data. Continue with new session?".
  2. Load the d3plot results file from the truck folder.
  3. Go to the Set panel.
  4. Click Import, to import a saved set.
  5. Verify that Select format is set to HyperView.
  6. Click on the file browser icon .
  7. Select the groups.txt file.
  8. Click Open.
  9. Click OK to import the selected file and close the Import Sets dialog.
    Observe that both the truck 1 and truck 2 sets (groups) are imported.

    Activating either of the check boxes will display the components, feature lines, and colors of each set (group) on the screen accordingly.

Viewing the components in a Set (Group) from the Results Browser

  1. From the Results Browser, right-click on the Components folder and select Hide.
  2. Expand the Sets folder.
  3. Right-click on the truck 1 set and select Show.
  4. Right-click on the truck 2 set and select Show.
    The truck 1 and truck 2 imported sets are now displayed.


    Figure 4.