In this tutorial, you will learn how to use the animation controls and the
synchronized view utility.
This exercise uses the file truck.key
and the corresponding d3plot located in the
animation\truck folder.
The 3D View Controls and Standard Views toolbars allow you to visually manipulate
model graphics, plots, and videos. The toolbars can be docked in the window or they
can be undocked and placed anywhere on the screen. The synchronized view option on
the Page Control toolbar allows you to view the model in multiple windows
synchronically.
Figure 1. 3D View Controls Toolbar Figure 2. Standard View Controls Toolbar
See the Toolbars topic
for additional information.
Use the View Controls
Load the model file truck.key and the corresponding
results file d3plot, located in the
animation\truck folder.
Change the angle of rotation in the Standard Views toolbar by clicking on the
Preferences menu and selecting
Options.
The Options dialog is displayed.
Click the Visualization option on the tree (located on
the left side of the dialog).
Figure 3.
Change the Rotation angle from its default value of 15
degrees to 30 degrees by changing the value in the text
box.
Click OK to close the dialog.
Click the Rotate Left/Right icon and the Rotate
Up/Down icon on the 3D View Controls toolbar,
to rotate the model about the horizontal and vertical axis, respectively. The
left and right mouse buttons are used to control the direction.
Click the Rotate Clockwise/Counter Clockwise icon , to rotate the model about the
axis perpendicular to the plane of the screen. Clicking the left mouse button
rotates the model clockwise, while clicking the right mouse button rotates the
model counter-clockwise.
Click the Zoom In/Out icon , to zoom in and out. Clicking the left mouse button
zooms in and clicking the right mouse button zooms out.
Use the Fit Model/All Frames button on the Standard Views toolbar to
fit the model to the window.
Note: You can also use the keyboard shortcut (press the
‘F’ key on the keyboard) to fit the model to the
window.
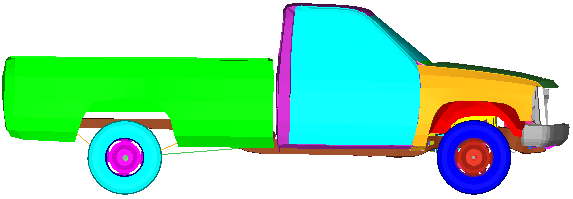
Click the XZ Left Plane View icon to view the model in the Left
view.
Figure 4.
Click the Start/Pause Animation button on the Animation toolbar to
animate the model.
Note that some parts/components of the animation are outside the window
graphics area.
Right-click on the Fit Model/All Frames icon to place all the animation
frames within the window frame.
Click the Start/Pause Animation button to stop the animation.
Right-click in the Results Browser
and click Create > View to save the current view.
Click the Isometric View icon on the Standard Views toolbar to
change the view to Iso.
Click the icon next to View 1 in the Results Browser to retrieve/view the saved view.
Change the Window Layout and Load Files
Click the arrow next to the Page Window Layout button on the Page Controls toolbar,
and select the two window layout .
Activate the new window.
Load the truck.key and d3plot files
in the new window.
Change the View in Multiple Windows Simultaneously Using
Synchronize View
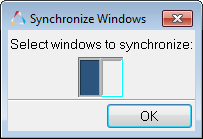
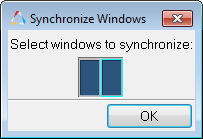
Click the Synchronize Windows icon on the Page Controls toolbar to
open the Synchronize Windows dialog.
Figure 5.
The two windows have the same background color as the windows in the
graphic area, indicating that they are synchronized.
Click OK to close the dialog.
Click the YZ Front Plane View icon to display the front view for
the two windows.
Click the Isometric View icon and change the view by using the
left and right mouse buttons to click the Zoom In/Out
icon .
You can also use the mouse graphic controls to rotate, zoom, and pan both
models while in the synchronized view mode:
Press the Ctrl key on the keyboard and click and
move the left mouse button to rotate the model.
Press the Ctrl key on the keyboard and click and
move the middle mouse button/scroll wheel to zoom into an area of the
model.
Press the Ctrl key on the keyboard and click and
move the right mouse button to pan/move the model.
Stop the synchronization of the windows by clicking on the active
Synchronize Windows icon .
Click the Synchronize Windows icon again to open the
Synchronize Windows dialog.
Click the second window in the dialog to exclude window 2 from
synchronization.
Figure 6.
Click OK to close the dialog and activate the view
synchronization option.
Click the various rotate icons to rotate the models.
Click the Synchronize Windows icon to stop the view
synchronization.
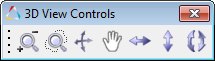

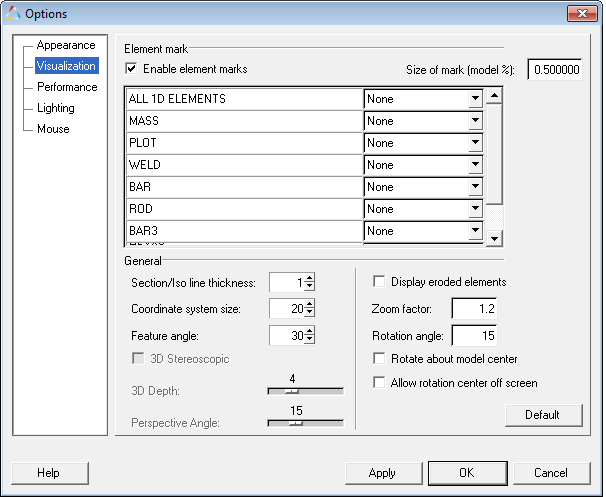 Figure 3.
  and the Rotate
Up/Down icon
and the Rotate
Up/Down icon  on the 3D View Controls toolbar,
to rotate the model about the horizontal and vertical axis, respectively. The
left and right mouse buttons are used to control the direction.
on the 3D View Controls toolbar,
to rotate the model about the horizontal and vertical axis, respectively. The
left and right mouse buttons are used to control the direction.
 , to rotate the model about the
axis perpendicular to the plane of the screen. Clicking the left mouse button
rotates the model clockwise, while clicking the right mouse button rotates the
model counter-clockwise.
, to rotate the model about the
axis perpendicular to the plane of the screen. Clicking the left mouse button
rotates the model clockwise, while clicking the right mouse button rotates the
model counter-clockwise.
 , to zoom in and out. Clicking the left mouse button
zooms in and clicking the right mouse button zooms out.
, to zoom in and out. Clicking the left mouse button
zooms in and clicking the right mouse button zooms out.
 on the Standard Views toolbar to
fit the model to the window.
Note: You can also use the keyboard shortcut (press the ‘F’ key on the keyboard) to fit the model to the window.
on the Standard Views toolbar to
fit the model to the window.
Note: You can also use the keyboard shortcut (press the ‘F’ key on the keyboard) to fit the model to the window. to view the model in the Left
view.
to view the model in the Left
view.
 on the Animation toolbar to
animate the model.
Note that some parts/components of the animation are outside the window graphics area.
on the Animation toolbar to
animate the model.
Note that some parts/components of the animation are outside the window graphics area. to stop the animation.
 on the Standard Views toolbar to
change the view to Iso.
on the Standard Views toolbar to
change the view to Iso.
 next to View 1 in the Results Browser to retrieve/view the saved view.
 on the Page Controls toolbar,
and select the two window layout
on the Page Controls toolbar,
and select the two window layout  .
.
 on the Page Controls toolbar to
open the Synchronize Windows dialog.
on the Page Controls toolbar to
open the Synchronize Windows dialog.
 to display the front view for
the two windows.
to display the front view for
the two windows.
 .
.