Load Cases
A load case is a set of loads and supports, displacements, accelerations, and temperatures that act on a model at one time.
Before running an analysis or optimization, you need to define at least one load case for your model. You may also want to create multiple load cases with different loads and displacements to understand how this impacts the results of an analysis or optimization.
A model can experience different load cases at different times; for example, consider a building that is subjected to gusts of wind. At one moment the wind pressure on the side of a building may come from the east, and the next moment it may change and come from the west. If you want to create a building that will resist wind blowing from either east or west, you would create two different load cases: the first containing a pressure from the east direction, and the second with a pressure from the west direction. This allows you to generate one shape that is optimized to handle any number of different load cases.
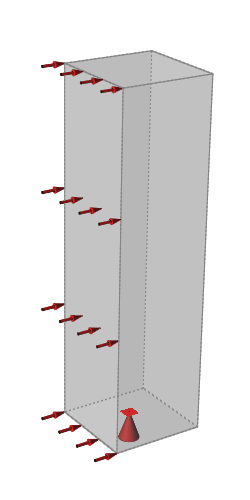 Figure 1. Load Case 1: West Wind and Ground Support
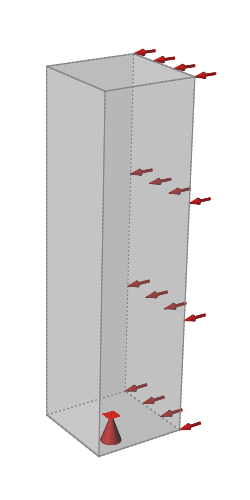 Figure 2. Load Case 2: East Wind and Ground Support
Load Cases Table
The Load Cases table allows you to quickly review and assign loads to load cases. You can also create new load cases, edit loads, and import or export loads to a .csv file.
Click the ![]() satellite icon that appears when you hover over the Loads,
Disps, Accels, or Temp icons on the Structure ribbon to display the Load Cases
table.
satellite icon that appears when you hover over the Loads,
Disps, Accels, or Temp icons on the Structure ribbon to display the Load Cases
table.
Summary Tab
Use the Summary tab on the Load Cases table to:
- Include or exclude loads and constraints from load cases using the blue check icons
- View and compare specific load cases
- Import loads and constraints in a fixed comma separated format
- Export loads and constraints to a fixed comma separated format
- Create new load cases
- Rename load cases using the context menu
- Delete load cases using the context menu
- Show or hide loads and constraints using the context menu
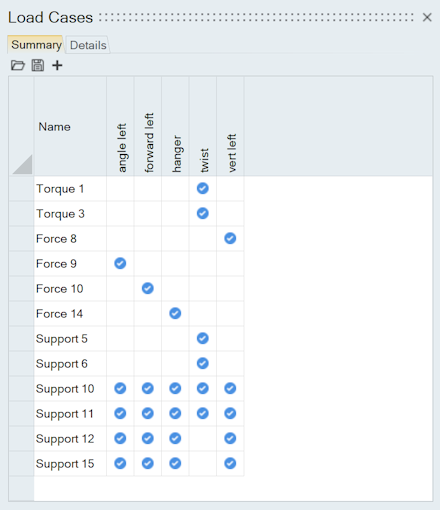 Figure 3. Load Cases Table: Summary Tab
Details Tab
Use the Details tab on the Load Cases table to:
- Import loads and constraints in a fixed comma separated format
- Export loads and constraints to a fixed comma separated format
- Create new load cases
- Filter loads and constraints by type using the toolbar icons
- Filter data from each column using the column filter
- Edit loads and constraints in the table
- Include or exclude loads and constraints from load cases using the context menu
- Rename load cases using the context menu
- Delete load cases using the context menu
- Show or hide loads and constraints using the context menu
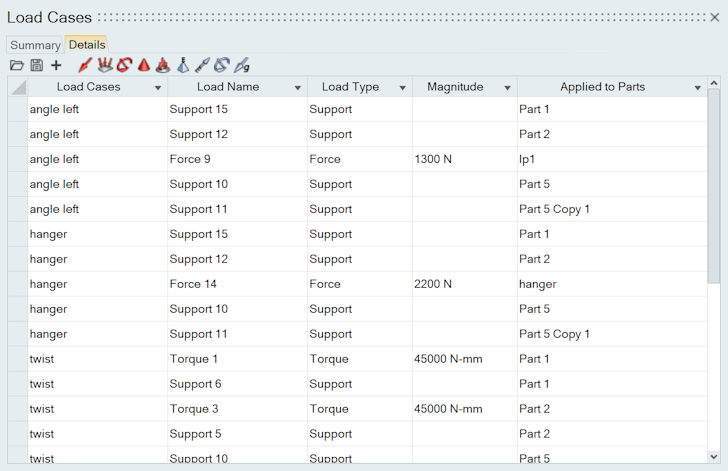 Figure 4. Load Cases Table: Details Tab
Create and Configure Load Cases
Use the Summary tab on the Load Cases table to assign loads to load cases.
-
Click the
 satellite icon that appears when you hover over the Loads, Disps, Accels, or
Temp icons on the Structure ribbon to display the Load Cases table.
satellite icon that appears when you hover over the Loads, Disps, Accels, or
Temp icons on the Structure ribbon to display the Load Cases table.
- Select a table cell on the Summary tab to toggle a load on or off for a specific load case. Loads are shown in rows; load cases in columns.
- To create a new load case, click the + icon, or right-click on a column header to open the context menu and select New Load Case. You can also use the context menu to show or hide which load cases are visible.
Import or Export Loads, Point Parts, or Coordinate Systems
Use the Load Cases table to import and export loads to a .csv file.
When importing loads, we recommend modifying a sample .csv file rather than creating one from scratch. In a text editor, open the Load Table Import.csv file in the Tutorials folder in the installation directory, then edit the file as needed to define your loads, point parts, or coordinate systems.
-
Click the
satellite icon that appears when you hover over the Loads, Disps, Accels, or
Temp icons on the Structure ribbon to display the Load Cases table.
-
Select whether to import or export.
- Click the
 icon to import loads.
 - Click the
 icon to export loads.
- Click the
-
When importing loads, the data must be in .csv format with the following column headings: Load Cases, Load Name, Load Type, Magnitude, Fx\Mx\Tx, Fy\My\Ty, Fz\Mz\Tz, Dx\Rx, Dy\Ry, Dz\Rz, Position X, Position Y, Position Z, Applied To, Applied to Parts, Scale Factor, Additional Positions.
It is fine to leave cells in the table blank if you do not have data for that column.
- Be sure to use valid units in the .csv file when importing loads.
- If the header row of the csv file has valid units, these units will be preserved on import.
- If the header row has no units, the current display units will be applied on import.
- If the header row has invalid units, you will be given the option to convert the units in the .csv file to the current display units on import.
- If a cell has a valid unit, this unit will be preserved on import.
- If a cell has an invalid unit, this unit will be ignored and the units for the column header used instead.
Sort and Filter Loads
Use the filter icons on the Details tab in the Load Cases table to show only loads of a specific type.
Figure 5. Load Cases Table: Filter Icons

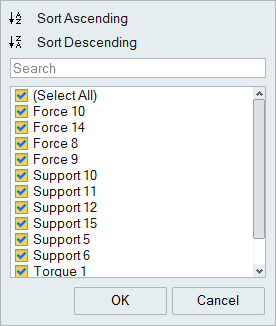
Figure 6. Load Cases Table: Sort and Search
Review and Edit Loads
Use the Details tab on the Load Cases table to review and edit loads.
| To | Do this |
|---|---|
| Rename a load or load case | Double-click the load or load case in the table to make the field editable. |
| Change the magnitude of a load | Double-click the magnitude in the table to make the field editable. |
| Delete a load | Right-click the load in the table and select Delete from the context menu. Load cases can only be deleted using the Model Browser. |
| Sort a column | Click the column header. Click repeatedly to toggle between ascending and descending order. |
| Show or hide columns | Right-click on a column header and select which columns to show from the context menu. |
| Reorder columns | Click and drag a column header to reorder the columns. |
| Insert rows | Right-click a row in the table to open the context menu, and select Insert Row Above or Insert Row Below. |
| Select all table data | Click the  icon in the upper left corner of the
table. icon in the upper left corner of the
table. |