3D images planes are primarily used for displaying static
images and videos in the 3D model space. The embedded image planes are scaled and
positioned with respect to the model dimensions. Multiple 3D image planes (each
containing a static image or video) can exist simultaneously to correspond with various
view and orientations of the model and the media.
From the Image/Video tools, click the Align tool.
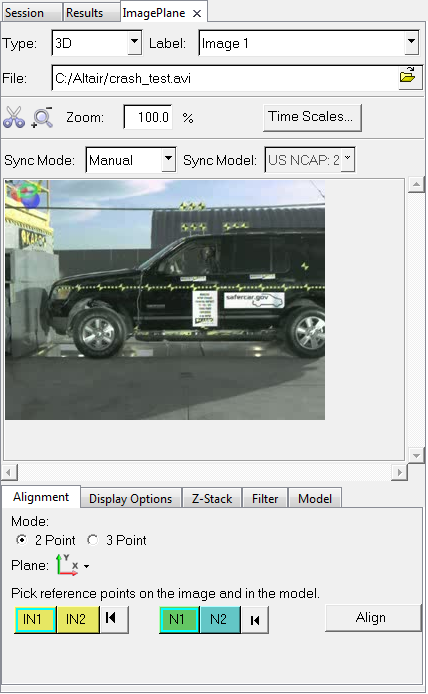
Figure 1.
Tip: Image planes can also be created using the context menu in the
Results Browser.
The Image Plane tab is displayed. Figure 2.
Select the 3D option from the Type drop-down menu.
Optional: Change the name of the default label by clicking in the
Label field and entering in a new label.
The label is a convenient way of referring to an image plane on which the
media is projected (for example, "Foreground Image"). Use the drop-down menu to
switch between the various image planes and select one for viewing.
Tip: Labels can also be updated using the Rename option on the
Results Browser context menu.
Browser to select an image or video file. The full path and file names are
displayed.
Clicking Open will add the selected image/video to both
the Image Plane tab viewing area and the modeling window.
Tip: Scroll bars are automatically available when the media is
larger than the viewing area. The viewing area tab width can also be
adjusted for clarity when reviewing original images.
As each image plane loads a single static image or video, any data can be
displayed and replaced with another media file on a given image plane.
The following image and video files are currently supported:
Altair Movie File (*.amf), created using the AMF Builder. This is a
modified AVI file with timing information embedded in the file.
Windows Media (*.wmv)
MPEG Video (*.mpg)
Windows AVI File (*.avi). One frame equals one second by default. UNIX
supports AVI's that are uncompressed or compressed with CINEPAK or
MJPEG.
PNG (*.png)
Bitmap (*.bmp, *.dib)
JPEG (*.jpg, *.jpeg)
Animated GIF (*.gif)
Tagged Image File Format (*.tif, *.tiff)
Tip: An Image Planes folder will be added to the Results Browser tree structure once a file is
loaded.
Optional: Resize the width of the Image Plane tab to adjust for the image/video
resolution, by clicking on the vertical line which separates the tab from the
graphic display area and dragging and releasing the mouse button when the width
is the desired size.
Use the various sub-tabs to align the image plane, adjust display options,
control the stacking order, apply various image processing filters, and tie an
image to a model.
Note: The sub-tabs available at the bottom of the tab/panel are dependent on the
type of Image Plane selected.
Restriction: The Z-Stack tab does not apply to 3D image planes,
however it does allow you to reorder any 2D images planes to display in the
foreground or background of the graphics area.
Click Close to apply changes and exit the tab.
Tip: Right-click on an image plane within the Results Browser and select Edit in
order to display the Image Plane tab again for editing purposes.
Note: The graphical manipulator is linked to the Image Plane tab, therefore the
display of the graphical manipulator is turned off whenever the tab is
closed. See "Show Manipulator" for additional details regarding turning on
the display of the graphical manipulator.