Create the Seatbelt Mesh
In this step you will create a seatbelt mesh.
-
Select the root of the SeatbeltSystem to activate the Entity Editor.
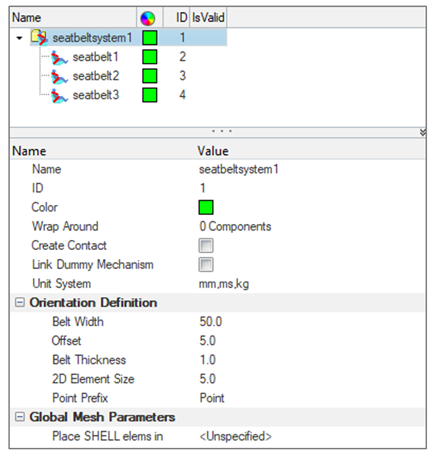
Figure 1. -
In the Entity Editor:
-
Select the Wrap Around Components as shown in
the following image.
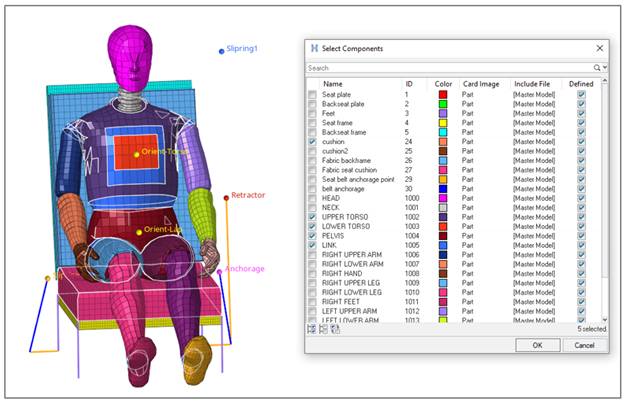
Figure 2.
-
Select the Wrap Around Components as shown in
the following image.
-
In the Entity Editor for seatbelt1:
-
Activate the nodes selector and select the two nodes defined by the
tags "Retractor" and "Slipring1" to define the belt path of
seatbelt1.
The seatbelt1 1D mesh is automatically generated.
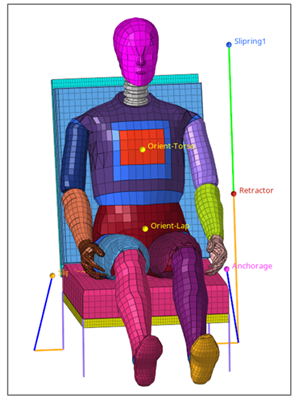
Figure 3.
-
Activate the nodes selector and select the two nodes defined by the
tags "Retractor" and "Slipring1" to define the belt path of
seatbelt1.
-
In the Entity Editor for seatbelt2:
-
Activate the nodes selector and select the three nodes defined by the
tags "Slipring1," "Orient-Torso," and "Slipring2" to define the belt
path of seatbelt2.
The seatbelt2 mesh is automatically generated.
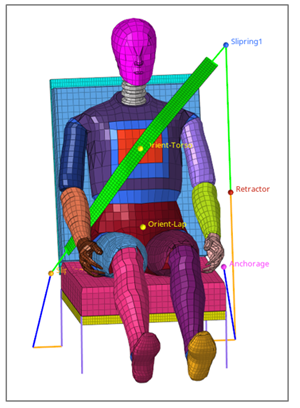
Figure 4.
-
Activate the nodes selector and select the three nodes defined by the
tags "Slipring1," "Orient-Torso," and "Slipring2" to define the belt
path of seatbelt2.
-
Repeat Step 8 for seatbelt3 by selecting nodes defined by "Slipring2,"
"Orient-Lap," and "Anchorage."
The seatbelt3 mesh is automatically generated.
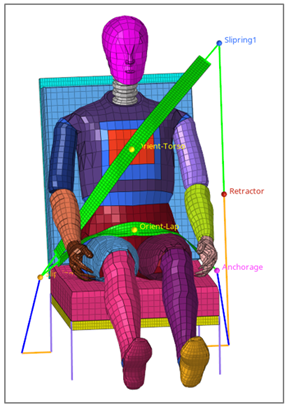
Figure 5.