Reduce 3D to 1D using Planar Symmetry
Planar symmetry is similar to linear symmetry accept that it reduces two dimensions instead of one. This enables you to morph your model along a single axis with only two or more handles.
- From the Tools page, click HyperMorph.
- Click Systems.
- Create a system with the x-axis pointing along the dimension to be retained.
- Click return to go to the HyperMorph module.
- Click Symmetry.
- Select the create subpanel.
- In the name field, enter a name.
- Select the global domain icon.
- Switch the selector from linear to planar.
- Select the system you created.
- Select the x-axis as the axis to align the symmetry.
- Click create.
- Click return to go to the HyperMorph module.
- Click Symmetry.
- Select the update by domain subpanel.
- Select the global domain.
- Select the planar symmetry.
- Click update.
A planar symmetry is created and the other two symmetries from the global domain are removed. You are allowed to have any number of symmetries associated with a domain and all will apply, but combining linear and planar symmetry in the same direction results in an unrealistic situation and poor influence calculations.

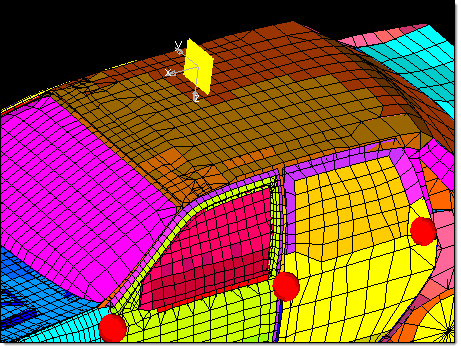
Figure 1. System and Planar symmetry. The planar symmetry icon is a plane perpendicular to the system x-axis. Note that the placement of a planar symmetry system does not matter, the effect of the planar symmetry system is determined only by the direction of the x-axis.

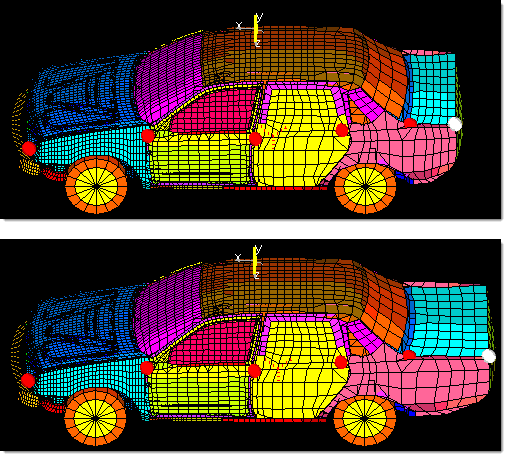
Figure 2. Using Planar Symmetry. The handle at the rear of the model is selected and the entire trunk of the car is morphed. With planar symmetry you only need a row of handles lying roughly along the planar symmetry system x-axis.