Use a set of tool surfaces to split a set of target surfaces. You can choose which
side to keep or keep both sides.
-
On the ribbon, click the Modify tab.
-
Click the Split icon.
-
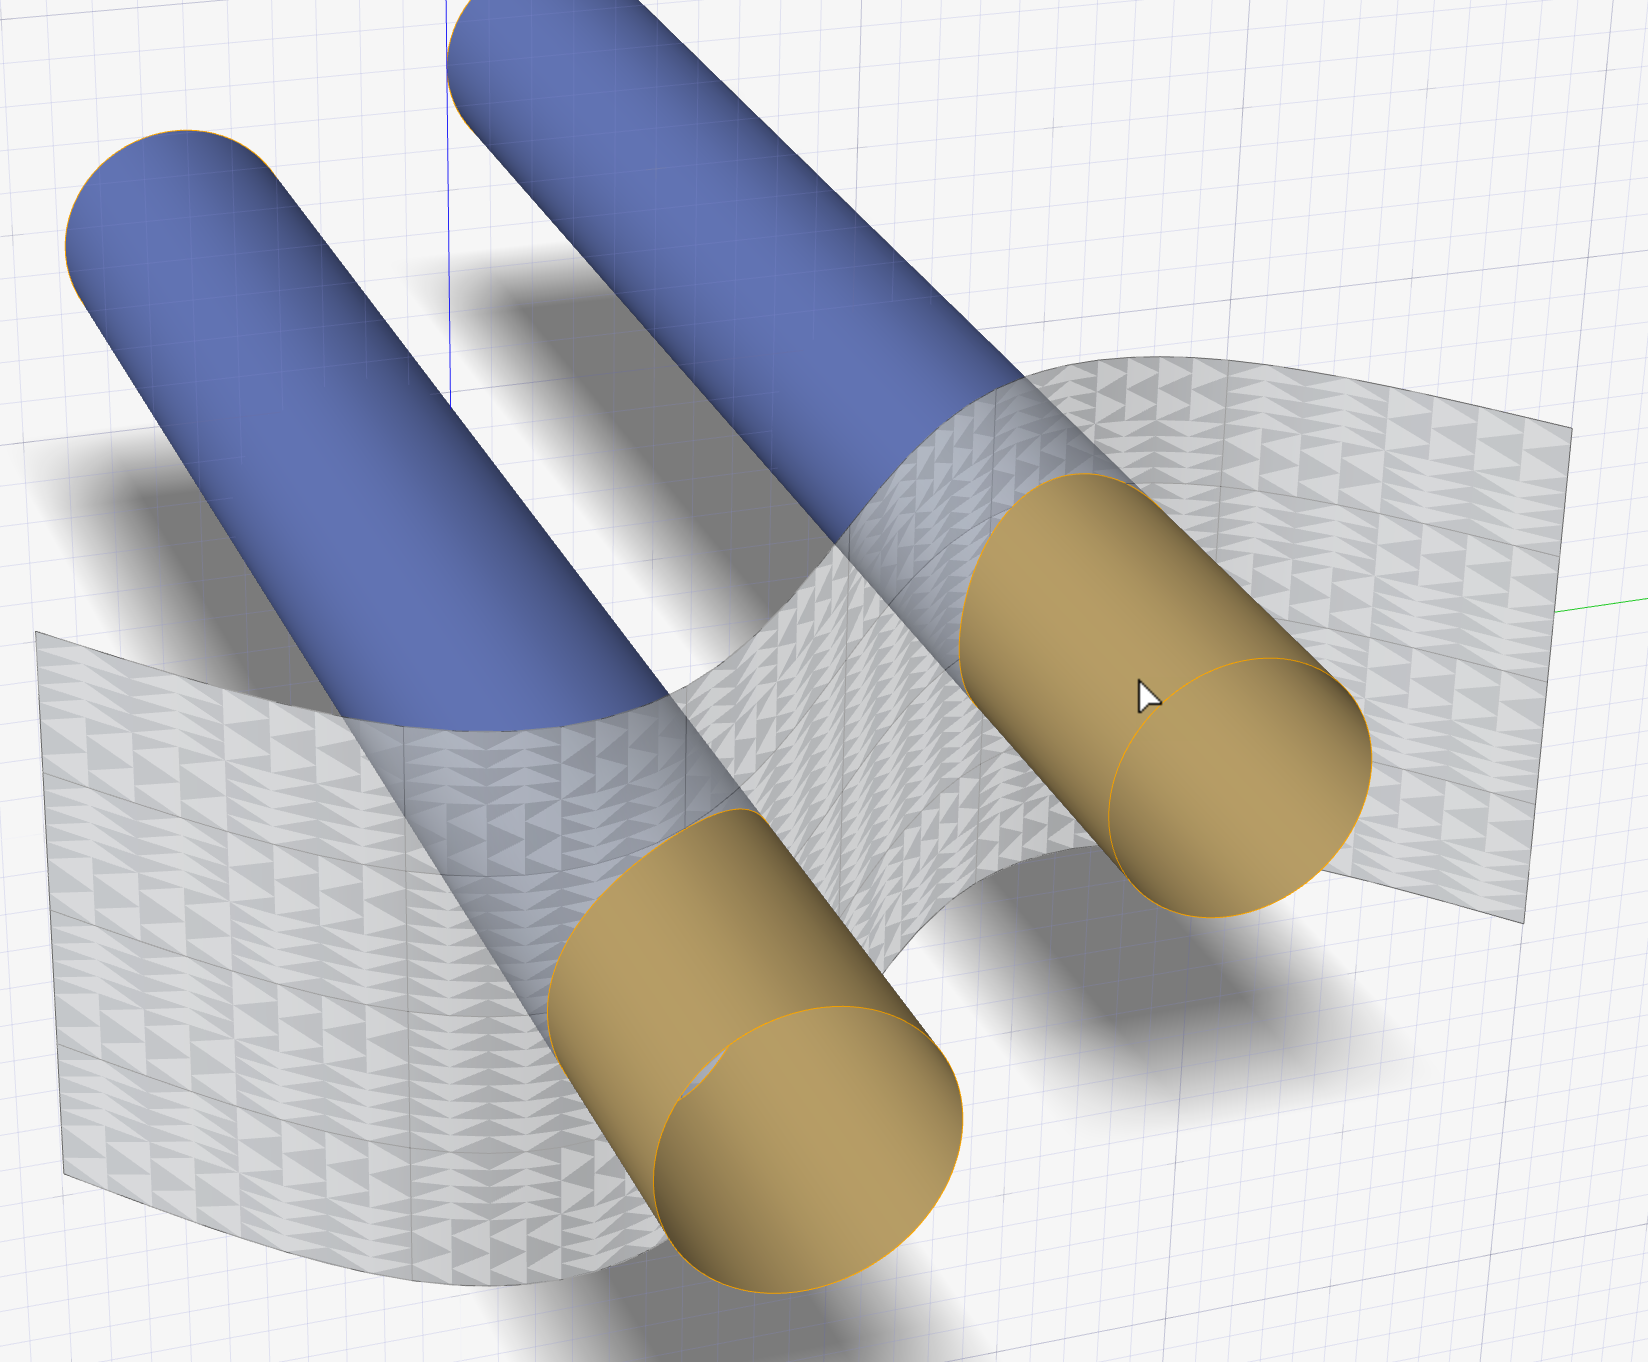
Define the target surfaces, which are the surfaces that will be split.
- Click the target surfaces, and then right-click to confirm.
-
Define the tool surfaces, which are used to trim the target surfaces.
- In the guide bar, click Tools.
- Click the tool surfaces, and then right-click to confirm.
The split surfaces are displayed in two colors, blue and ochre, to
indicate the new distinct parts.
-
Edit the split surfaces:
| To |
Do this |
| Remove/keep sides |
- Hover the mouse cursor over the side you'd like to
remove.
- When one of the following tooltips is displayed,
click to remove the side.
- Remove this region...(Keep
Front)
- Remove this region...(Keep
Back)
Alternatively, in the guide bar, select from:
- Keep Front
- Keep Back
- Keep Both
|
| Make the result solid or hollow |
By default, in the guide bar, Solid
Result is selected. To make the result a
hollow surface, deselect Solid
Result. |
-
Right-click and mouse through the check mark to exit, or double-right-click.