HM-3450: Multi-Component Replacement
In this tutorial, you will learn how to simultaneously replace multiple components in your current model using the Part Replacement tool. You will be replacing six related components (bumper, front frame, and radiator frame) in the Pr_Inc.k include file with components that contain a finer mesh.
This exercise uses the files located in the hm-3450 folder, which can be found in the
hm.zip file. Copy the file(s) from this directory to your working
directory.
Load the User Profile
In this step you will load the LS-DYNA user profile.
- Start HyperMesh Desktop.
- In the User Profile dialog, select LS-DYNA.
- Click OK.
Import the Solver Deck File
In this step you will import the solver deck file.
- Open the Import - Solver Deck tab by clicking from the menu bar.
- In the File field, open the Master.k file.
- Click Import.
Replace Parts
In this step, you will replace parts in the Pr_inc.k include file.
-
In the Model Browser, right-click on the
Pr_Inc.k include file and select Replace
Manual from the context menu.
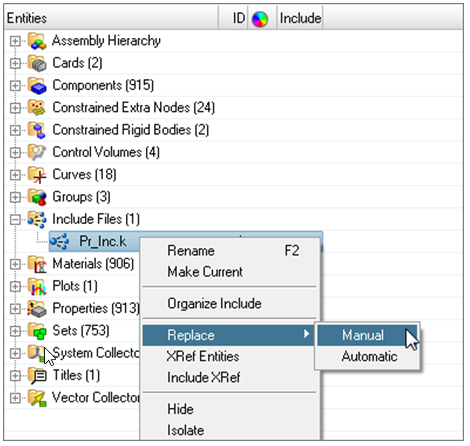
Figure 1.The Part-Replace dialog opens.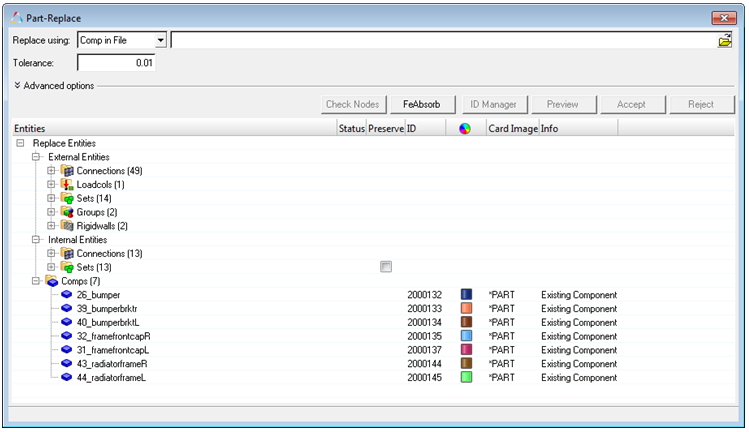
Figure 2. -
Set the Replace using field to Comp in File, then open
the Incoming_idclash.k file, which contains the target,
replacement parts.

Figure 3. -
In the Component Pairing dialog, check the component
pairing.
-
Click OK.
Note: When performing Manual part replacement, you have the flexibility to modify the component pairing using add/remove pairing option in component pairing window; whereas, when performing Automatic part replacement, you cannot modify component pairing.
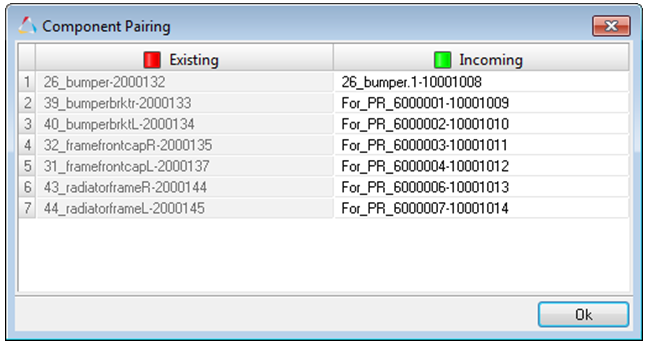
Figure 4.
-
Click OK.
-
In the Entities Selection dialog, specify replacement
methods for incoming/existing entities and click OK.
External entities are shared with other components, along with the selected components that are being replaced, for example sets, groups and output blocks. Internal entities are specific to the components being replaced, for example sets, groups and output blocks.
- Accept incoming entities (existing entities deleted) deletes all of the internal entities on accept.
- Accept existing entities (Incoming entities deleted) deletes all of the incoming entities on accept.
- Merge existing and incoming entities (no entities deleted) retains both existing and incoming entities on accept.
Note: When performing Automatic part replacement, HyperMesh automatically selects the Accept incoming entities (existing entities deleted) method.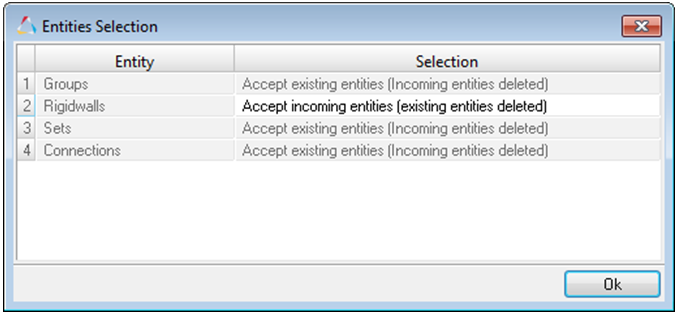
Figure 5. -
Check the status of each entity.
Note: All internal entities are deleted and all external entities are updated.
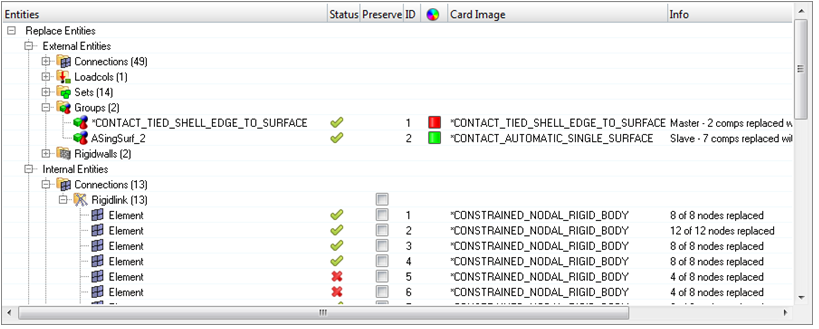
Figure 6.
Review ID Ranges
In this step you will review ID ranges.
- Click ID Manager to invoke the ID-Manager from which you can review existing ID ranges defined for the components.
- Modify ID ranges as needed.
- Click Close.
Run the Model Checker Post Part Replacement
In this step you will run the model checker post part replacement.
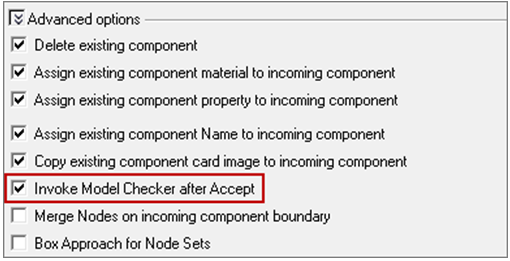
Figure 7.
Accept Part Replacement Changes
In this step you will accept the part replacement changes.