Learn how to apply the die compensation feature to your model to counter the springback
effect after forming.
Open the Model
The model data you import includes the simulation results
from a single action and springback operation.
From the File menu, select Open.
In the Open File dialog, navigate to the file
in the tutorials folder in the
installation directory in Program Files\Altair\2021.2.1\InspireForm2021.2.1\tutorials\SRAIL_Springback_compensation1.iform.
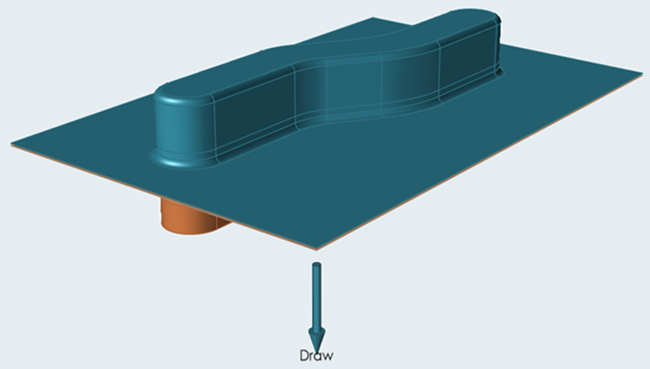
The model should look something like this:
Review the Model Setup and Results
The model for this tutorial includes results for a
single-action and springback analysis.
On the Tryout ribbon, click the Show Analysis Results icon.
The Anaylsis Explorer appears with the results for the run
s-rail_ext12mm.
For Run, keep the current run; for Operation, select
Springback; and for Result Type, select
Displacement.
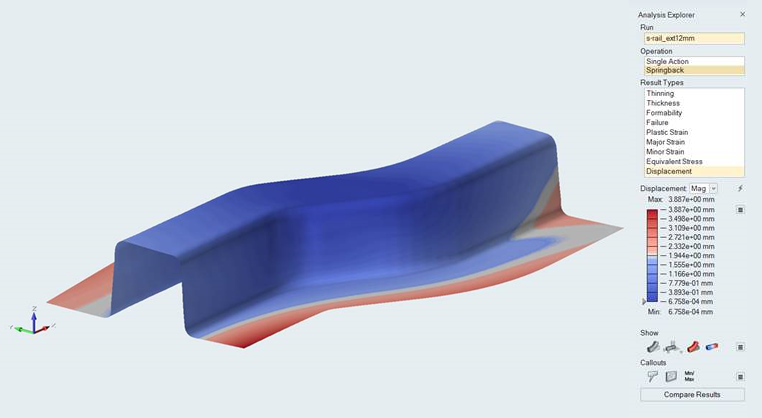
Review the values for Displacement. Notice that the maximum value before
compensation is 3.887e+00 mm.
Redesign the Die
From the Tryout Ribbon, Redesign tools, click the
Compensate icon.
A guide bar appears indicating the workflow of the compensation process
which includes selecting a Reference Part, selecting up
to three Fixture Points, and running the
Compensate operation.
For this tutorial, you do not have to select a reference part. By default, if
you do not select a reference part, the die of the preceding forming operation
is selected automatically.
On the model, select three fixture points as indicated in the following image.
The placement can be approximate.
The fixture points restrict changing the model at the specified points
during the compensation process.
On the guide bar, select the Replace Tools box, then
click the Compensate button.
The Compensation operation generates a new die that compensates for the
known springback in the formed shape. The Replace Tools option automatically
replaces the existing tools with the new compensated tools.
Note:
The Die Compensation process may take several minutes to
complete.
The replaced tools are displayed in the closed position.
The original die is still present in the tool set, but is
hidden.
To view the original die, select View > Model Configuration.
The original tools are shown in gray on the tree.
Position the Die Set
On the ribbon, hover over single action draw operation.
Click the Edit Position arrow.
In the first field of the guide bar, choose Open.
The software automatically positions the tools to their open
state.
To preview the forming action of the current tool set, on the Single Action
icon, click Edit Action.
An animation of the forming operation is generated for the
model.
Run the Analysis with Compensated Tools
From the Tryout tab, Run tools, click Run Analysis .
In the Run Analysis dialog, type in the name
SRAIL_Springback_compensated2.
Click Run.
Note: Expect the analysis to run up to 10 minutes.
Review the Results of the Compensated Tools
On the Tryout tab, Analyze icon, click Show Analysis
Results.
The Analysis Explorer dialog opens.
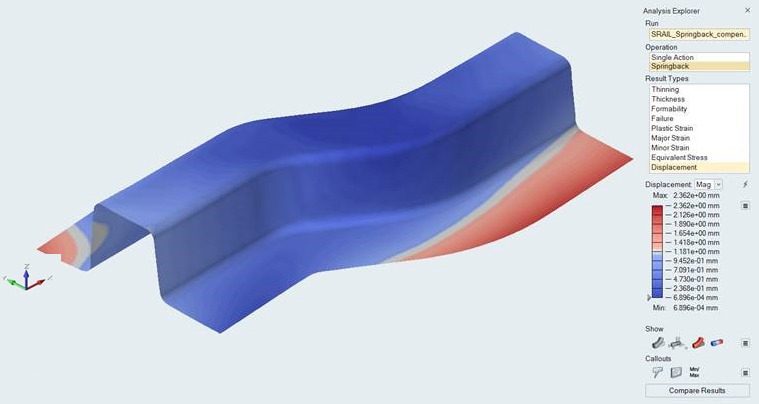
For run, select SRAIL_Springback_compensation2.
For operation, select Springback.
For Result Type, select Displacement and review the
results.
Repeat the steps for the run
SRAIL_Springback_compensation and compare to
SRAIL_Springback_compensation2. Notice the correction
for springback in the displacement values.
Figure 1. Displacement for Springback Before Compensation
Figure 2. Displacement for Springback after Compensation
 The Anaylsis Explorer appears with the results for the run s-rail_ext12mm.
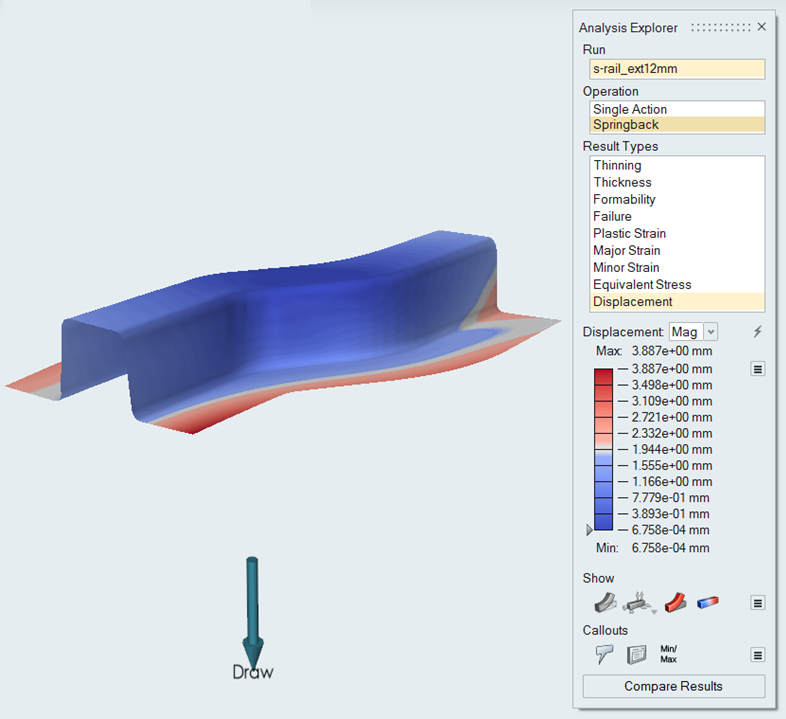
 A guide bar appears indicating the workflow of the compensation process which includes selecting a Reference Part, selecting up to three Fixture Points, and running the Compensate operation.
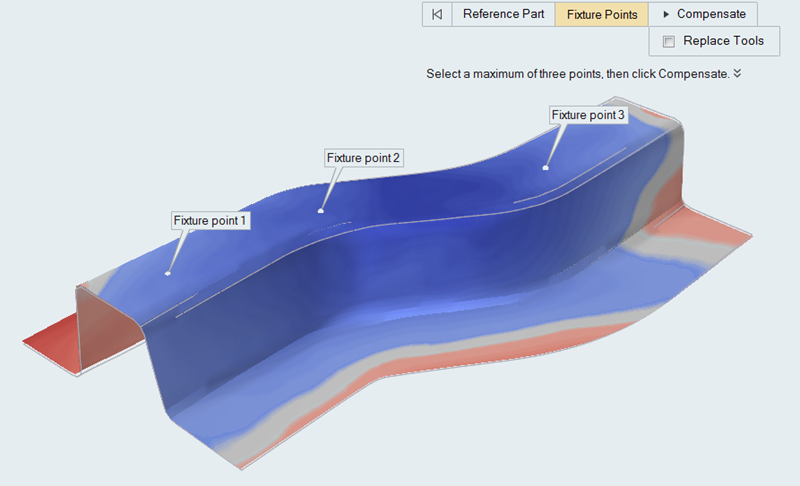
 Note:
Note: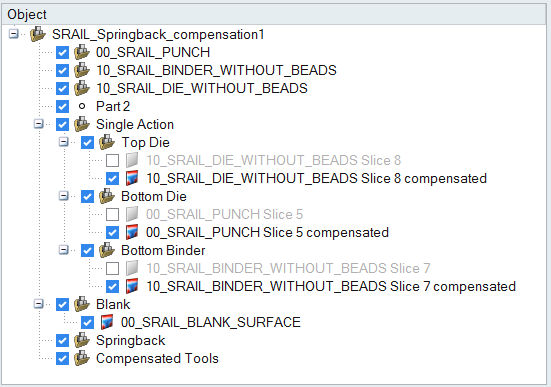

 arrow.
 .
.
 An animation of the forming operation is generated for the model.