Gravity (optimization)
The Gravity option allows you to include gravity when running an optimization, and to change its direction.
If the weight of a structure is a significant portion of the load it is bearing, then you should include gravity when running an analysis or optimization. Large objects like buildings and bridges must support their own weight and should have gravity applied to them, while small, stiff structures that don't flex perceptibly under their own weights should not have gravity applied.
You can define whether to apply gravity in the Run Optimization window.
-
Click Run Optimization on the
Optimize icon.

- Select a Run Type and optimization Objective. The options in the Run Optimization window will change based on which options you select.
-
Click the
 button next to
Gravity and select Yes.
button next to
Gravity and select Yes.
-
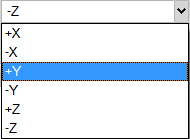
To change the direction of gravity, select a direction from the pull-down
menu.
- Set the remaining options for the run as desired.
- Click Run to start the optimization. While the optimization run is in progress, you can monitor its status using the Run Status window.
- When complete, double-click the name of the run to view the results.
Tip:
- Gravity pulls toward the negative z direction by default, but you can change the direction using the Preferences window under Run Options.
- When applying gravity for an optimization, if your model includes a non-design space or a concentrated mass, then no other loads are required because gravity imparts a load. If you only have a design space, you must apply a force, pressure, torque or concentrated mass to your model if you intend to apply gravity during optimization. If there are no other forces, or the other forces are very small relative to the weight of the structure, optimization will return an empty structure.