Activate Separating Contact
Setup non-linear separating contact.
For a video tutorial on modeling separating contact, click here.
For more information about separating contact, including validation benchmarks, click here.
-
Add a non-linear separating contact analysis branch.
-
Select .
Figure 1. 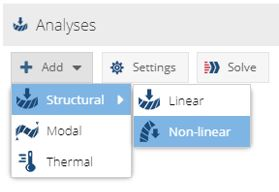
-
Select .
-
In the new Analysis branch, next to the name of the analysis, click
 (Action Menu) > Contact conditions.
Figure 2. 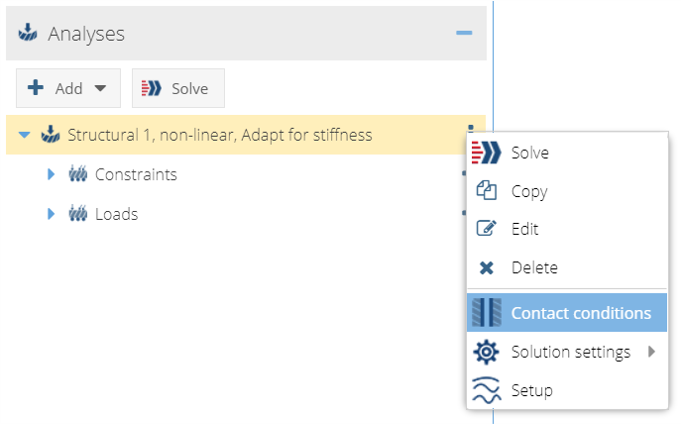
-
Identify which contact conditions are allowed to separate.
-
Select the (Action menu) next to the
contact condition and click Edit.
Figure 3. 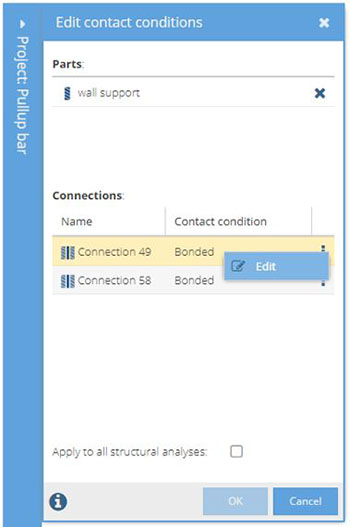
-
Select the