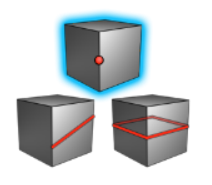
Insert a new vertex along an edge, splitting the edge into two new edges.
This tool is useful when you need to refine the geometry of a PolyNURBS object. Note
that this tool permanently modifies the selected object rather than creating a new
one, so it does not have construction history.
-
On the ribbon, click the PolyNURBS tab.
-
In the Split group, click the Split
Edge icon.
-
Click the PolyNURBS object.
Edges will be indicated in yellow upon hovering.
-
In the guide bar, choose from the following options:
- To create equally spaced snap points along the selected edge, enter a
Subdivision Snap value.
For example, if you
want to add a vertex one-quarter of the way along a selected edge,
set the Subdivision Snap value to 3; doing so places 3 control
points along the edge to create four evenly spaced
subdivisions.
- To add one vertex at each Subdivision Snap point in one click, select
Multiple Split.
Note: By default the subdivision snap is set to 1. This will allow you to snap
the vertex to the midpoint on the edge. You can turn the subdivision snap to
0 to disable the midpoint snap.
-
Click the edge to split, and then (if Multiple Split is
not enabled), you can drag the division point to reposition it.
-
Right-click and mouse through the check mark to exit, or double-right-click.