Assign
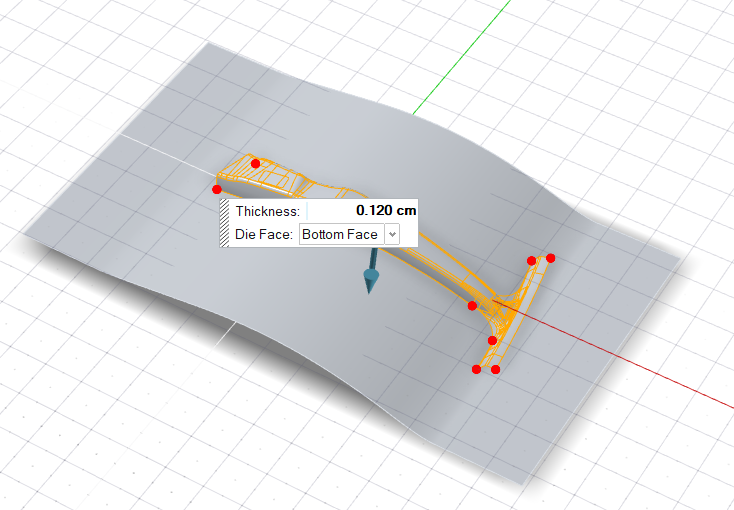
Select a part and define the thickness and position.
-
Click the Part icon.
-
Click the Assign icon.
-
Select a part.
Important:
- The part must be a surface, not a solid. From the solid, you can create a surface using the Surface Extract tool.
- You can select only one part. If you try selecting more parts, only the last selection is used. Use the Combine tool to combine multiple disconnected parts into one connected part.
To reselect a part, in the guide bar, select Clear Selection , and then select a different part.The draw direction is calculated automatically and displayed as a blue arrow. Red dots indicate discontinuity vertices (locations where edge discontinuity occurs) or corners. Ribs will be automatically added here when you create the addendum.