Learn how to find and remove pockets, holes, rounds, and fillets.
In this lesson you will learn how to:
Find and remove pockets and holes
Find and remove rounds and fillets
Push and pull faces
The Simplify tools on the Geometry ribbon can be used to remove features that normally
prevent easy modification of a design space used for optimization. This tutorial will
illustrate how to modify your design space by removing pockets, rounds, and fillets.
Open the Geometry Simplification Model
Press F7 to open the Demo Browser.
Double-click the Geometry Simplification.x_t file to load
it in the modeling window.
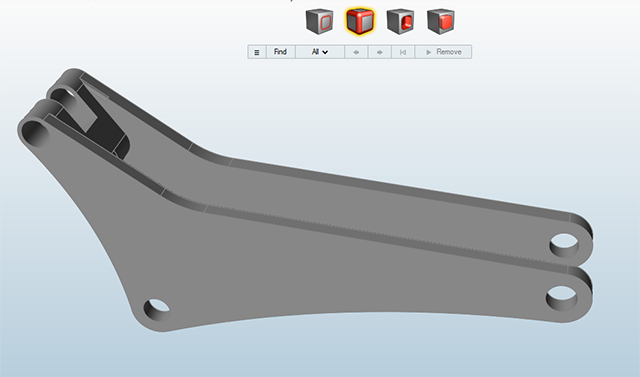
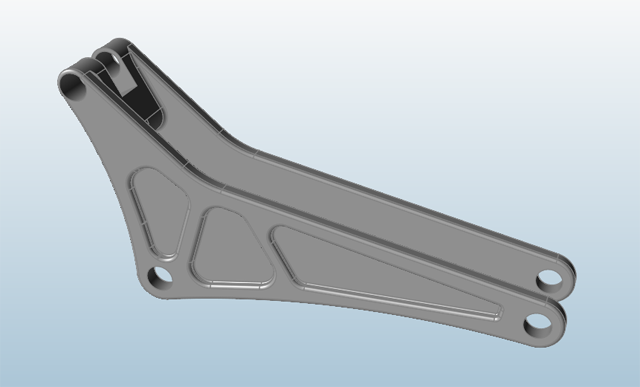
Adjust the view so the model is positioned as shown below:
Make sure the display units in the Unit System Selector are set to
MPA (mm t N s).
Remove Holes and Pockets
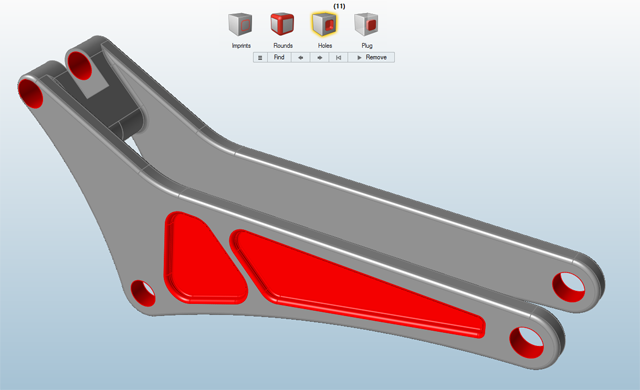
Select the Simplify tool on the Geometry ribbon.
Select the Holes tool from the secondary ribbon.
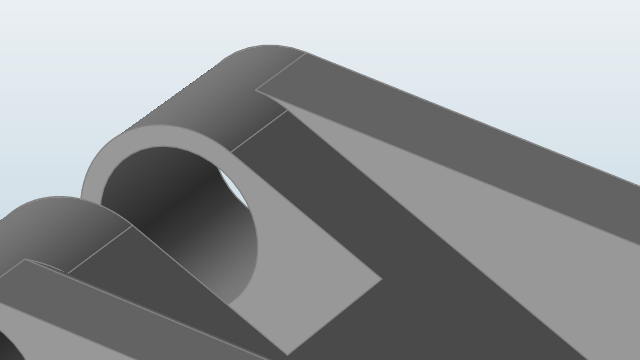
Inspire automatically finds all of the holes and
pockets in your model, which are shown in red. The number shown above the Holes
icon indicates the total number of holes and pockets found, in this case
twelve.
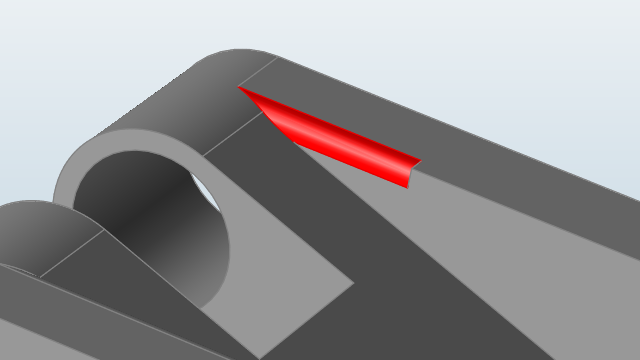
Mouse over one of the pockets.
You'll notice the mouse cursor changes and shows a check
mark.
Left-click the pocket to remove it.
Continue removing the other five pockets (there are three on each side) by
left-clicking on them.
Note: Do not remove the holes.
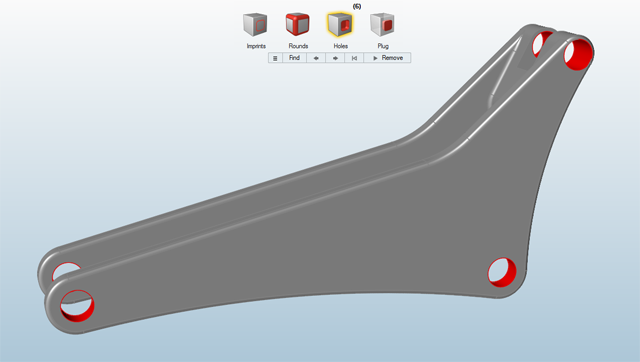
Right-click and mouse through the check mark to exit, or double-right-click.
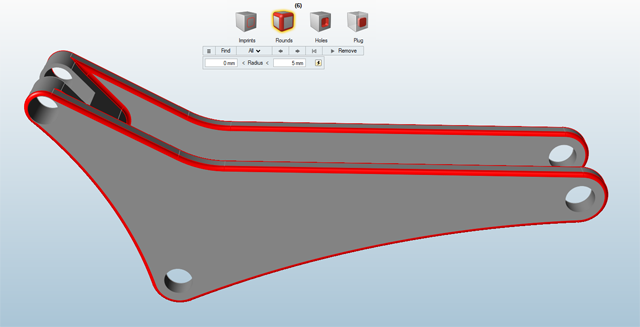
Find Rounds and Fillets
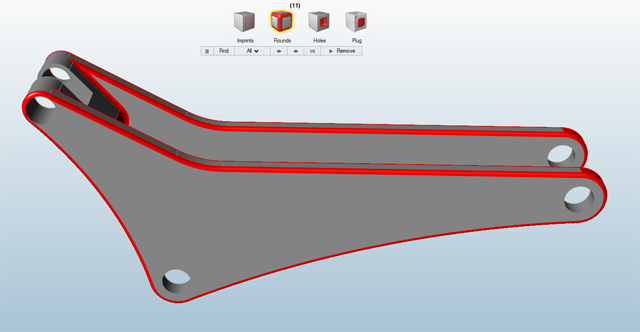
Select the Simplify tool on the Geometry ribbon.
Select the Rounds tool from the secondary ribbon.
Inspire automatically finds all of the rounds and
fillets in your model. The number shown above the Rounds icon indicates the
number of fillet chains (as opposed to individual fillets) found.
Note: When
possible, fillets should be removed in chains rather than
individually.
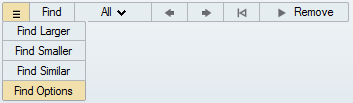
You'll notice the default search value may automatically find more fillets and
rounds than you want. Click the button
on the guide bar and select Find Options.
Change the upper bound for the Radius from 32.5 mm to
5 mm and press Enter.
This will filter the results so that only fillets and rounds with a radius of
0 mm to 5 mm are selected.
With the filter applied, the number of round and fillet chains detected drops
to 6.
Remove Rounds and Fillets
Click the Remove button to remove
all fillets and rounds.
You'll notice not all fillets have been removed.
Zoom in on the single fillet that appears in the top left corner of the model,
then mouse over the fillet and left-click to select it.
Left-click the fillet again to remove it.
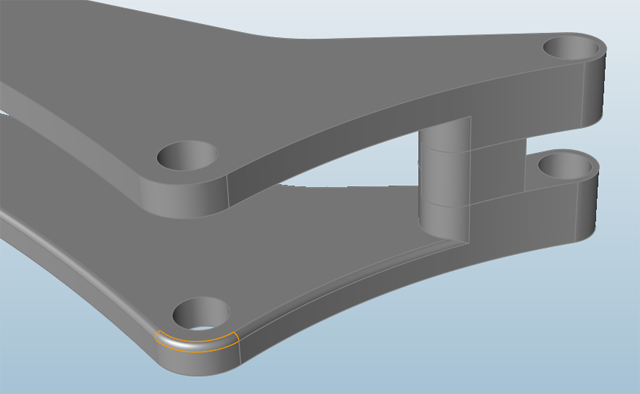
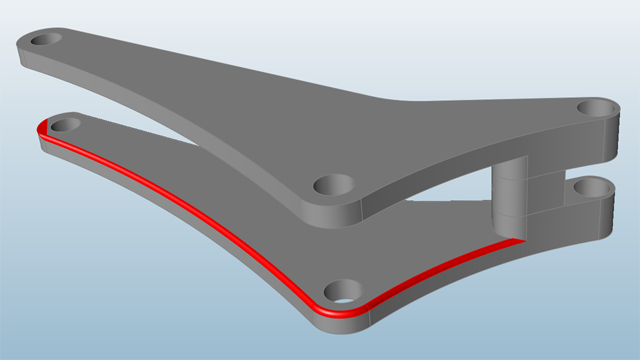
Zoom out, rotate the model, and hover your mouse over the round shown in the
picture.
Double left-click this round.
You'll notice the entire chain is selected.
Left-click again to remove the chain.
Rotate the model and remove the round chain on the other side of the
model.
You can select, deselect, and remove individual rounds or chains of rounds in
the following ways:
Click on a round or fillet to select it.
If there are several contiguous rounds or fillets, double-click one to
select the entire chain. Selecting an adjacent round/fillet will add to
the chain.
Click on a selected round or fillet again to remove it. If it is part of
a chain, the entire chain will be removed.
Hold down the Ctrl key and left-click to deselect
a round or fillet. Hold down the Ctrl key and
double-click to deselect an entire chain.
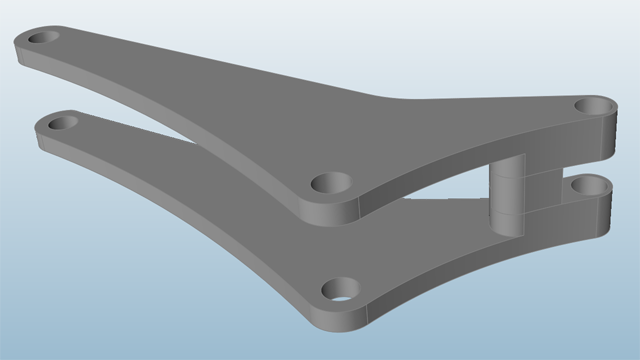
Now, the rounds and fillets are completely removed.
Right-click and mouse through the check mark to exit, or double-right-click.
Push/Pull Interior Faces
With the rounds and fillets removed, it is possible to push and pull the
interior faces. Select the Push/Pull tool on the Geometry
ribbon.
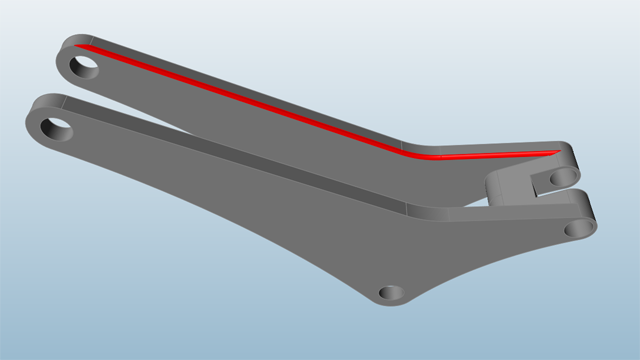
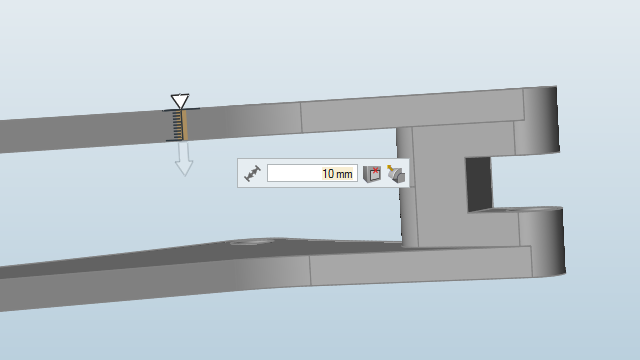
Left-click once on the face shown below:
Click and drag the pyramid to position it on the exterior face.
This will redefine the starting point of the push/pull operation.
Type 12 in the microdialog and press
Enter.
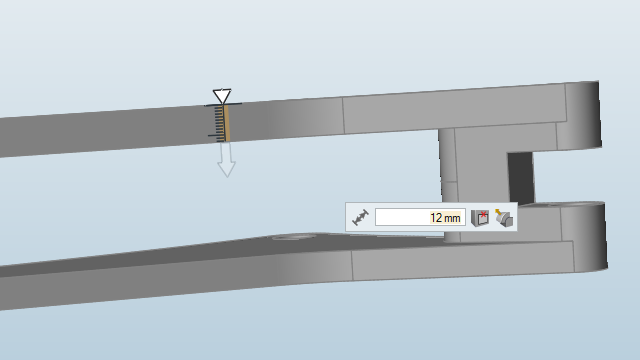
Repeat the push/pull procedure for the other interior face, pulling it to
12 mm.
Right-click and mouse through the check mark to exit, or double-right-click.


 button
on the guide bar and select Find Options.
button
on the guide bar and select Find Options.

 to remove
all fillets and rounds.
You'll notice not all fillets have been removed.
to remove
all fillets and rounds.
You'll notice not all fillets have been removed.