Overhang is a type of constraint used in additive layer manufacturing. It is used to
eliminate overhang and create a more self-supporting structure, which helps minimize the
need to add support structures when printing your part.
Overhang constraints cannot be used with lattice optimization.
Apply an Overhang Shape Control
Select the Overhang tool and click on a design space to apply an overhang shape
control.
Click the Draw Direction tool on the Shape
Controls icon.
Click the Overhang tool on the secondary ribbon.
Select a design space. A bounding box appears around the part.
Select a face on the bounding box to choose a plane closest to the print base.
The blue cones indicate the print direction.
If needed, use the Move tool on the microdialog to
position the normal of the blue plane to coincide with the normal of the print
base.
Enter an overhang angle in the microdialog. This is the angle at which the part
changes from self-supporting to requiring supports when being printed. This
angle is generally determined by your printer.
Right-click and mouse through the check mark to exit, or double-right-click.
Tip:
You can also right-click on a design space in the modeling window or in the
Model Browser and choose Shape Controls > Overhang from the context menu.
The Method property in the Property Editor provides two optimization methods
for overhang constraints. The Strict method attempts to perfectly match the
supplied print angle. It can fail if not enough material is initially given.
Lenient is equivalent to the Penalty method in OptiStruct, and allows some
of the model to fail to match the overhang angle while still converging to a
solution.
Microdialog Options
Double-click a shape control to edit it and access the microdialog
options.
Icon
Description
Apply Draw Direction
Click to convert the overhang constraint to a different type of draw
direction.
Rotate the shape control.
Overhang Angle
Enter an overhang angle. This angle is generally determined by your
printer.
Overhang Examples
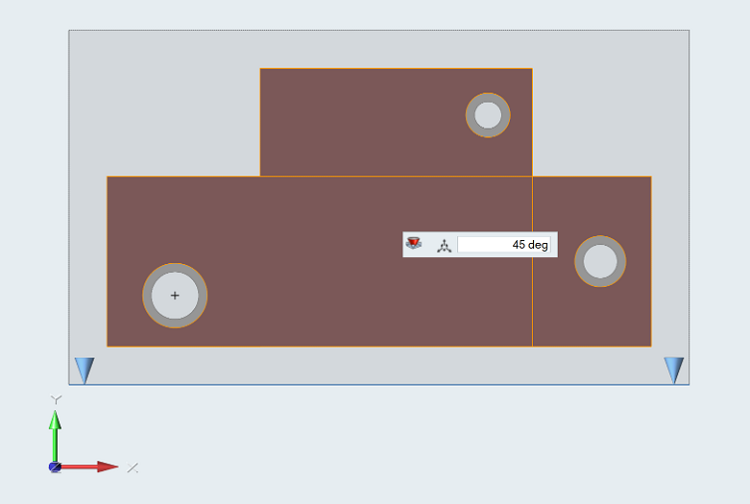
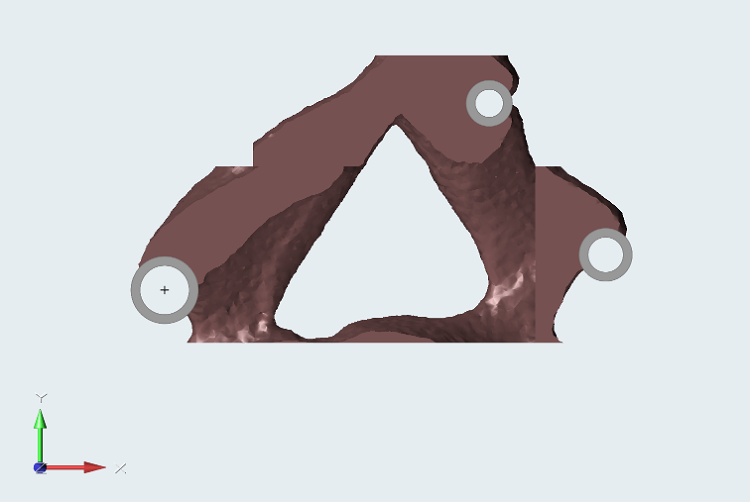
Overhang: 45 Degrees X Direction
Figure 1. Design space with 45-degree overhang in the x direction.
Figure 2. Optimized shape with 45-degree overhang in the x direction.
Overhang: 45 Degrees Y Direction
Figure 3. Design space with 45-degree overhang in the y direction.
Figure 4. Optimized shape with 45-degree overhang in the y direction.


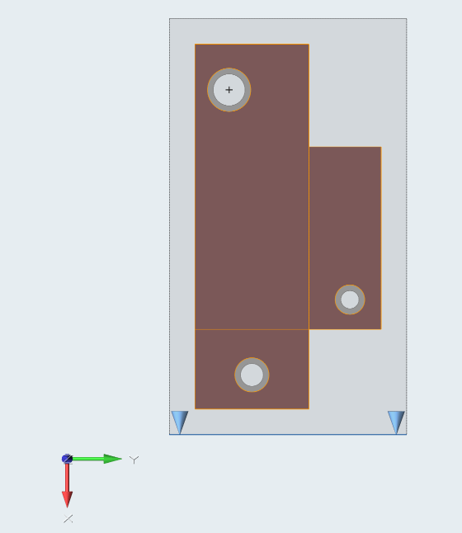
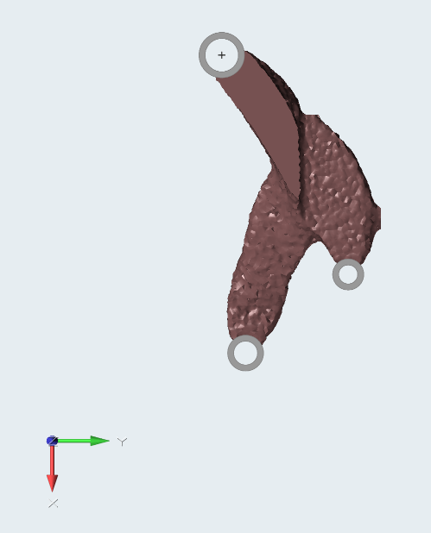 Figure 2. Optimized shape with 45-degree overhang in the x direction.