This tutorial guides you through the setup of an optimization study using the link between HyperForm and HyperStudy. This tutorial assumes you have familiarity with HyperForm, HyperMorph, HyperStudy, and basic understanding of optimization.
Stamping processes typically deal with a large number of shape and process design variables. In order to automate the process of arriving at an optimal choice of design variables, a link between the analysis program and the optimization program is essential. For the example problem in this tutorial, you set up process variables using Hyperform panels, and shape variables using HyperMorph, a mesh morphing tool. To run the analysis, you use RADIOSS One Step.
You can easily extend this method to set up an optimization study with incremental analysis.
Problem Overview
A quality function that minimizes failure by tearing or wrinkling has been developed using the major and minor strain ratios that correspond to the formability zones under a forming limit diagram. The objective function is to minimize the distance between the major and minor strain coordinates for each material point in strain space and the curve describing the quality function as illustrated in the following figure:
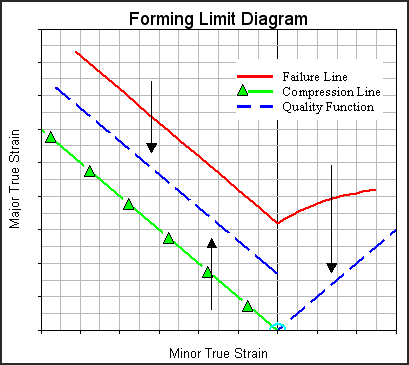
Quality Function for Minimizing Formability Defects
The shape variables are the blank edge profile. The die entry radius, the part depth, and the process variables are the blankholder force and the drawbead restraining forces as illustrated in the following figure:
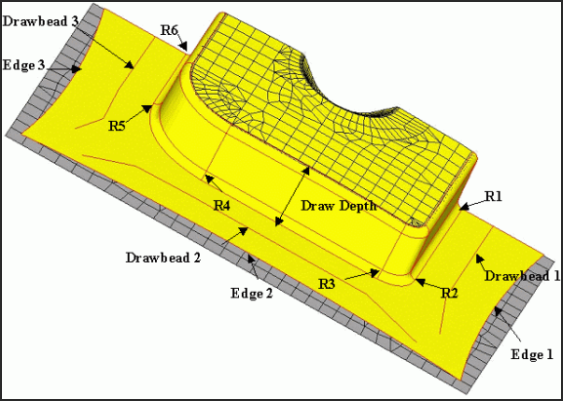
Distribution of Design Variables
| 1. | On the Preferences menu, click User Profiles. |
| 2. | For Application, select Manufacturing Solutions. Verify that HyperForm and RADIOSS_One_Step are selected as below, and then click OK. |

|
| 1. | From the File menu, click Open. |
| 2. | Navigate to the file: part1b_opti.hf, and then click Open. |
Note: The model files for this tutorial are located in the file mfs-1.zip in the subdirectory \hf\Opti\. See Accessing Model Files.
|
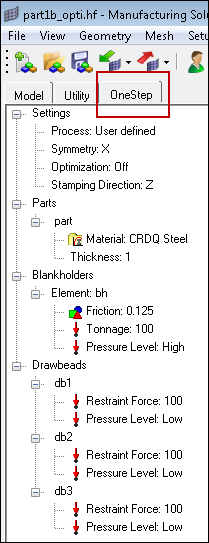
| 1. | From the OneStep tab, check that the part has an assigned material, thickness, blank holder and drawbead as you see below: |
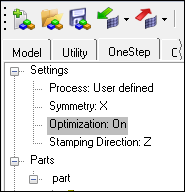
| 2. | From Settings, right-click Optimization, and then select On: |
| 3. | Navigate to your Base Directory (working folder). From Settings, right-click Base Directory, and then select Set: |
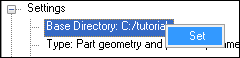
| 4. | From the Browse For Folder dialog that appears, navigate to the correct folder, and then click OK.
|
| 5. | Return to the OneStep tab and check that the options are set as below. To change a setting, right-click the option. |
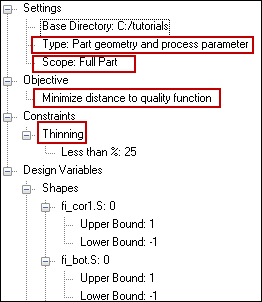
| 6. | On the OneStep tab, locate the Design Variables branch which contains the shapes and process variables in the model, and then do the following: |
| • | From Blankholders, right-click bh.friction, and then select Remove. |
| • | Under bh.tonnage, left-click Upper bound, and then click the value next to it and enter 200. |
| • | Under bh.tonnage, left-click Lower bound, and then click the value next to it and enter 0. |
| • | Under db1.restraintforce, left-click Upper bound, and then click the value next to it and enter 200. |
| • | Under db1.restraintforce, left-click Lower Bound, and then click the value next to it and enter 0. |
| • | Repeat these two bullet steps for db2.restraintforce and db3.restraintforce. |
| 8. | From Thickness, right-click part.thickness, and then select Remove. |
| 9. | From Friction, right-click part.friction, and then select Remove. |
| 10. | To animate a shape variable, right-click the variable, and then select Animate: |
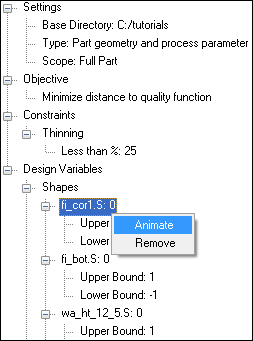
| • | Alternatively, click the Animate button on the bottom, right of the screen. |
| • | Click Close to close the animate panel. |
| 11. | To run the optimization study, on the OneStep tab, move your cursor to the white space near the scroll bar, right-click, and then select Run: |
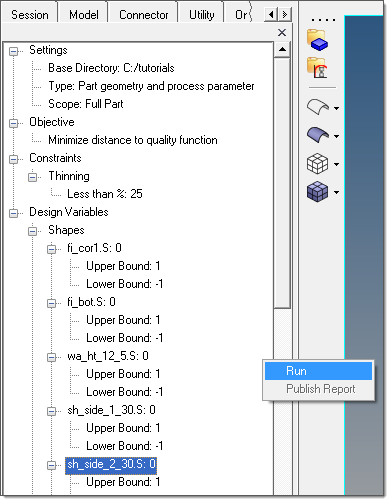
Note: Your cursor needs to be close to the scroll bar for the Run command to appear.
|
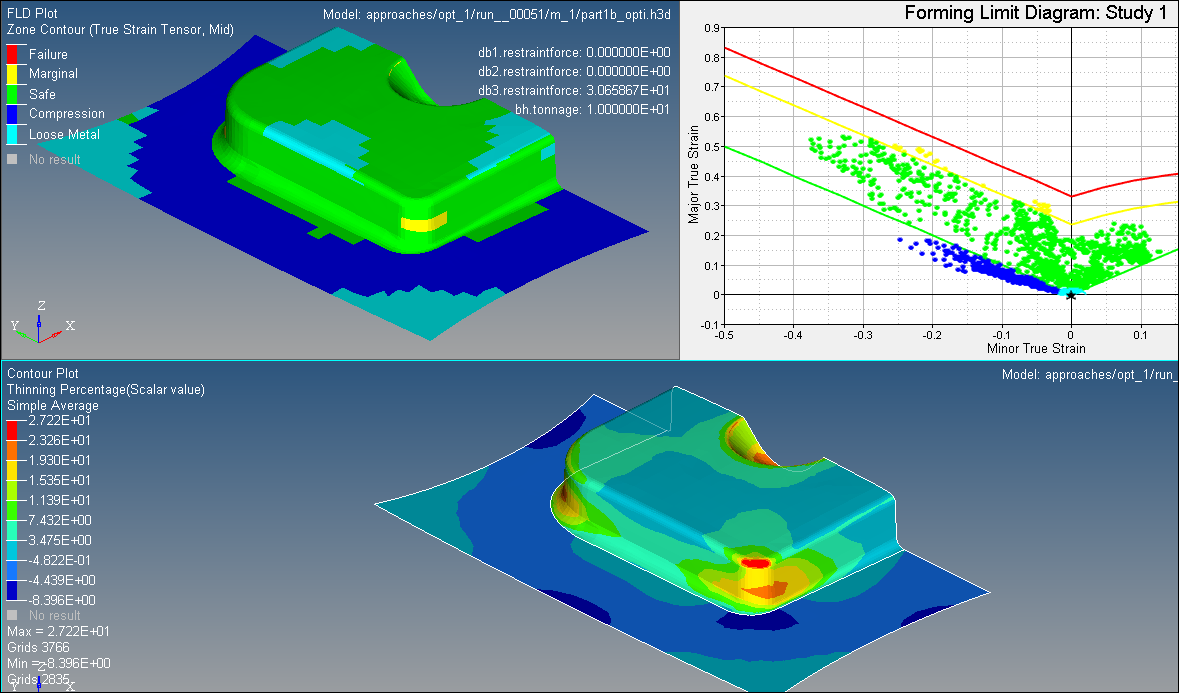
| 1. | After the optimization converges, HyperView opens with the results of the optimized shape. |
| • | If the optimization does not converge, then an optimization summary dialog appears with a prompt for you to open the closest results. |
| • | Follow the prompt. A screen appears with something like the following: |
|
| 1. | Switch to the HyperForm Radioss OneStep window. |
| 2. | From the Optimization tab, right-click in the white space near the scroll bar, and then select Publish Report. |
| 3. | The default web browser opens with the results of the actual part before optimization, followed by the results of the five most optimum designs of the part after optimization. |
|
Return to Optimization Tutorials


