In this tutorial, you will learn how to create a section cut along a plane, create
multiple sections cuts along different planes, and create a deformable section
cut.
This exercise uses the model file
truck.key and the corresponding d3plot
results file located in the animation\truck folder.
To access the Section Cut panel:
Click the Section Cut button on the Display
toolbar.
OR
Right-click in the Results Browser and select Create > Section Cut from the context menu.
Figure 1.
The Section Cut panel allows you to cut planar or
deformable sections through a model, so you can view the details inside a model.
Section cuts can also be created and edited using the Entity Editor in the Results Browser. Figure 2.
Creating a Section Cut Along a Plane
Load the truck.key model file and the corresponding
d3plot results file, located in the
animation\truck folder.
Right-click in the Results Browser and select Create > Section Cut > Planar from the context menu.
Use the Entity Editor to define the section.
Under the Standard section, verify that
Orientation is set to
yaxis.
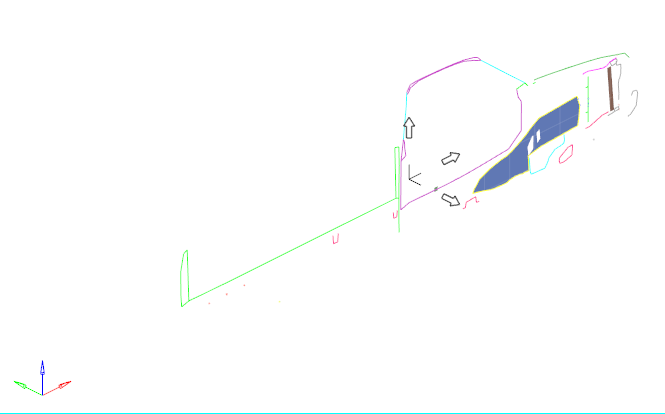
Under the Display section, verify that the Cross section
Only option is selected.
A cross section band is displayed in the graphics area.
Figure 3.
Under the Standard section, click in the Position
field and then use the graphical manipulator to drag the cross section
to different locations on the model.
Under the Display section, click in the Cross Section
Width field to access a slider bar. User the slider bar
to adjust the width of the cross section.
Figure 4.
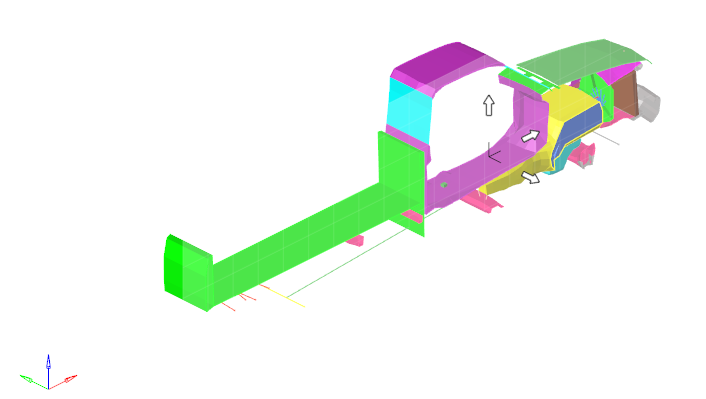
Under the Display section, uncheck the Cross Section
Only option.
Click in the graphics area and press ‘T’ on the
keyboard, to view the model in transparent mode.
Press ‘L’ to view the feature lines.
Press ‘T’ and ‘L’ again to turn
off transparent and feature line views.
Create and View Multiple Section Cuts
Add another section cut by right-clicking in the Results Browser and selecting Create > Section Cut > Planar .
This time we will use the Section Cut panel to edit the section. Click the
Section Cut panel button on the Display toolbar to enter
the panel.
Select X Axis for the plane.
Verify that the Clipping plane option is turned
on.
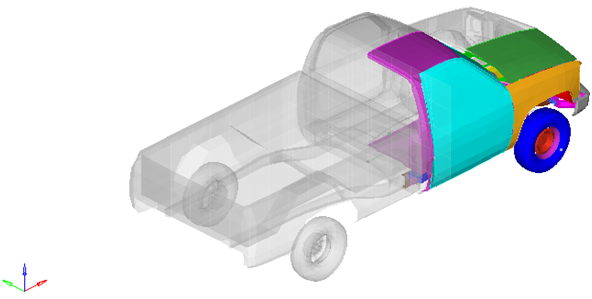
Click Apply, to create a section cut in the X direction,
with respect to the previously made section in the Y direction.
Reverse the clipping plane to view the other side of the
section cut.
Turn on transparency.
Figure 5.
Use the slider bar under Define plane to increase or
decrease the clipped section.
Create a Deformable Section Cut
Animate the model .
Select the Animation Controls panel from the toolbar
.
Slow down the speed of the animation.
Return to the Section Cut panel , and observe the animation of
the model.
The model appears to be passing through a plane that has been defined at the
point where the section was created. This is due to the fact that this is a
Planar section cut, therefore the plane of the model
does not move with the model.
Stop the animation.
From the Results Browser, use the Change load
case toolbar to select the first time step.
Note: The Change load case toolbar visibility can be toggled on/off using the
Configure Browser option (located in the Results Browser context menu).
With Section 2 highlighted in the list of section cuts,
turn on the Deformable option (under Deform mode).
Click Apply, to view a deformable section cut.
HyperView remembers the location of your reference
cut. The section cut is deformed relative to the time listed in the Time column.
At the time you create the deformable section cut, the cut remains planar. When
you animate the model, the section cut starts deforming.
Animate the model and observe the section cut.
Note that in this case, the sectional plane moves with the model.

 on the Display
toolbar.
on the Display
toolbar.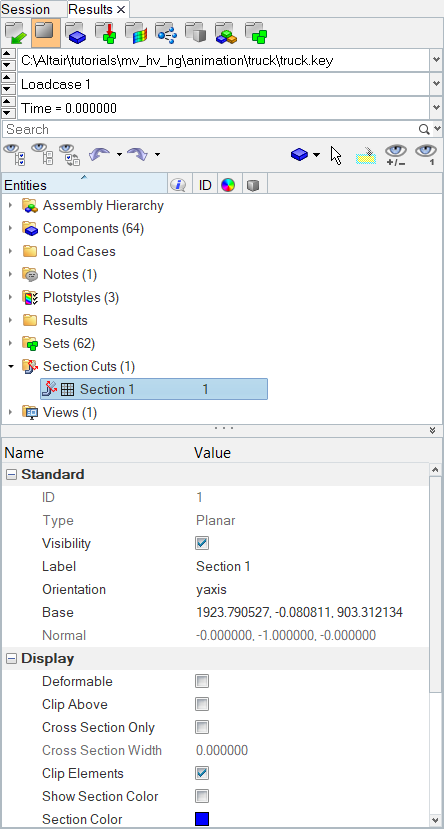
 .
.
 .
.