Change a Material
| 1. | In the Tree window, select parts and/or assemblies. |
Several parts and assemblies can be selected using the SHIFT, CTRL, or SHIFT+CTRL keys.
| 2. | Open the context menu (right mouse button) and select List Selection. |
A Selection List window opens.
| 3. | Select one or several parts in the Selection List window. |
| 4. | Click the right mouse button to open the context menu and select Change Material. |
A Material File dialog opens.
| 5. | In the Material File window, select the new material and click OK.. |
A Material Review dialog opens.
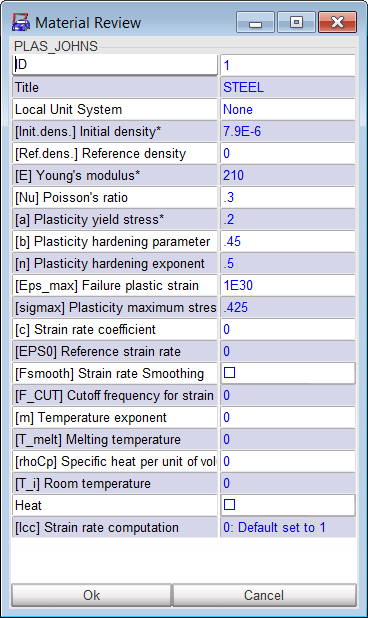
The Material File window contains all the materials from the database. If some materials are missing, the database must be updated.
| 6. | For some material laws (law 2, law 36, etc.), the stress vs. strain curve appears. Modify the parameters to be changed and click Apply to update the curve and Yes in the pop-up dialog window to confirm the change of material. |
Change a Property
| 1. | In the Tree window, select parts and/or assemblies. |
Several parts and assemblies can be selected using the SHIFT, CTRL, or SHIFT+CTRL keys.
| 2. | Open the pop-up menu (right mouse button) and select List Selection. |
A Selection List window opens.
| 3. | Highlight a part in the Selection List window. |
| 4. | Click the right mouse button to open a pop-up menu and select Change Property. |
A Property File dialog opens.
| 5. | In the Property File window, select the desired new property and click OK. |
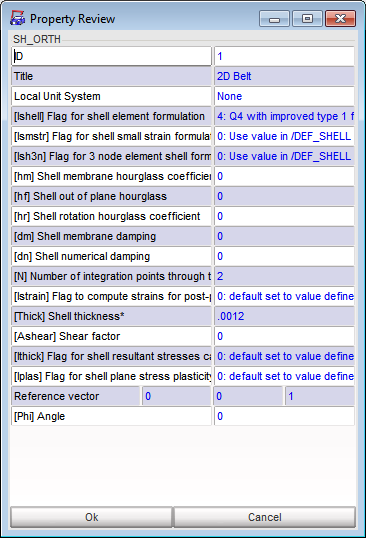
A Property Review dialog opens.
Change Property and Keep Thickness
| 1. | In the Tree window, select parts and/or assemblies. |
Several parts and assemblies can be selected using the SHIFT, CTRL, or SHIFT+CTRL keys.
| 2. | Open the pop-up menu (right mouse button) and select List Selection. |
A Selection List window opens.
| 3. | Highlight a part in the Selection List window. |
| 4. | Click the right mouse button to open a pop-up menu and select Change Property and Keep Thickness. |
| 5. | In the Property File window, select the desired new property and click OK. |
A Property Review dialog opens.
Change the Thickness of a Part
| 1. | In the Tree window, select parts and/or assemblies. |
Several parts and assemblies can be selected using the SHIFT, CTRL, or SHIFT+CTRL keys.
| 2. | Open the pop-up menu (right mouse button) and select List Selection. |
A Selection List window opens.
| 3. | Highlight a part in the Selection List window. |
| 4. | Click the right mouse button to open a pop-up menu and select Change Thickness. |
| 5. | In the Change Thickness window, enter the new thickness and click Ok. |


