Use the Bead Utility

Use this utility to add a bead between two points in a mesh.

Note: If you need to make a curved bead, or a bead across jointed or highly-curved components, this is best accomplished with the sculpting tools in HyperMorph's Freehand panel.

However, the bead utility presents a quick and easy way to create simple linear beads, such as those used to initiate crumple zones in vehicular crash mitigation.

Beads can be of any height or radius, and can be sharp (curved or angled along the top) or flat (raised from the surface, but flat along the top). However, this distinction will only be apparent if the radius and height are relatively close to the existing element size.


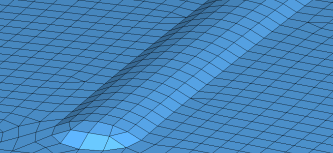
Figure 1. . Radius 20, height 5, either sharp or flat, with mesh size 8


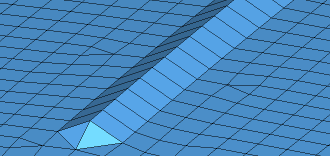
Figure 2. . Radius 10, height 5, sharp, with mesh size 8


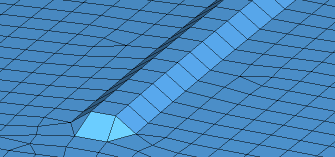
Figure 3. . Radius 10, height 5, flat, with mesh size 8
  1. From the Utility Browser, Geom/Mesh menu, click Bead.
    A temporary panel is displayed in the panel area.
  2. Select two nodes to define the beginning and end of the bead.
    Only two nodes are supported by this tool.
  3. Click proceed.
    The panel closes and the Create Bead - Two Nodes dialog opens.
  4. Enter a value for the beam radius.
    This value determines the width of the bead at its base. It is best to base this to some degree on the existing element size.
  5. Enter a value for the base height.
    This is how far the bead rises above the mesh on which the end nodes reside.
  6. Use the bead shape options to determine whether the bead has a flat top, or a peaked or rounded one.
  7. When the characteristics are set, click Create to generate the bead. If the results are not satisfactory, click Reject and change the characteristics, then create again.
    If you need to change the start and end nodes, you will need to Reject any bead already created, Close the utility, and then re-open it to select new nodes.