Add Fiber Orientation Results
Select Add Fibers when running a detailed filling analysis to produce results that include fiber orientation tensors.
Prerequisite: Before running the analysis, you first need to apply a material that includes fiber properties to your mold part. See Add Fibers to a Material for more information.
-
On the Analyze icon, click Run
Analysis.

-
When the analysis is completed, select the run, Filling
stage Fiber Orientation result type, and one of the
following Fiber Orientation Tensors in the Analysis Explorer.
- XX: red color contour displays tensor in the X-direction.
- YY: red color contour displays tensor in the Y-direction.
- ZZ: red color contour displays tensor in the Z-direction.
- XY: displays tensor on the XY-plane.
- YZ: displays tensor on the XZ-plane.
- ZX: displays tensor on the ZX-plane.
Example Result for Fiber Orientation Tensor XX: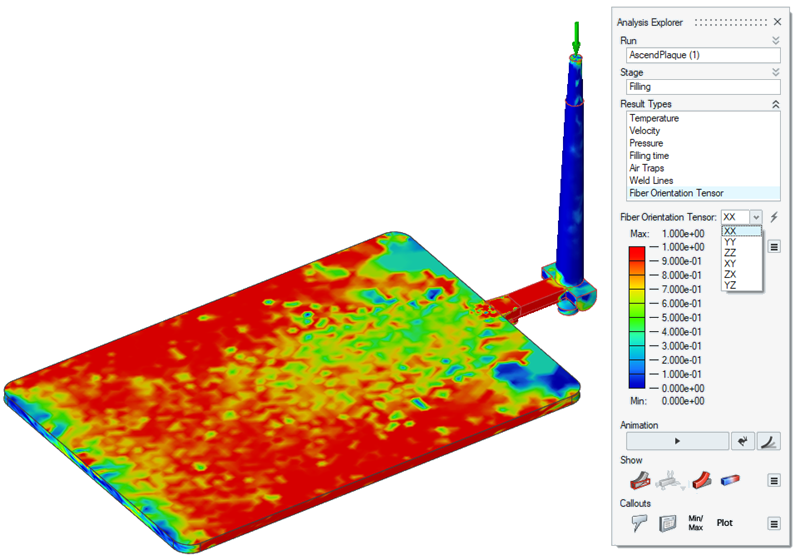
-
To further explore the tensors, select the options button:

