Modify the Display Settings
Modify the appearance of a rendering during post-processing.
-
Click the Darkroom icon.

Display Settings
You can modify the exposure, tone mapping, and filtering; add effects; view the render channels; reduce noise; and perform a photometric analysis.
Exposure
- ISO
- Controls the sensitivity of the image sensor. Higher values result in
brighter images.Tip: A value of 100 is mostly used for exterior shots under a clear sky and sun light. Higher values, usually between 400 and 1600, are used mostly for interior shots.
- Exposure Value (EV)
- Controls the camera's shutter speed. Lower values result in brighter
images.Tip: For an overly bright scene, use a positive value. For an overly dark scene, use a negative value.
Tone Mapping: Standard (RAW)
- Gamma
- Default value: 2.2. Lower values will make the image darker while higher values will give a washed-out look.
Tone Mapping: Filmic
The Filmic option only works if you turned on Filmic in the Camera/Rendering settings.
- Gamma
- Default value: 2.2. Lower values will make the image darker while higher values will give a washed-out look.
- Shadows
- Higher values will make shadows darker.
- Highlights
- Higher values will make highlights stronger.
Tonemapping: Reinhard Local
- Gamma
- Default value: 2.2. Lower values will make the image darker while higher values will give a washed-out look.
- Exposure
- Higher values will increase the overall brightness.
- Radius
- Adjust this value to remove tonemapping artifacts.
Tonemapping: Reinhard Global
- Gamma
- Default value: 2.2. Lower values will make the image darker while higher values will give a washed-out look.
- Exposure
- Higher values will increase the overall brightness.
Tonemapping: Camera Response Function (CRF)
- CRF
- Camera Response Function simulates specific camera models using real data files from the manufacturer.
Filtering
- Sharpness
- The default value (50%) is a balance between blurring and sharpening. Only applicable when Supersampling is set to Normal or High.
- Burn
- The burn value minimizes the burnt areas of an image. Lower values will reduce burnt areas.
- Chroma
- Chroma enhances the color of the image, acting like a saturation control.
- Contrast
- Higher values will give higher contrast.
- White Balance
- Can be used to balance an image using color temperature. A value of 6500K is usually used to balance light coming from the sun.
FX
- Glare
- Introduces a bloom effect in the final image.
- Vignetting
- It mimics the phenomenon where light comes through the lenses near the edges. Higher values will make the edges of the image look darker.
Channels
- Channel
- Shows a list of all the active render channels with the ability to
switch between them.
The default channel, which is rendered every time, is the Color Channel.
Denoiser
This option is only available if you turned on Denoiser Filter in the
Camera/Rendering settings.
- Denoise
- Reduces the amount of noise in the final rendered
image.
- None (default)
- NVIDIA Optix: To use Optix, you need a NVIDIA GPU with a compute capability of 3.0 or higher and a driver version of 396.65 or higher.
- NLM: This denoiser filter is only
available if you selected the Presto/IR engine.
- Strength: Controls how much the denoising filter will affect the final image.
- Details: Controls the similarity in the level of detail between the final rendering and the original image. Higher values correspond to more similar levels of detail.
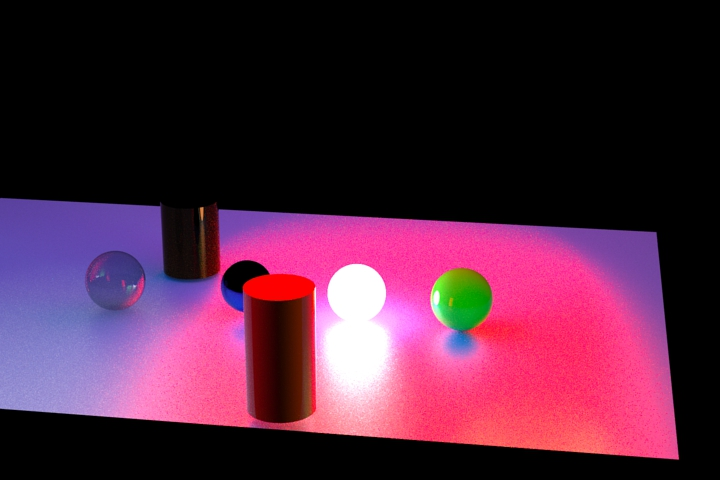
Figure 1. Without NLM Denoiser. Noise is visible, especially on the plane.
Figure 2. With NLM Denoiser. Noise is reduced; the plane is cleaner.
Analysis
- Analysis
- Turns the image into a false color rendering, so you can perform a photometric analysis.