Tutorial: FMU Import and Export
Learn how to import the FMU (Functional Mock-up Unit) into your model for data exchange, and export the FMU for co-simulation.
Files for This Tutorial
Controller.scm; Controller_FMU.scm; sb_controller_.fmu
About FMI and Requirements
The Functional Mock-up Interface (FMI) is a tool-independent standard that supports both model exchange and co-simulation of dynamic models using a combination of XML files and compiled C-code.
- Activate supports FMI 1.0 import and FMI 2.0 import and export processes.
- A Functional Mock-Up Unit (FMU) can be imported into an Activate model as a single block. Additionally, an Activate super block can be exported as an FMU in order to be exchanged and co-simulated with other tools supporting the FMI standard.
- The use of the Functional Mock-up Interface with Activate requires the selection of a solver and installation of a compiler.
Compiler Requirements
Activate requires a C-compiler to compile super blocks into C-code and the FMU. Activate detects if Microsoft Visual Studio or GCC is installed on your system and automatically invokes the compiler toolchain without any manual intervention.
If you do not have one of the supported compilers installed, you can complete the tutorial by loading the FMU that is provided with the tutorial model files: <installation_directory>\tutorial_models\sb_controller.fmu. If loading this file, skip the section, Exporting a Super Block to the FMU, and proceed to Importing the FMU through Model Exchange.
Supported Compilers on Windows Platforms
TCC is the default compiler provided for Windows. Some use cases require the installation of a third-party compiler. The following are the supported compilers for the Functional Mock-Up Interface (FMI), Modelica components, and C-code generation.
| Compiler | FMI Export | Modelica Support | C-Code Generation |
|---|---|---|---|
| Microsoft® Visual Studio 2019: Community, Professional | Yes | Yes | Yes |
| Microsoft® Visual Studio 2017: Express, Community, Professional | Yes | Yes | Yes |
| Microsoft® Visual Studio C++ Build Tools 2019; 2017;
2015 Note: The option for Windows 10 SDK must be
selected.
|
Yes | Yes | Yes |
| Microsoft® Visual Studio C++ 2015 (VC 14.0 Community and Professional) | Yes | Yes | Yes |
| Microsoft® Visual Studio C++ 2013 (VC EXPRESS/VC Pro 12.0) | Yes | Yes | Yes |
| Microsoft® Visual Studio C++ 2012 (VC EXPRESS/VC Pro 11.0) | Yes | No | Yes |
| Microsoft® Visual Studio C++ VC 10.0 (VC Pro 10.0) | Yes | Yes | Yes |
| Microsoft® Visual Studio C++ SDK 7.1 (VC EXPRESS 10.0) | Yes | No | Yes |
| TCC (default provided with Activate installation) | No | No | Yes |
Supported Compilers on Linux Platforms
GCC is the default compiler provided for Linux. Some use cases require the installation of a third-party compiler. The following are the supported compilers for the Functional Mock-Up Interface (FMI), Modelica components, and C-code generation.
| Compiler | FMI Export | Modelica Support | C-Code Generation |
|---|---|---|---|
| GCC | Yes | Yes | Yes |
Required Development Tools for Linux Platforms
The installation of development tools is required for Linux platforms to compile C code. The proposed commands will ensure that the required development and build tools are installed for GCC and G++.
| Linux Platform | Installation Command |
|---|---|
| SUSE 15 SP1 |
|
| CentOS 8.2 / RHEL 8.2 | or
|
FMU Export on Linux Platforms
FMU exporting on Linux requires ld version 2.27 or greater.
To export an FMU in Activate on Linux platforms, the
compilation and linking of the C code requires ld version 2.27 or greater. You can ensure
that you are working with a compatible version of ld by installing or updating Binutils with
the command: yum install binutils.
Selecting a Solver
-
On the ribbon, hover over the Simulate tool group
 , and click Setup
  .
.
Importing the FMU through Model Exchange
Import the FMU into a controller model with the Model Exchange option.
-
In the FMU block dialog, for the FMU filename, click
 , and
browse to the exported FMU file that you created in the last steps.
Alternatively, to use the example FMU that is provided for this tutorial, browse
to
<installation_directory>\tutorial_models\sb_controller.fmu.
All other parameters on the General Parameters tab are automatically populated.
, and
browse to the exported FMU file that you created in the last steps.
Alternatively, to use the example FMU that is provided for this tutorial, browse
to
<installation_directory>\tutorial_models\sb_controller.fmu.
All other parameters on the General Parameters tab are automatically populated.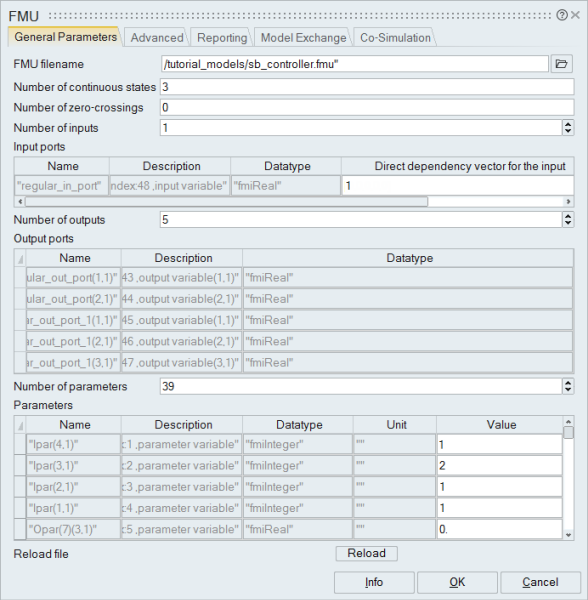
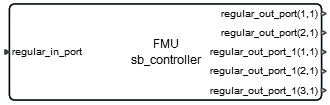
-
To resize the FMU block, select it and drag it from the corner until you can
easily read all of the labels on the block.
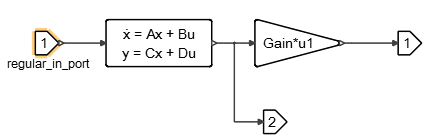
The FMU block has one input and 5 outputs. Note that all inputs and outputs carry a scalar signal and that vector or matrix data is not allowed in the FMI standard.
You can derive the input and output dimensions of the original super block controller by examining the ContStateSpace and MatrixGain blocks inside. The input size is 1x1; the first output size is 2x1; and the second output size is 3x1.
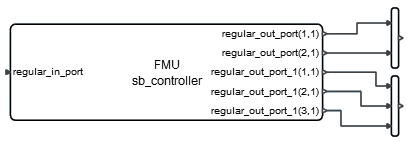
-
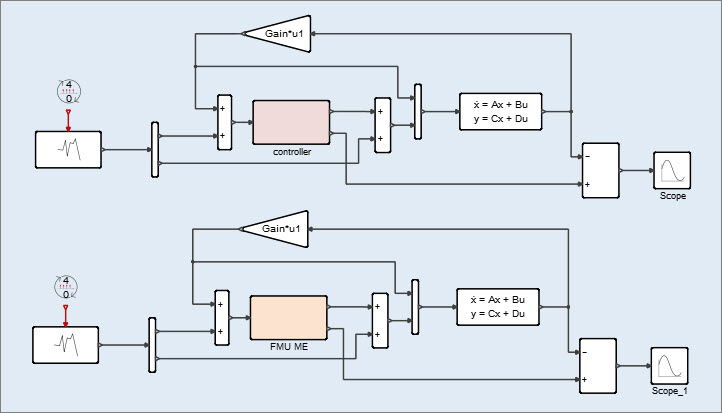
Assemble the scalar outputs from the FMU block so that the block resembles the
original super block from the input/output (I/O) perspective.
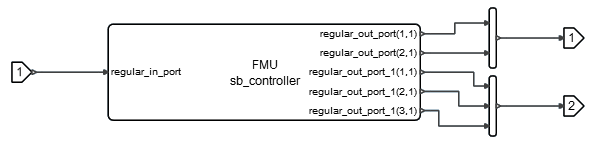
-
Connect the blocks as follows:
-
To duplicate the main diagram, box-select the entire main diagram, press
Ctrl+C, and then Ctrl+V.
A duplicate diagram is added to the model:

-
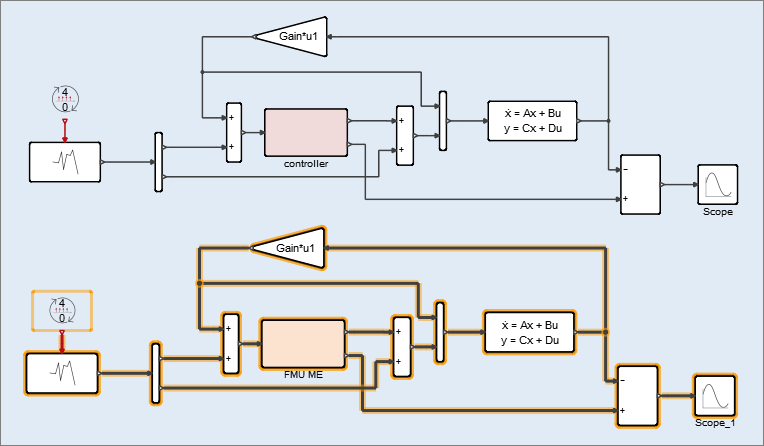
Select the super block FMU ME containing the FMU block;
press Ctrl+X; select the super block
controller_1; press Ctrl+V.
The super block, controller_1, is replaced with FMU ME:
-
On the ribbon, from the Simulate tool group, click
Run
.
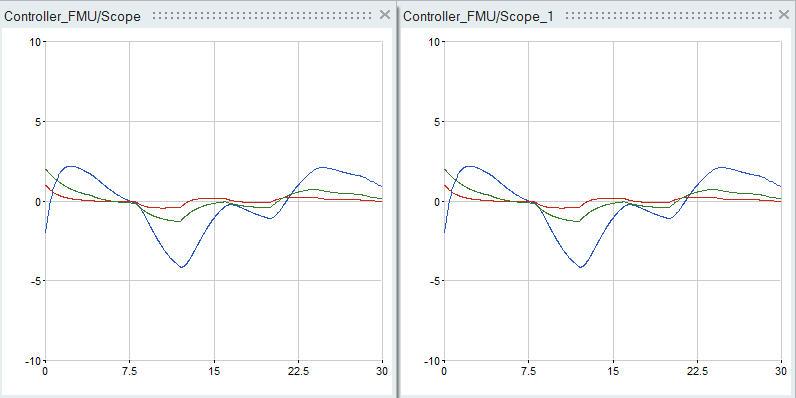
As the simulation runs, examine the Scope windows of the two Scope blocks. The windows should display the same curves indicating that the imported FMU is co-simulating successfully with the rest of the model, and that the imported FMU behavior is the same as the original super block from which the FMU was exported.
-
On the ribbon, click Save
 .
.
Importing the FMU Through Co-Simulation
Import the FMU into a controller model with the Co-Simulation option.
-
Box-select the diagram that contains the super block, FMU
ME, and press Ctrl+C:
-
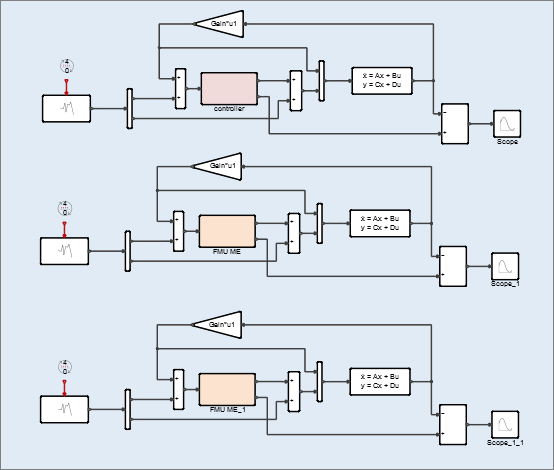
Move your cursor to a blank area below the diagrams, click, and press
Ctrl+V.
The diagram with the FMU ME super block is added as a third model for comparison.
The next steps show you how change the simulation type to co-simulation.
-
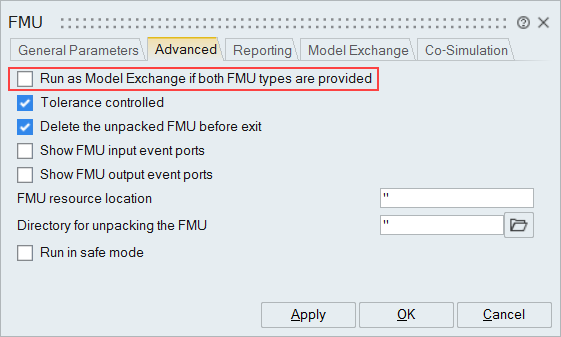
From the block dialog that appears, select the Advanced
tab and clear the check box: Run as Model Exchange if both FMU types
are provided. When the check box is cleared, the FMU runs in
co-simulation mode; when the check box is selected, the FMU runs in model
exchange mode.
 Your model should look something like this:
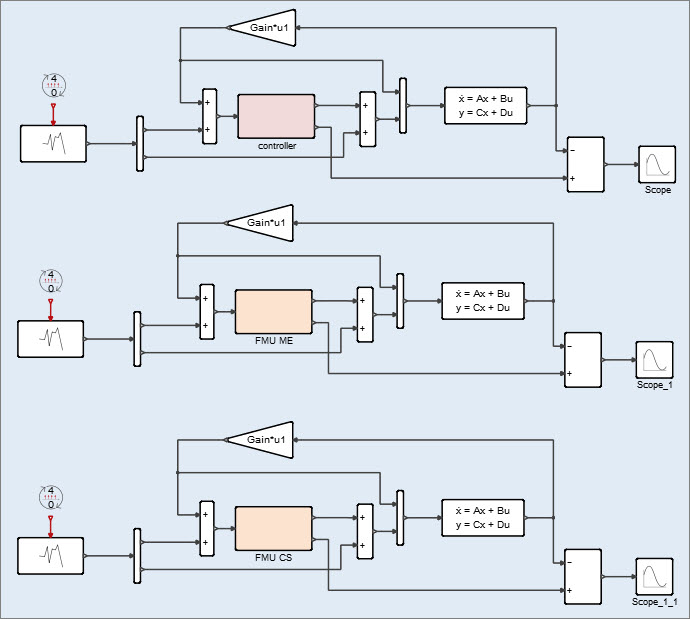
-
On the ribbon, click Run
.
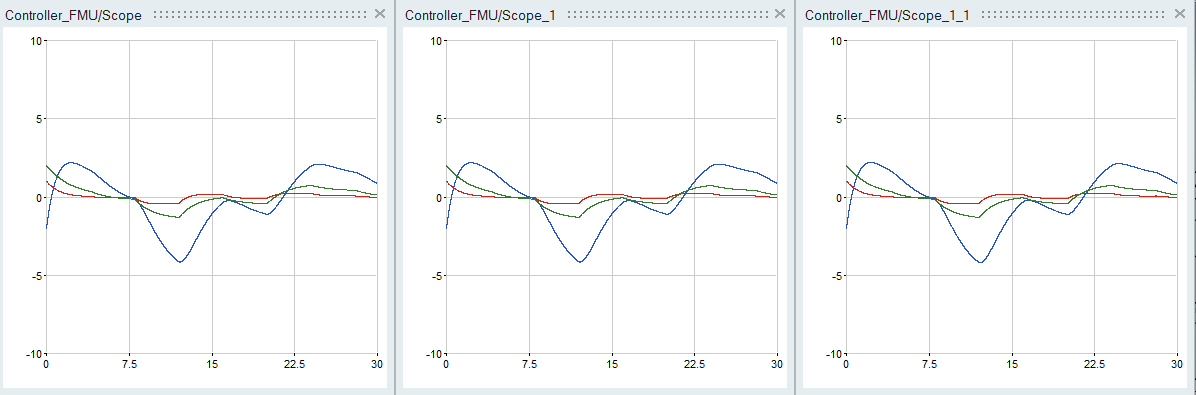
The simulation runs and the Scope windows produce the following plots:
-
On the ribbon, click Save
.
Exporting a Super Block to the FMU
Export a super block from the controller model into the FMU.
-
From the ribbon, select Open
 and
navigate to Controller.scm.
The Controller model opens with its main diagram displayed:
and
navigate to Controller.scm.
The Controller model opens with its main diagram displayed:
-
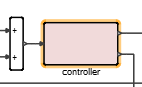
From the main diagram, double-click the super block,
controller:
-
Double-click the input block, regular_in_port.
-
The block dialog opens.
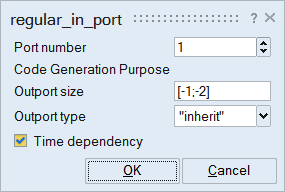 Note:
Note:The time dependency setting applied with earlier editions of Activate is no longer required and is currently ignored.
-
In the Context dialog, enter the following variable definitions, and click
OK:
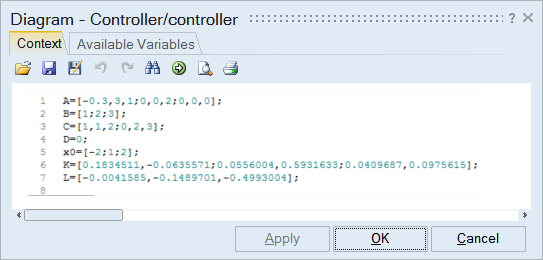 Tip: The variables are also defined in the root diagram context. You can copy the definitions from there and paste them into the controller diagram context.Note: This step is required for the FMU export because all context variables defined in the super block must be defined locally before exporting to the FMU. The super block to be exported searches for context variables defined at the current level only.