Job Submission Form
Information about the Job Submission Form.
- Application and Profile List
- Job Submission Form
- File Management
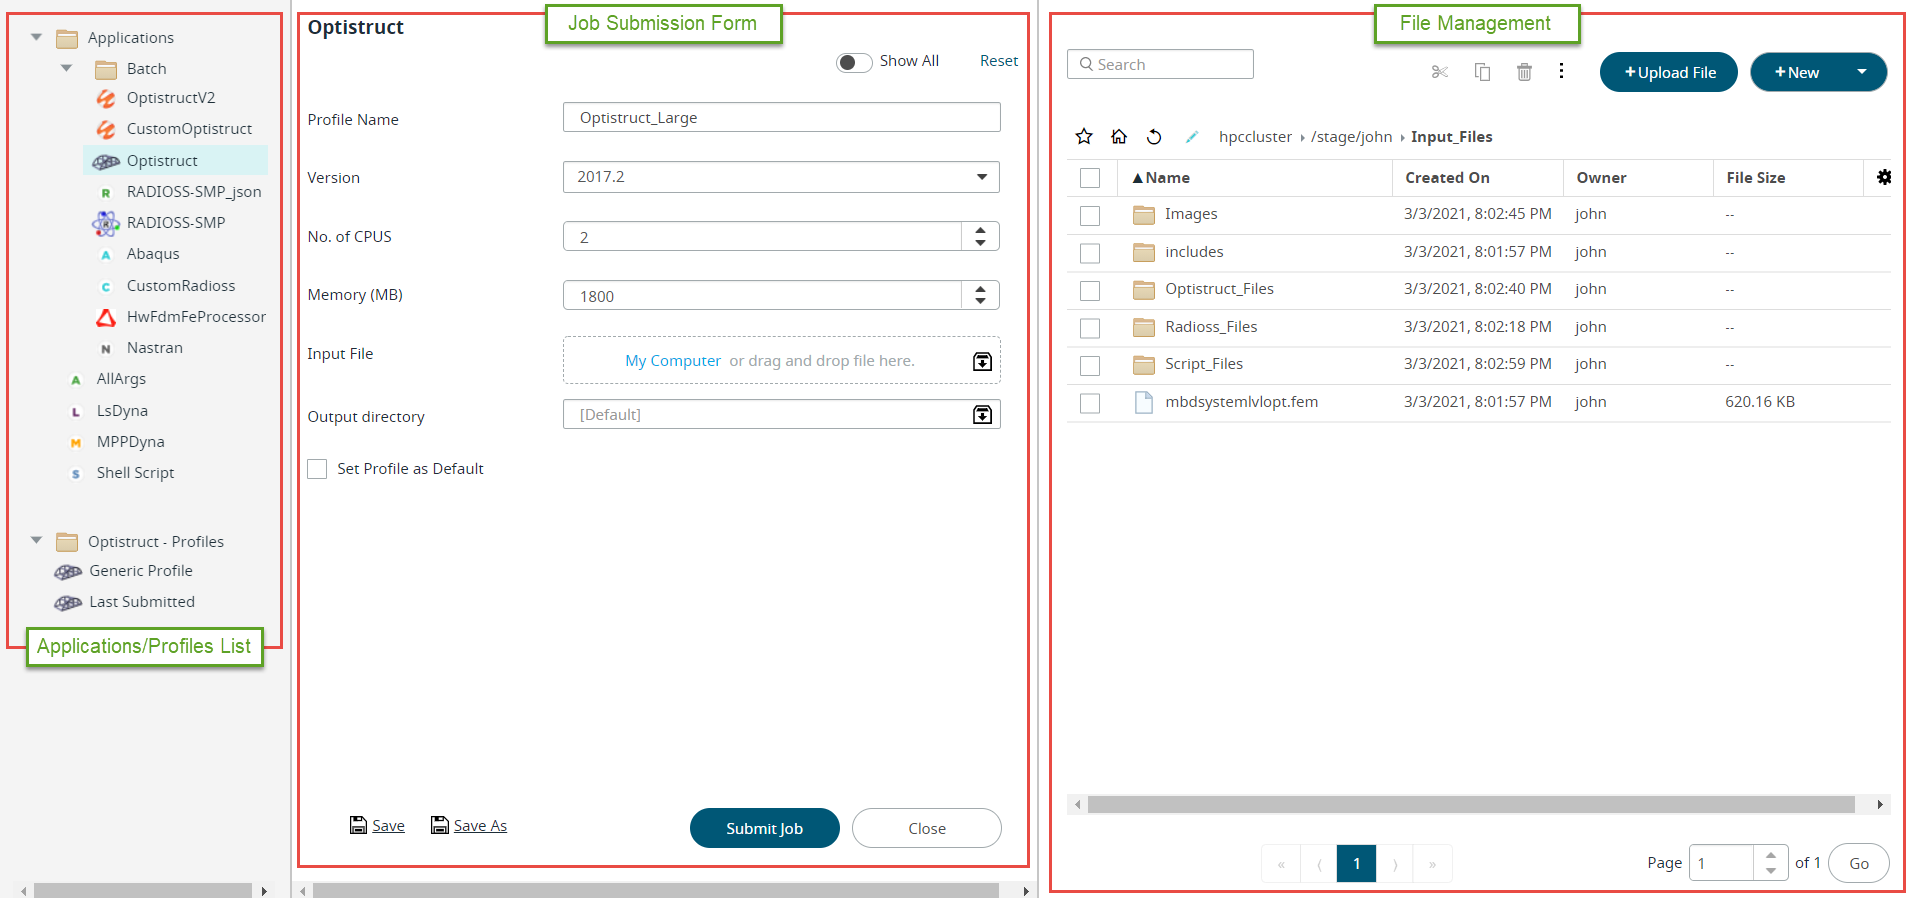
Application/Profile List
Applications (solvers) are displayed on the left-hand side of the Job Submission Form and are the applications that are installed on the HPC complex (server) selected in the Job Submission Form. Applications are categorized per your site's administrator.
- Generic Profile
- Displays the default arguments for the selected application.
- Last Submitted
- A special profile created automatically for each solver application storing your last job submission inputs.
- Custom Profile
- A profile created by you to save the job arguments that you have pre-populated.
Job Submission Form
The Job Submission Form contains the unique arguments necessary to submit a job for the selected solver.
By default, only the required fields are displayed. Move the toggle switch ![]() to the right to display all available application
arguments.
to the right to display all available application
arguments.
Tooltip displays the description of the application arguments when you mouseover the argument field.
- Select an input file from your local system by clicking My Computer. If you are uploading a zip file, an option is provided to extract the contents of a zip file. This option is displayed when you are uploading a single zip file.
- Drag and drop an input file from your local system or from the File Management pane on the right.
- Right-click a file displayed in the File Management pane located to the right of the Job Submission Form and select Add as Input File from the context menu.
If a Master File is selected as an input file, then the include files will be listed by default. The include files can also be updated in the same way as you update the input file. Select an include file from the File Management pane on the right. Right click on the file and select Add in Include Files from the context menu.
- Drag and drop a directory from the File Management pane on the right.
- Right-click on a directory displayed in the File Management pane located to the right of the Job Submission Form and select Add as Output directory.
Click Set Profile as Default to set the profile that is used as a default profile.
File Management
- Use the search box to narrow your search for the required directory or file.
- If you know the job input file folder path, then type the folder path in the
location breadcrumbs available at the top of the file list view.

- Add a favorite for quick access to frequently used files and directories by
clicking
 .
. - Quickly navigate to your home folder by clicking
 .
. - Specify job input files, include files and output directory using drag-n-drop or by right-clicking a file.