Create a Rendering
You can render the entire scene or selected objects in the scene to produce one image file. Renderings can be performed in a queue. Choose from Render or Render in Darkroom.
Render
Render is the faster option, allowing you to process the image in the application without the overhead of loading Darkroom. You then have the option to send the image to Darkroom for processing or save the image.
First,
you need to do the following:
- Open or create a model with materials applied.
- Define the rendering settings.
-
Do one of the following:
To Do this Render the current view - Press Ctrl+R.
- On the Rendering tab, click
the Render icon.
Render selected objects - Select the objects you'd like to render.
- Press I to isolate the selected objects. Isolating an object zooms in and temporarily hides all other objects.
- On the Rendering tab, click
the Render icon.
- Press I again to un-isolate the selected objects.
The Render Image window is displayed.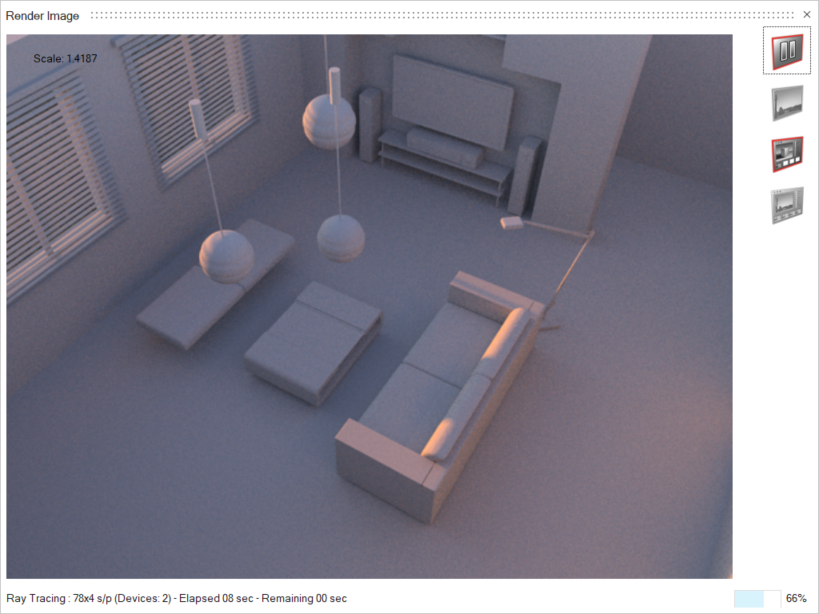
- To the bottom left of the current rendering, the status is displayed, including information about the rendering engine, number of samples, remaining time, and elapsed time.
- At the top right of the window, the scale is displayed.
- Optional:
To manage rendering, you can do the following:
Table 1. Render Image Options To Do this Resume rendering Click Pause/Resume rendering. 
Pause rendering Click Pause/Resume rendering. 
Save Image Click Save Image . 
Continue rendering in Darkroom Click Continue rendering in Darkroom. 
Save image to Darkroom Click Save image to Darkroom. 
Render in Darkroom
While it takes longer to load Render in Darkroom, you have the added benefits of being able to render in queue, directly manage the stored renderings, and directly perform post-processing.
First,
you need to do the following:
- Open or create a model with materials applied.
- Define the rendering settings.
-
Do one of the following:
To Do this Render the current view On the Rendering tab, click Render in Darkroom icon. 
Render selected objects - Select the objects you'd like to render.
- Press I to isolate the selected objects. Isolating an object zooms in and temporarily hides all other objects.
- On the Rendering tab, click
Render in Darkroom
icon.
- Press I again to un-isolate the selected objects.
The Render in Darkroom window is displayed: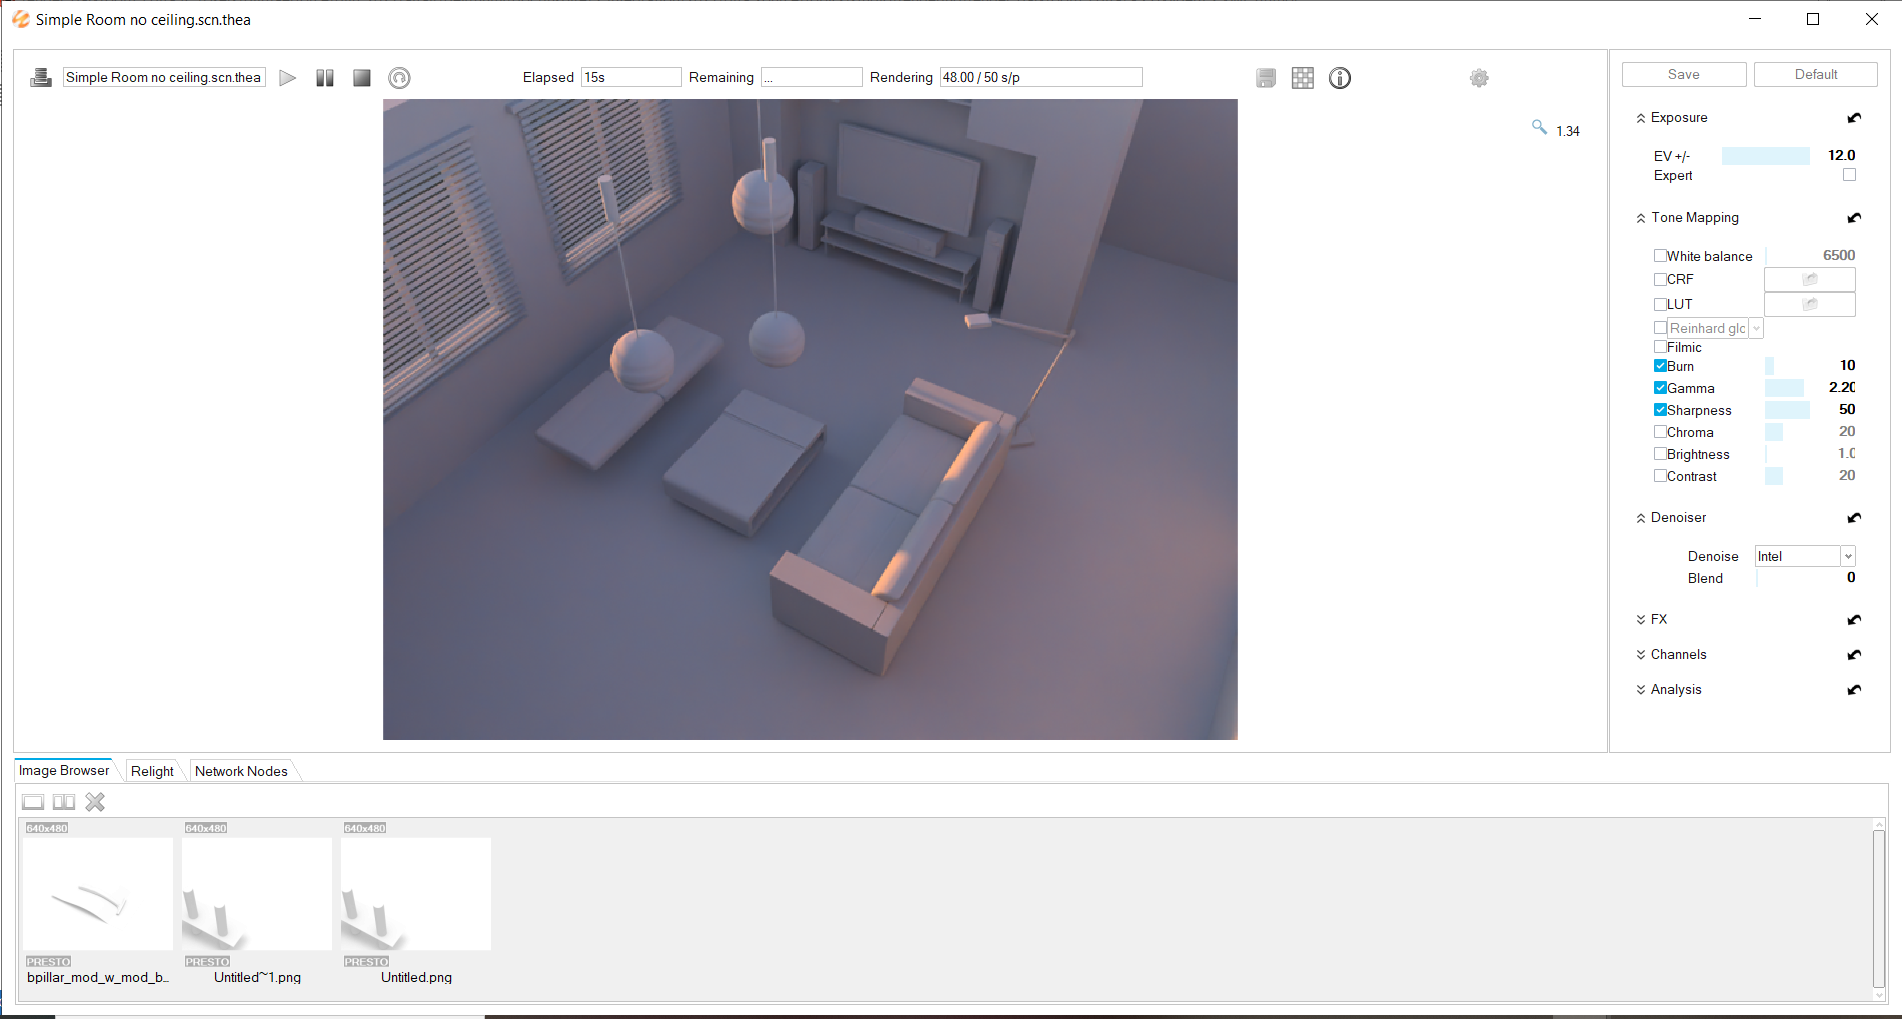
- To the bottom left of the current rendering, the status is displayed, including information about the rendering engine, number of samples, remaining time, and elapsed time.
- At the bottom right of the window, the current rendering is listed in the queue.
- Optional:
To add a job to the rendering queue, repeat the previous step.
To manage the rendering queue, you can do the following:
Table 2. Render in Darkroom Options To Do this Note Start rendering Click Start. 
If the model you want to render is at the top of the queue, you can click the file name to start rendering. Pause rendering Click Pause rendering. 
Stop rendering Click Stop . 
You will be prompted to save the rendered image. Change the order of the queue Click Move Up or Move Down. If a rendering is in progress, it cannot be moved. Delete a rendering from the queue Click the file name, and then click Delete Selected. 
If a rendering is in progress, it cannot be deleted.